Roof Systems in Custom Homes
A roof is the most weather-exposed part of a home. It takes every storm, every snowfall, every summer of UV, and every freeze-thaw cycle Virginia can produce. Most homeowners never look up at their roof until something goes wrong, and a well-built one means they rarely have to.
When planning a custom home, the roof gets less attention than kitchens or trim, but it carries more risk if it’s done wrong. Replacing a roof is one of the more expensive maintenance items a homeowner faces. Doing it right the first time pushes that decision off for decades.
This article explains roof systems in general terms. The specifications we build to are documented separately. We apply the same standards across the homes we build, whether a smaller rural ranch or a larger lakefront build.
Factory-built with hurricane straps tying every truss to the wall plate.
Self-adhered membrane at valleys, eaves, skylights, and roof-to-wall intersections.
Balanced with vented soffits at the eaves. Soffit baffles keep airflow clear.
Aluminum, formed on site in continuous runs and sized for the roof above.
Components of a Roof System
A roof isn’t a single thing. It’s a stack of layers that work together, and each one has a job. Gaps in any one of them can become a leak years later.
Each layer plays a role in the system:
The structural skeleton that gives the roof its shape and carries the load.
OSB or plywood structural panels nailed to the trusses to form the roof deck.
Metal flashing at the eaves and rakes that directs water off the roof and over the fascia.
A self-adhered membrane installed at the most vulnerable areas to block water from backed-up gutters, wind-driven rain, or ice dams.
A synthetic water-resistant layer that covers the rest of the deck beneath the shingles.
The visible weather surface that sheds water and resists UV.
Metal pieces that direct water away from gaps. Step flashing at roof-to-wall intersections, valley flashing through valleys, and counter-flashing at chimneys are the common types.
A flow path through the attic that controls heat and moisture.
A roof works as a system. Cut a corner on any single layer and the whole assembly is weaker for it.
Roof Trusses and Framing
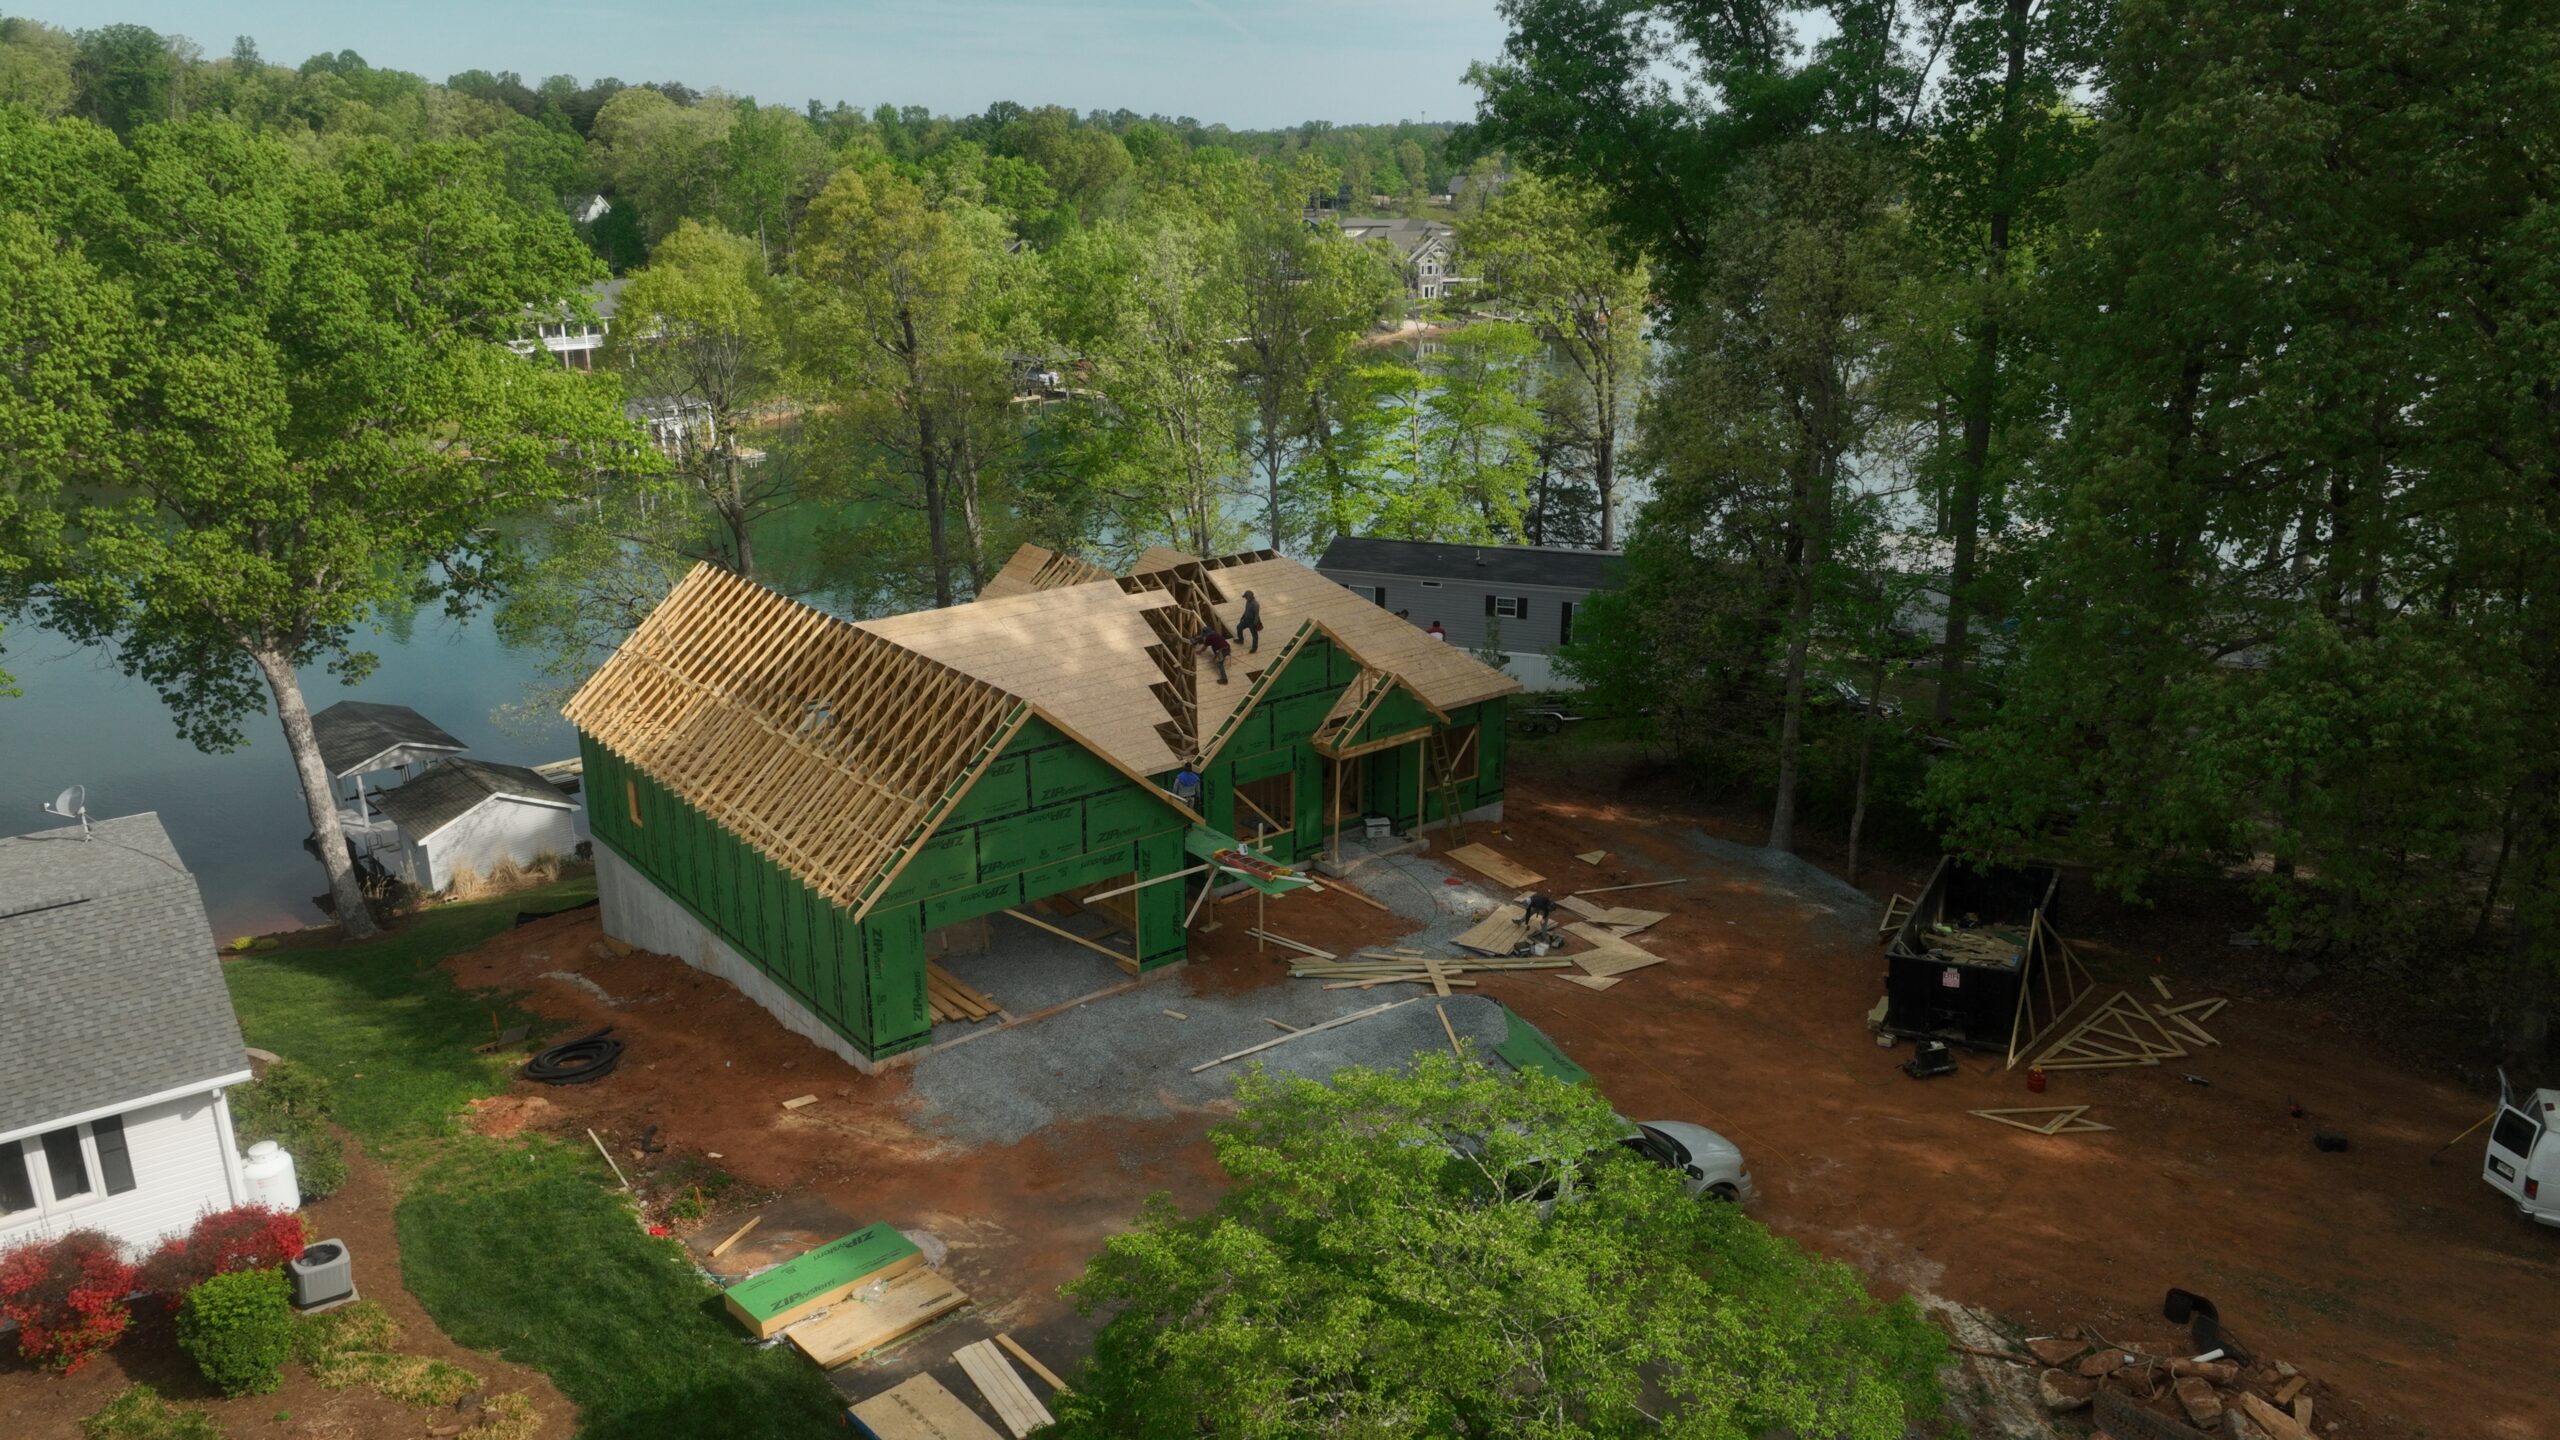
Most modern custom homes use pre-engineered trusses for the roof structure. These are factory-built triangular assemblies of dimensional lumber with internal web members that distribute the roof load across long spans. They arrive on site already built for the specific loads of the roof, sized and shaped for the plan.
The alternative is stick framing, where each rafter is cut and installed on site. Stick framing still has its place on a very complex custom roof that doesn’t lend itself to factory trusses, but for most homes, factory-built trusses are stronger, more consistent, and faster to install.
In the build sequence, roof framing happens early.
- Exterior framing first. The load-bearing wood-stud walls that support the roof go up before any roof work begins. (These aren’t the interior partition walls with drywall that you see when the home is finished. These are the structural exterior walls, just wood studs and sheathing at this stage.)
- Trusses next. Lifted into place by crane and fastened to the wall plates with hurricane straps.
- Sheathing follows. OSB or plywood nailed to the top of the trusses to form the deck.
- “Dry-in,” then roofing. Once underlayment and ice and water shield are on, the home is “dried in,” meaning it’s weather-tight before the shingles go on. Shingles complete the assembly within a day or two.
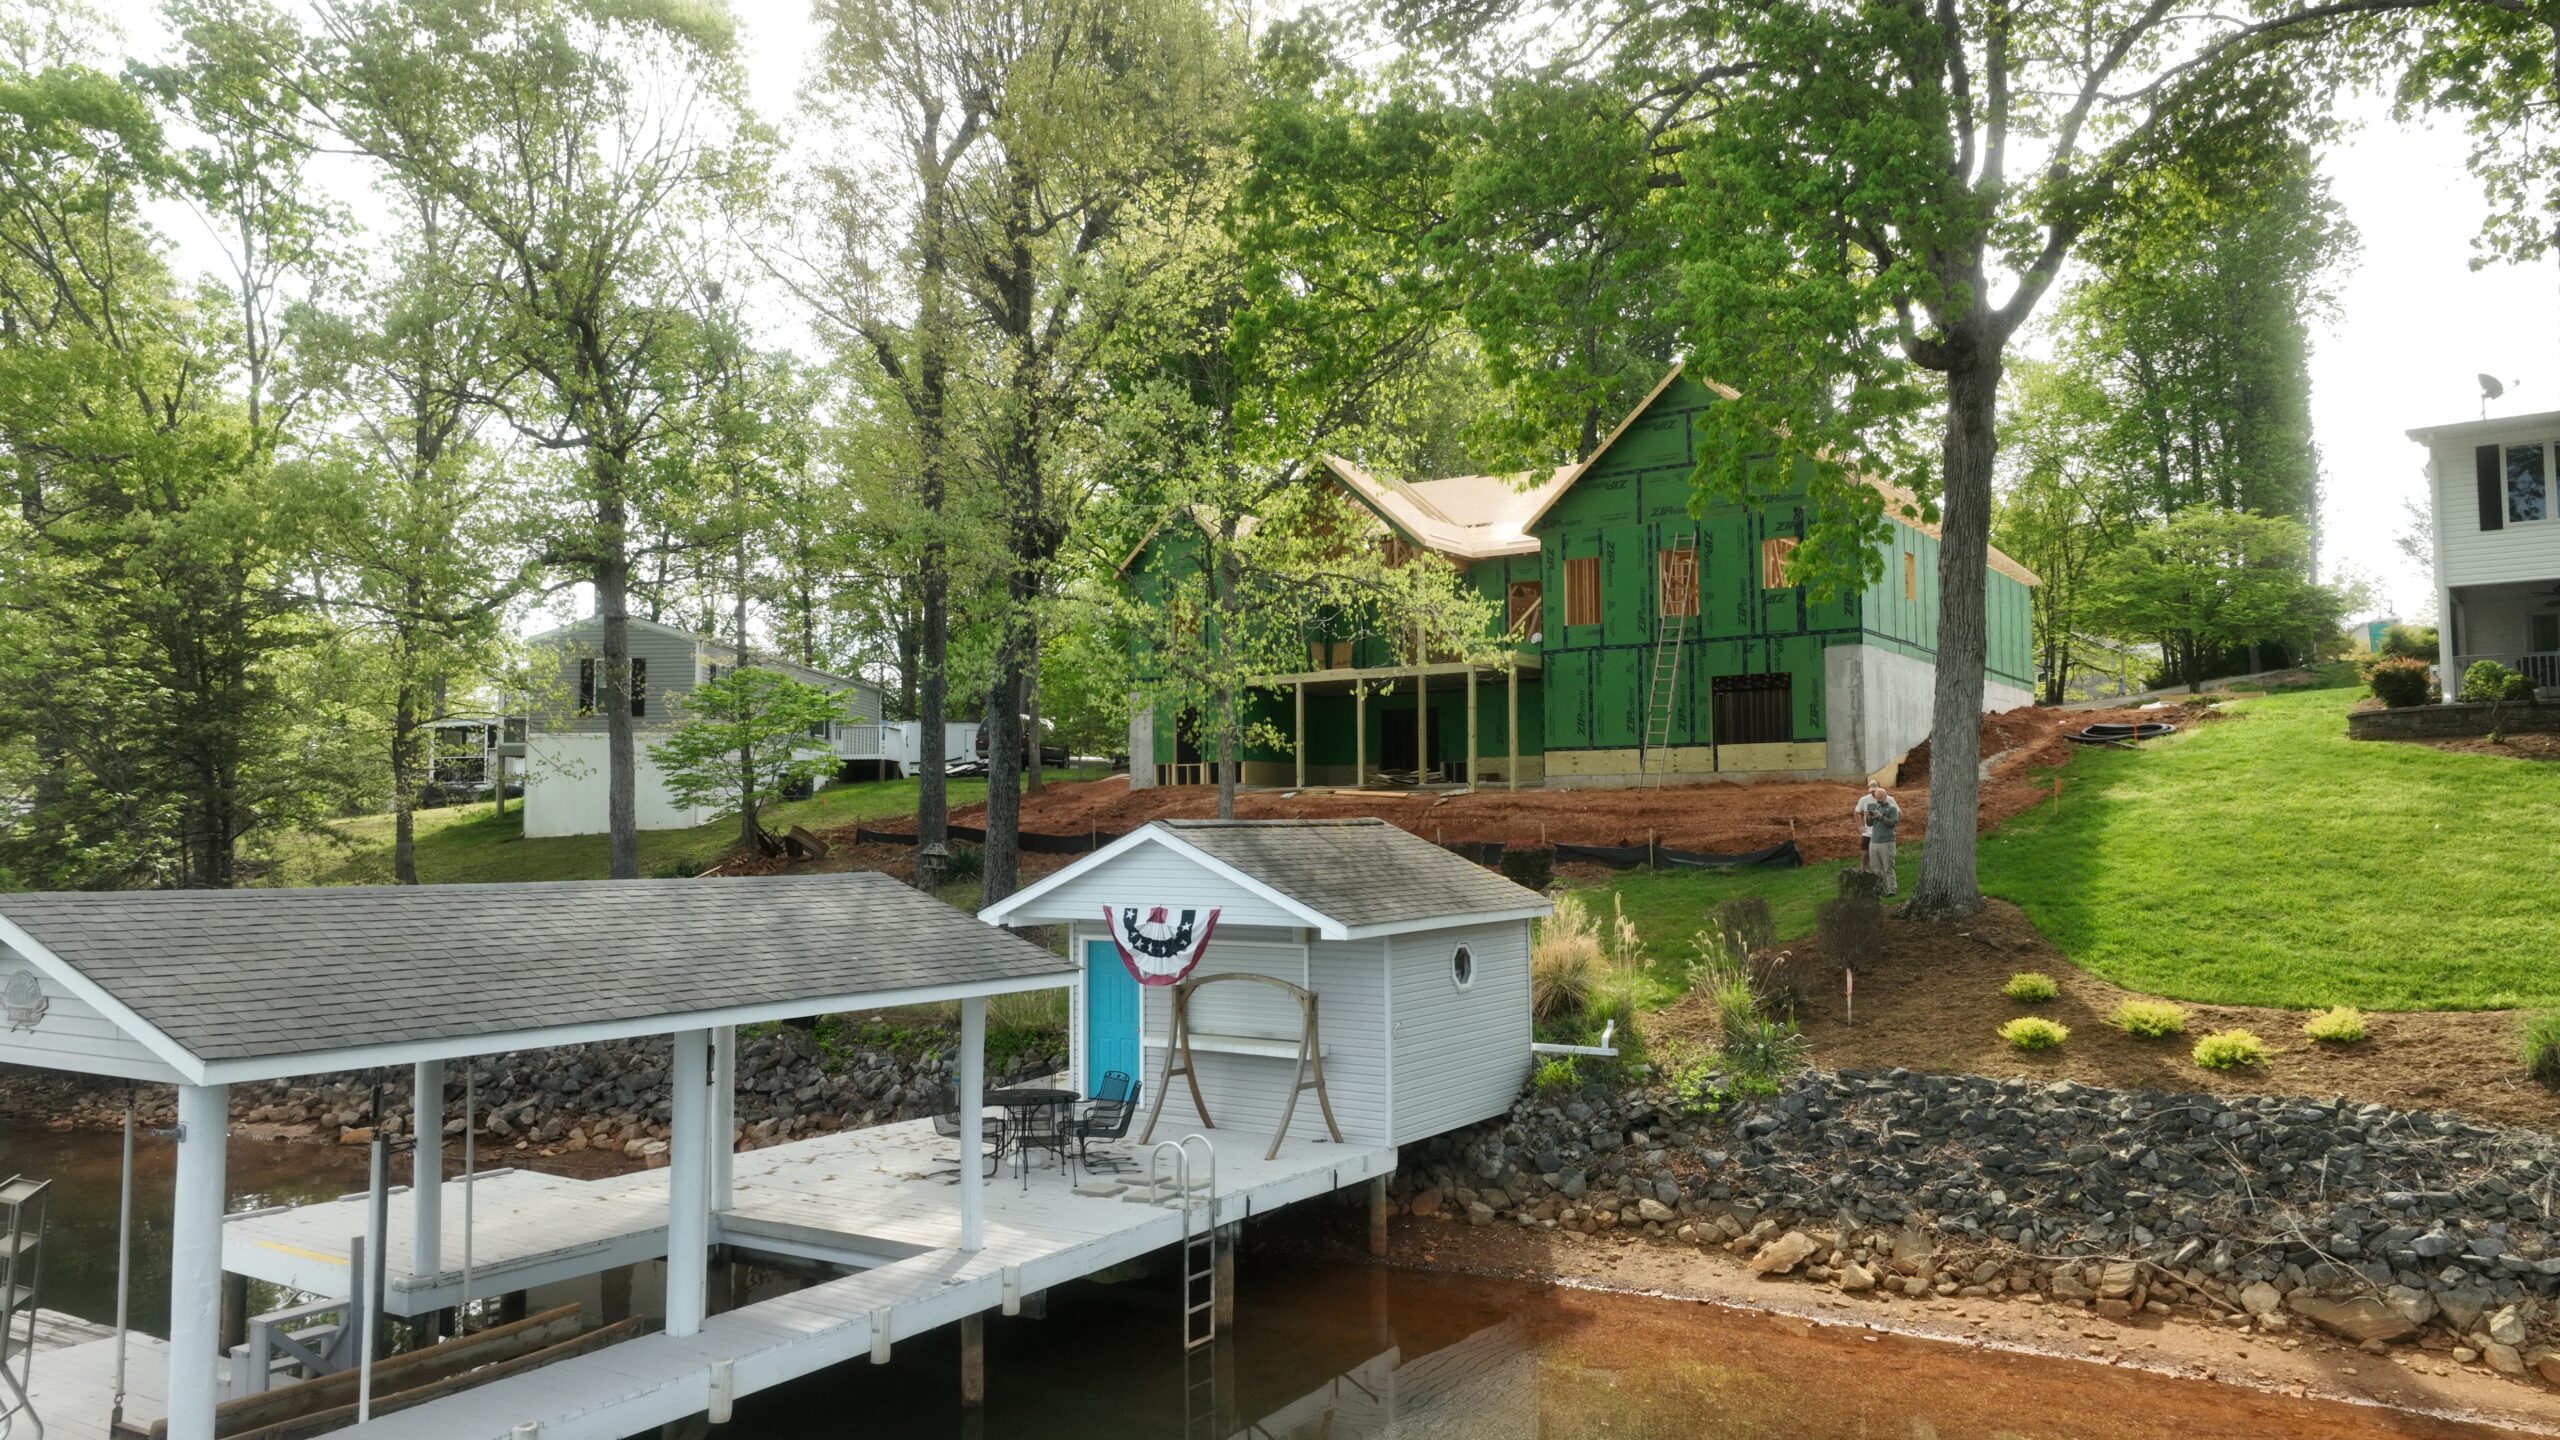
The whole roof phase typically wraps in a week or two. That matters because it gets a weather-tight shell on the home quickly, which protects the framing below from rain while interior work continues.
Each truss is fastened to the wall plate with a metal connector called a hurricane strap, which holds the roof structure against wind uplift (the upward force that high winds exert on a roof). This is required by Virginia code.
Practical Implications of Trusses
Pre-engineered trusses come with some constraints homeowners should understand before construction starts.
Truss-built attics aren’t usable as living space, because the web members run through the area. The web pattern that makes trusses strong is also what blocks out the attic.
If you want walk-up attic storage or a bonus room over a garage, that needs to be designed into the truss layout before the trusses are built.
Trusses are engineered around specific load-bearing wall locations. Once trusses are installed, moving an interior wall that carries load isn’t a simple change.
If you want any part of the attic to be useful (walk-up storage, a future bonus room, mechanical access), the truss design has to account for it before manufacturing.
Common options include:
- Attic trusses. A different truss design with an open center that can be finished into a bonus room. More expensive than standard trusses, but it gives you the space.
- Scissor trusses. Sloped bottom chords that create a vaulted ceiling in the room below. Less attic space, but a dramatic ceiling.
- Stick framing the attic area. For a complex custom design, the roof framing above the area in question can be stick-framed instead of trussed.
All of these have to be decided during design, not after the trusses are ordered. Trusses are typically the long-lead item in the build, and once they’re on the truck, the geometry is locked.
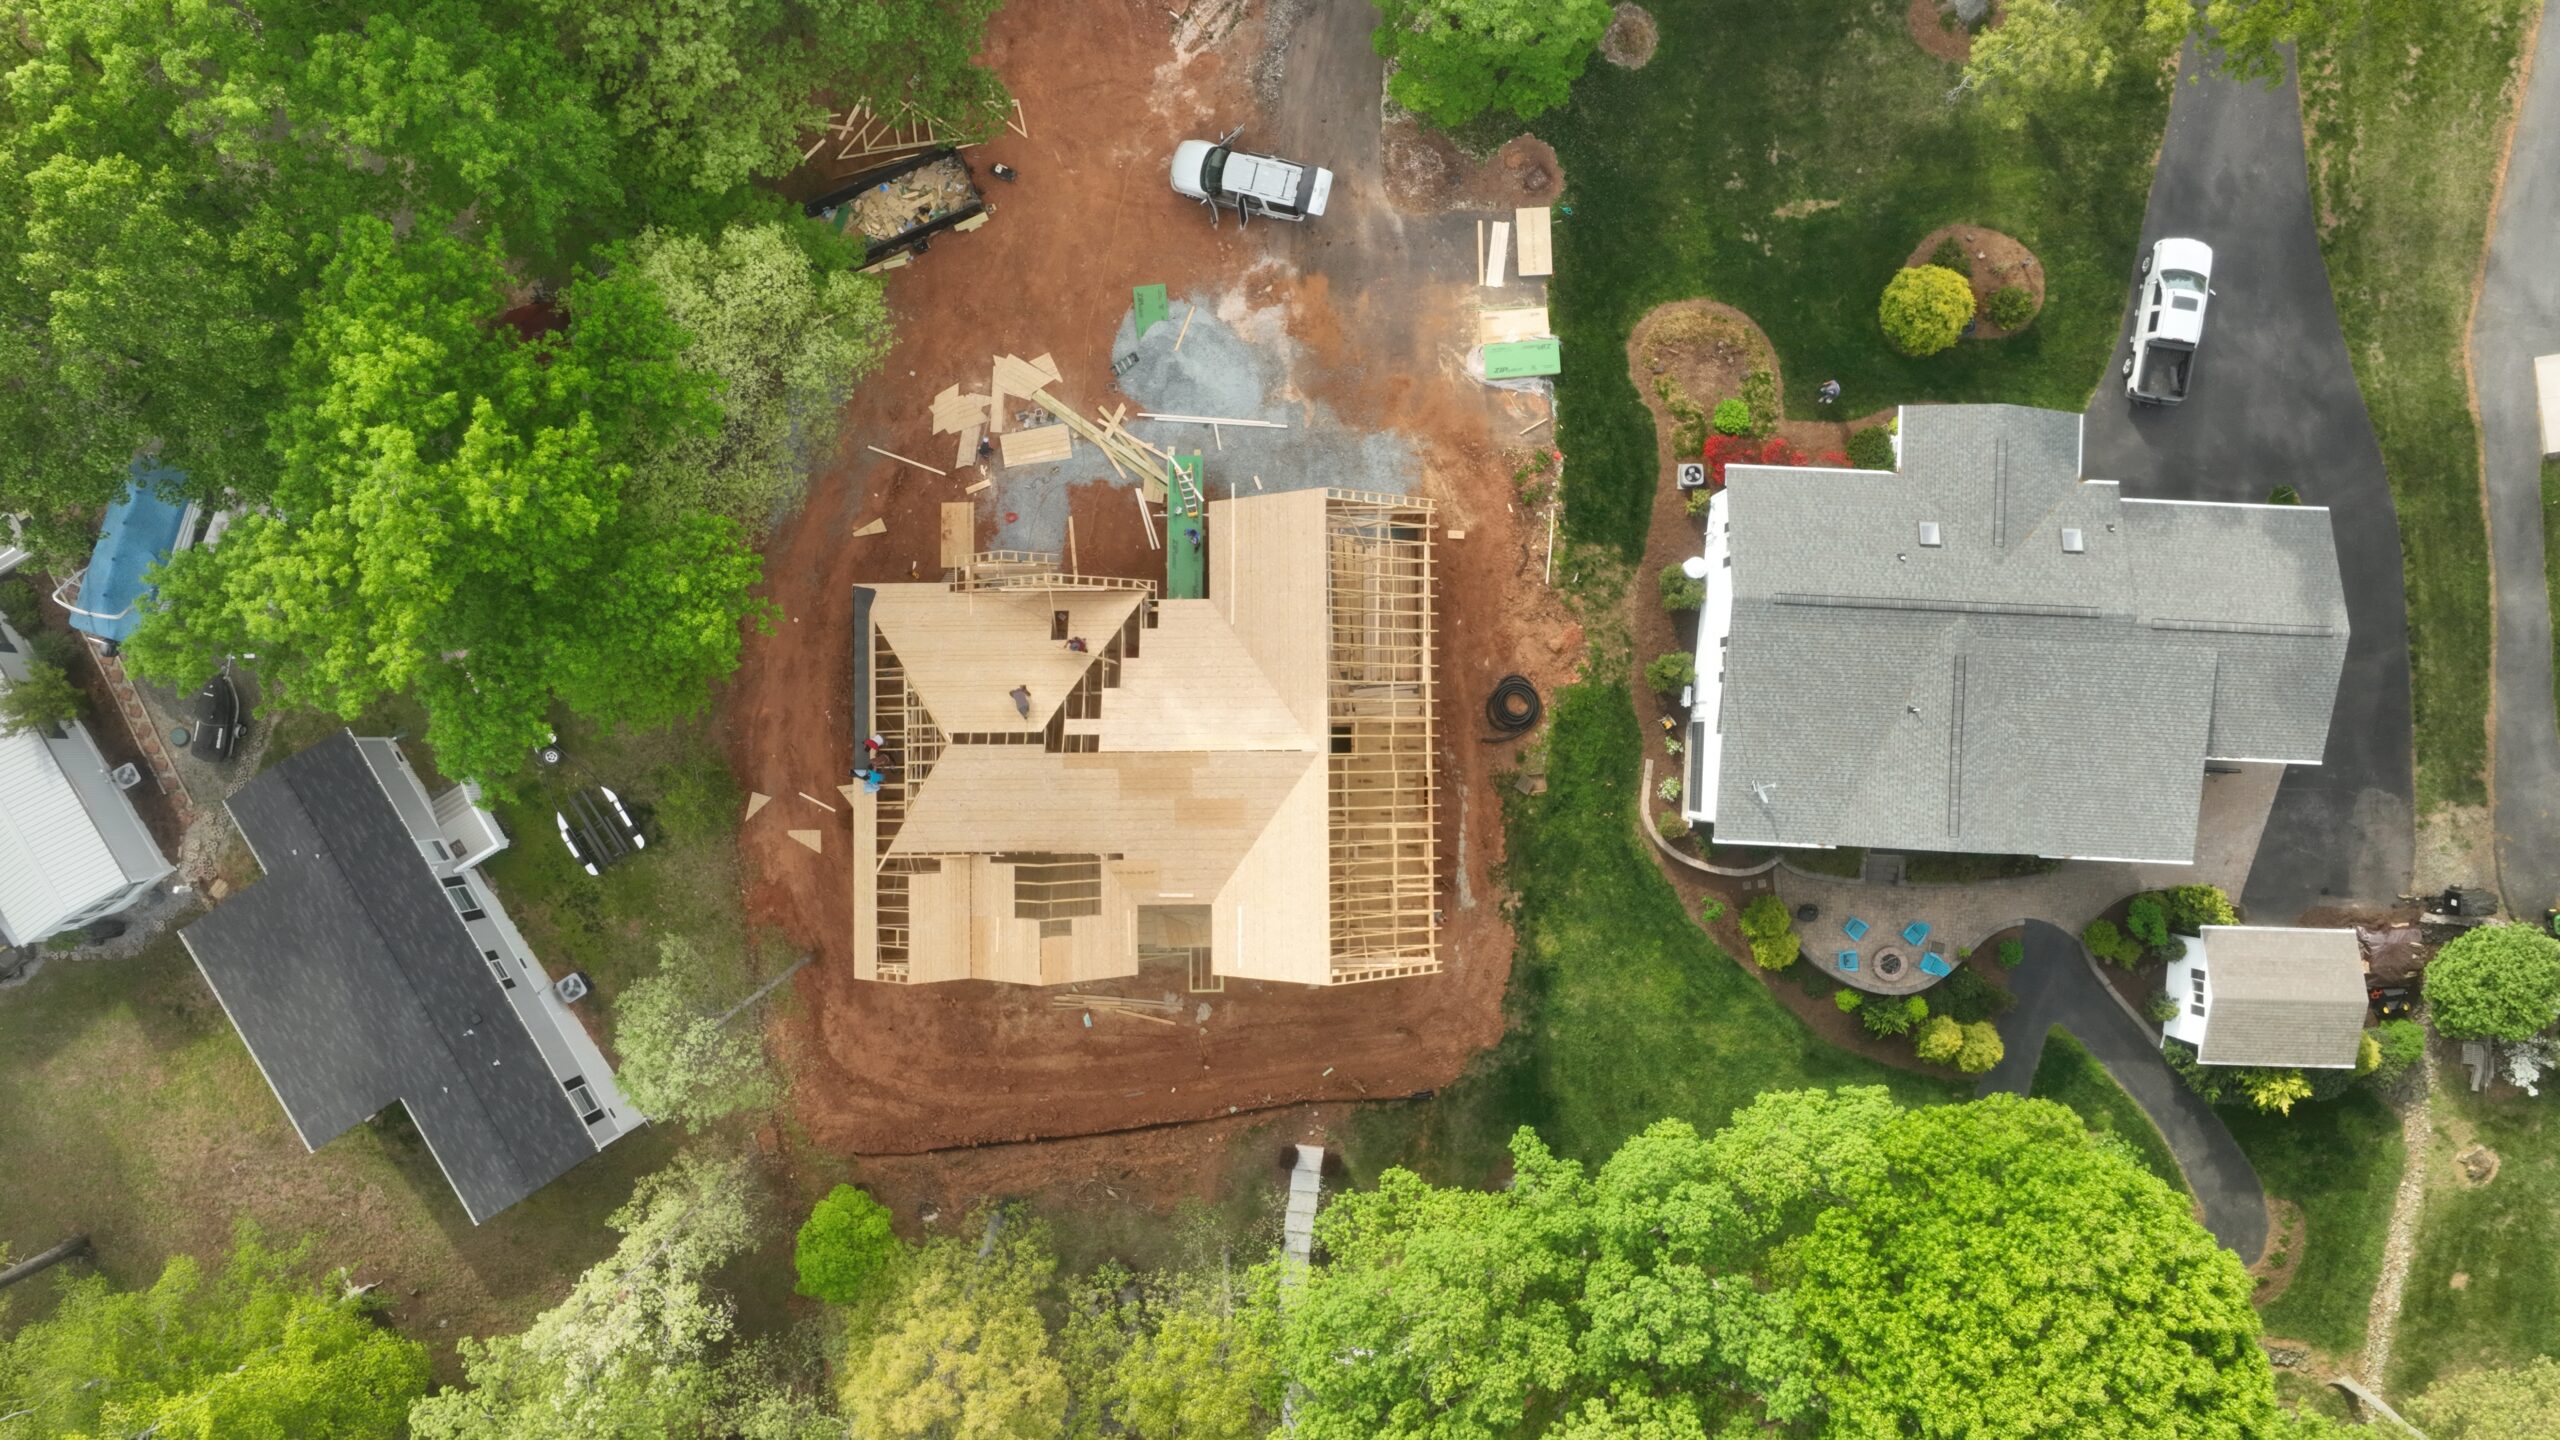
Sheathing and Underlayment
Once the trusses are set, OSB or plywood structural panels are nailed to the tops, edge to edge, to create a continuous roof deck. The deck is what every other layer of the roof system sits on, and it’s what gets nailed through when the shingles go on.
At the edges of the roof, both along the eaves and the rakes, drip edge is installed: a metal flashing that channels water off the roof and over the fascia instead of letting it work back behind. Drip edge is installed differently at eaves versus rakes. At the eaves it goes under the underlayment, at the rakes it goes over the underlayment. The sequence keeps water flowing off the roof and away from the structure.
The next layer is synthetic underlayment, a water-resistant membrane that covers the deck beneath the shingles. Its job is to keep water out of the structure if any gets past the shingles, which over the life of a roof is essentially guaranteed in small amounts over time. Quality underlayment plus tight shingle installation gives a redundant system.
Shingles shed most water. Underlayment catches the rest.
“Dry-in” is the milestone where the roof is weather-tight before the shingles are installed. It happens when the underlayment and ice and water shield are completely down, all edges and penetrations are flashed, and the home is protected from rain.
Dry-in matters because the interior work (wiring, plumbing rough-in, insulation, drywall) can begin as soon as the home is dried in. A builder who gets to dry-in quickly is protecting the framing and keeping the schedule on track. A builder who lets framing sit exposed to weather is creating problems that show up later as warping, mold growth, or fastener corrosion.
The shingles then go on after dry-in. They’re the final weather surface, but the dry-in layers are doing most of the work to keep the home dry during construction.
Ice and Water Shield
At specific areas of the roof, regular underlayment isn’t enough. These are places where water tends to back up or pool against the surface for longer than it would on a normal slope. The fix is a self-adhered membrane called ice and water shield, which bonds directly to the roof deck and creates a watertight seal even when shingles aren’t doing their full job.
Ice and water shield typically goes at:
A note on ice dams, since they’re the failure mode most homeowners haven’t seen up close.
In southwestern Virginia, we don’t get severe northern-style ice dams every winter, but we get enough freeze-thaw cycles that eave protection earns its place. Valley protection matters every time it rains hard.
There are several established ice and water shield products on the market (Grace Ice & Water Shield, GAF WeatherWatch, and CertainTeed WinterGuard are common ones). What matters more than the specific brand is that the product is rated for the application and is installed in the right locations.
Building code requires ice and water shield to extend a minimum of 24 inches inside the exterior wall line at the eaves. The reasoning: an ice dam can back water up well past the gutter, so the protection has to reach past the warm-wall line into the heated portion of the structure.
Builders in colder climates often extend this coverage to 36 inches or even the full first course (typically 3 feet) for extra protection. Around skylights and roof penetrations, the membrane wraps the opening completely, lapping over the flashing.
When evaluating a builder’s specs, look for the coverage area in square feet, not just whether ice and water shield is included. A builder using one roll at each valley and skipping the eaves is doing less than the code minimum.
Architectural Shingles
Architectural shingles are the standard for new construction today. Also called dimensional or laminated, they’re thicker, heavier, and last longer than the older 3-tab shingles they replaced. They also look better, with depth and shadow lines that read more like wood or slate from the ground.
The major architectural shingle manufacturers, including GAF, Owens Corning, and CertainTeed, all produce quality products with limited lifetime warranties. The differences between them come down to specific product lines, granule technology, and warranty terms. Any of these manufacturers can produce a roof that performs well for decades when the product is installed correctly.
A complete shingle installation includes more than the field shingles. Dedicated starter strips along the eaves and rakes seal the edges against wind uplift, and dedicated ridge cap shingles run along the peaks and hips. Some builders cut field shingles for these uses to save on material cost. Using the dedicated products the manufacturer makes for those locations is the better practice, and many manufacturers require it for the lifetime portion of the warranty to apply.
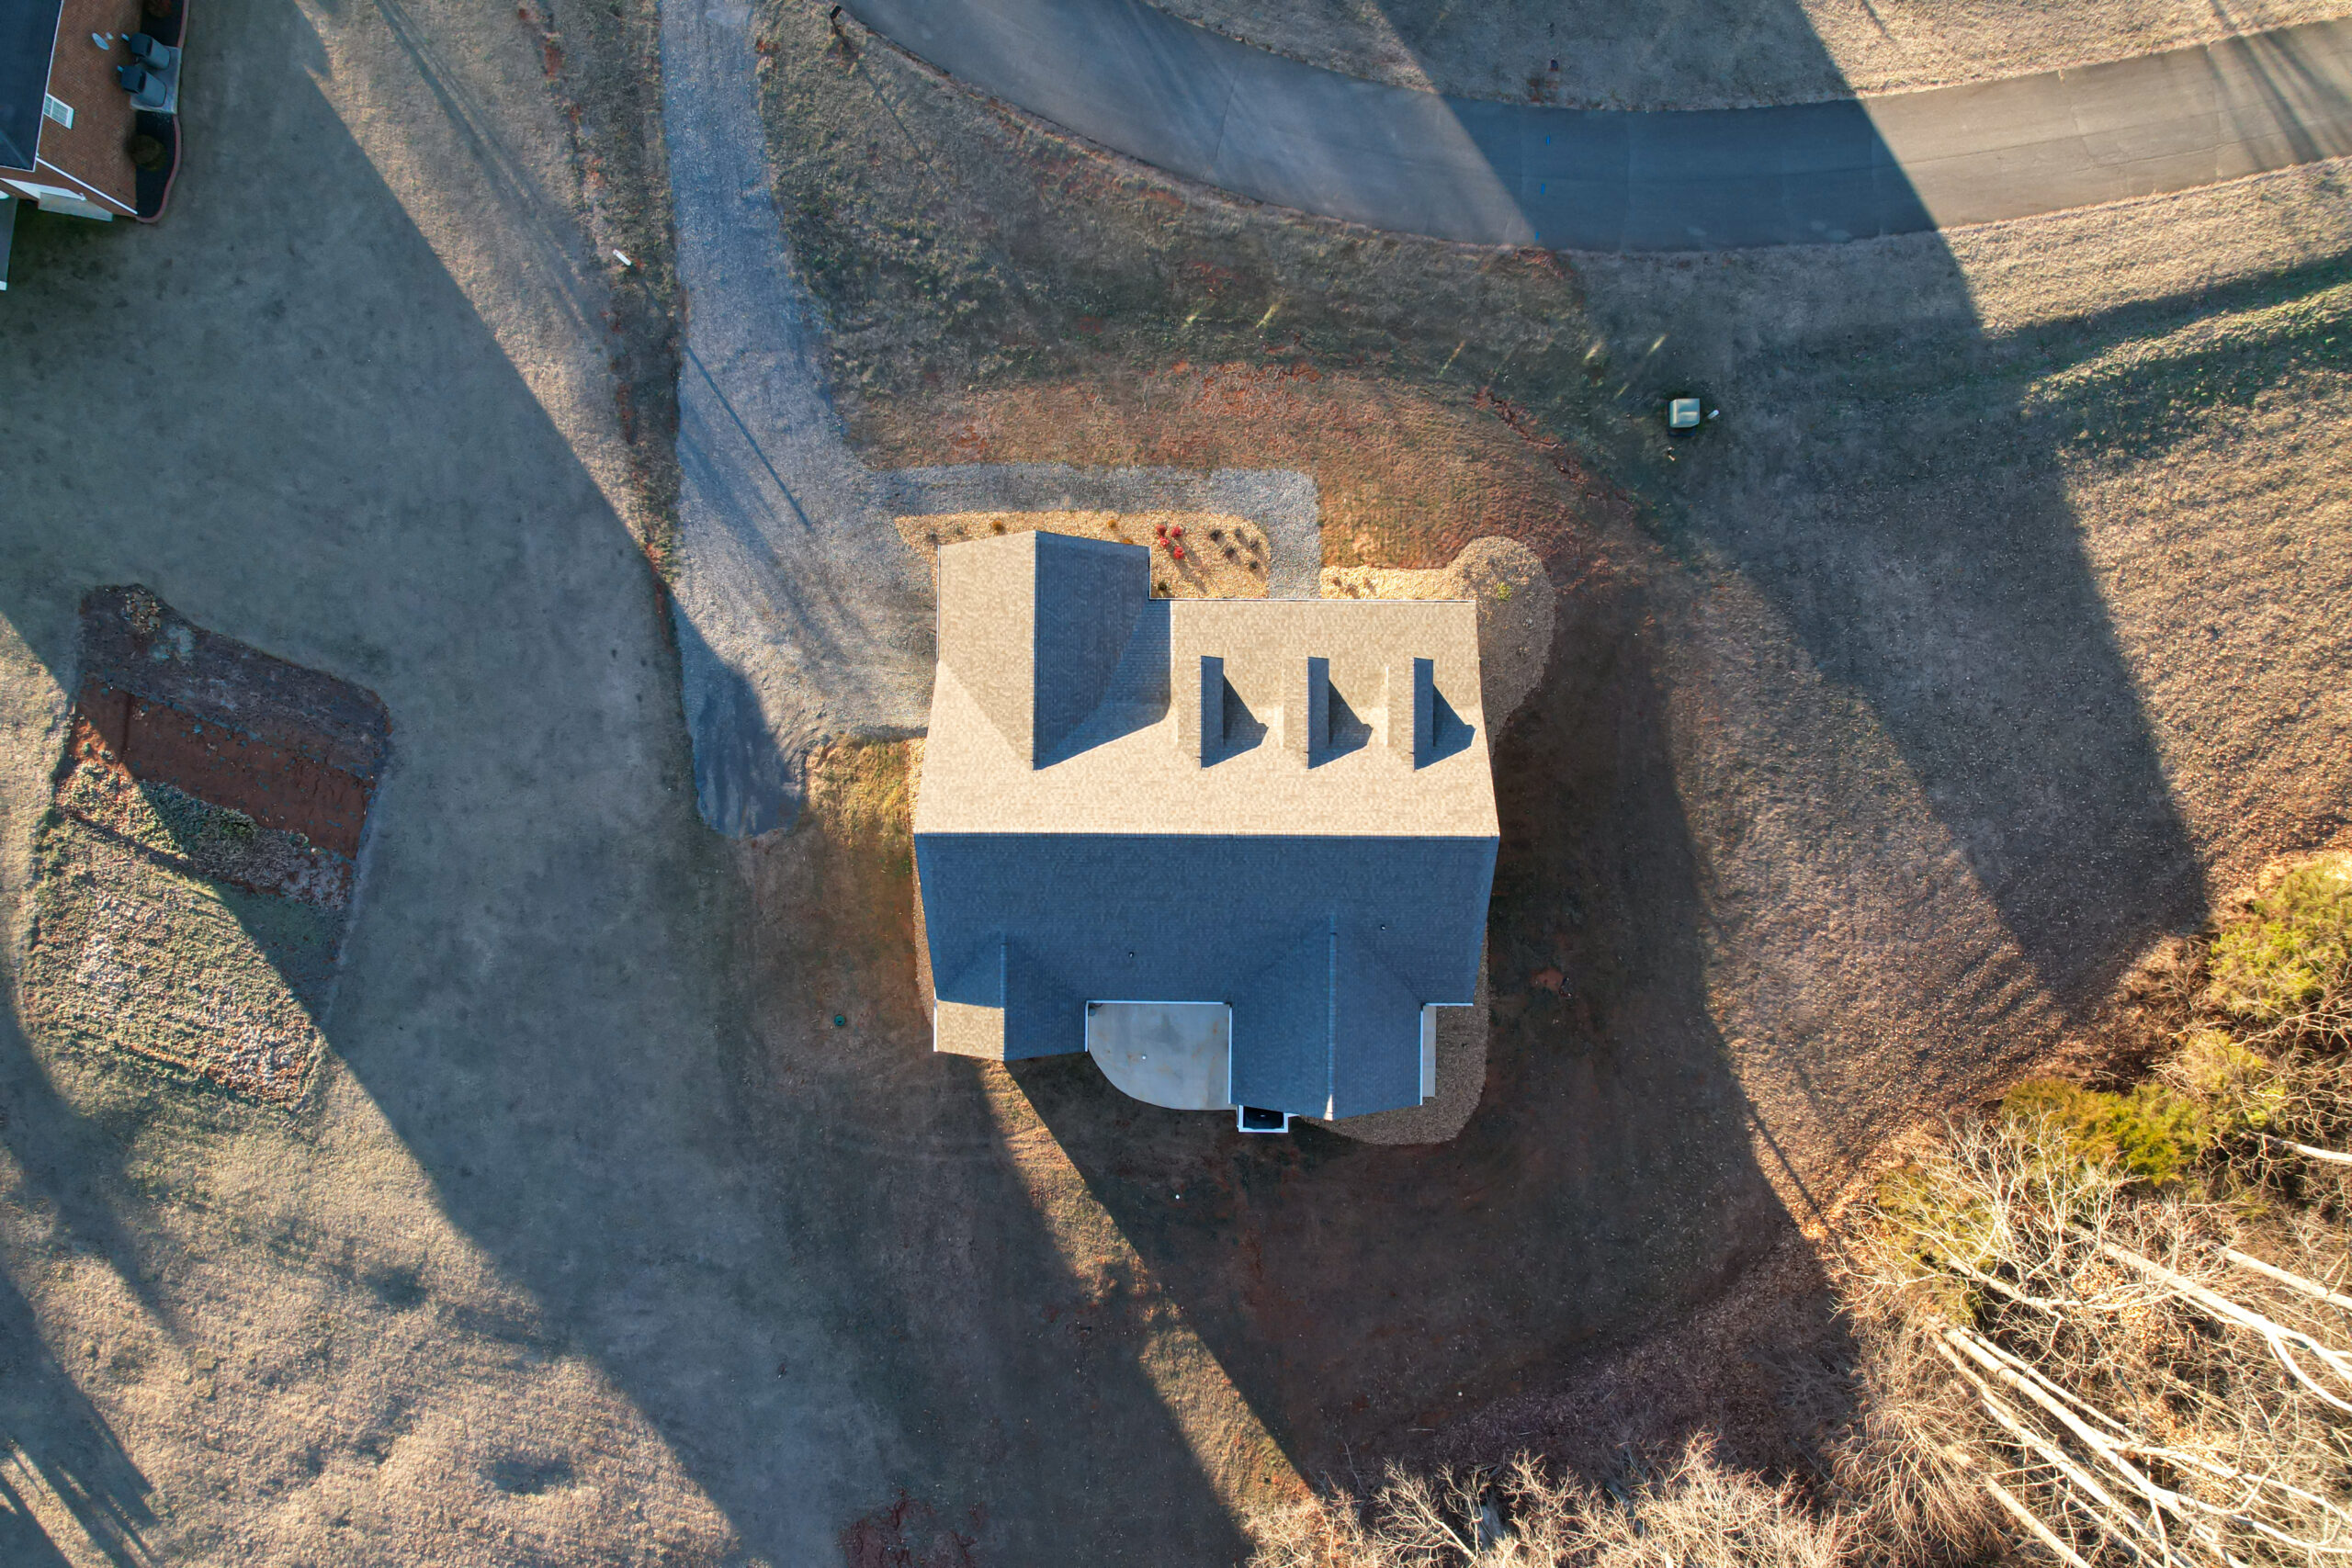
The same shingle system goes on every home regardless of size. A 1,400 square foot ranch gets the same architectural shingles, same ice and water shield placement, and same hurricane straps as a 3,200 square foot lakefront build. Quality doesn’t scale with square footage.
a well-built roof
architectural shingles
shingles can carry
When two roofing bids come in with a meaningful price difference, the difference is usually in the details that aren’t visible from the ground. Common shortcuts:
- 3-tab shingles in place of architectural shingles. Saves material cost. Shorter life, weaker wind rating, flatter appearance.
- Felt underlayment in place of synthetic. Tears more easily during installation, shorter service life beneath the shingles.
- Ice and water shield at valleys only, skipping the eaves. Misses the spot where ice dams form. Below code minimum.
- Field shingles cut for ridge cap and hip cap. Looks fine at first. Manufacturer warranty may not cover this approach.
- No dedicated starter strip at the eaves. Edges of the roof are more vulnerable to wind uplift.
- Stapled installation in place of nailed. Some manufacturers will not warrant stapled shingles.
- Powered attic fan in place of balanced soffit-to-ridge ventilation. Works less consistently and adds an electrical component that can fail.
Each shortcut saves the builder a small amount up front. It shows up later as a leak, a callback, or a premature replacement. Ask any builder for their detailed roofing specification in writing, and look for these specific line items.
Two different warranties cover your roof, and they cover different things.
Manufacturer warranty covers defects in the shingle itself, the product. It does not cover installation issues. Coverage is usually strongest in the first 10 to 15 years and prorates after that. Some manufacturer warranties require certified installers for the full lifetime portion to apply. The warranty document is the source of truth on what’s covered.
Builder workmanship warranty covers the installation itself: the labor that put the roof on the home. This is typically one year, sometimes longer. If a leak develops in the first year because of how the roof was installed (not because of a defective shingle), this is the warranty that applies.
If a shingle fails years later because of a manufacturing defect, the manufacturer pays. If a leak develops in the first year because of how it was installed, the builder pays. After the workmanship period, installation issues become the homeowner’s problem unless they’re covered by a separate extended warranty (sometimes available as an upgrade).
Read both warranties carefully and keep both documents with your home records.
The Importance of Subcontractor Selection
The roofing on most custom homes is installed by a specialty subcontractor, not the builder’s own crew. The quality of the install depends heavily on which roofing contractor the builder uses and how stable that relationship is.
A builder who uses the same roofing subcontractor consistently has done the work of vetting them. They know how that crew handles the details: flashing, starter strips, nail placement, valley work. They know who answers the phone if there’s a callback. A builder who shops the roofing job to whoever’s cheapest each time hasn’t.
When evaluating a builder, it’s worth asking who does their roofing, how long they’ve worked together, and whether the same crew works every home.
Rempfer Construction, Lynchburg. A Class A licensed contractor established in 2001. The same crew handles our roofs consistently, which means familiar standards, accountability, and a team that knows our specs without needing to be told.
For homeowners building from out of state, it’s worth asking up front how the builder will keep you informed during construction.
Common practices to expect from a builder working with distant clients:
- Photos at key milestones (foundation, framing, dry-in, drywall, trim, final walkthrough)
- Periodic video walkthroughs by phone
- Weekly or biweekly written updates with progress and upcoming decisions
- A primary point of contact who answers the phone and email
The roof phase happens fast, often in a single week or two. A builder who documents it as it goes gives you confidence that the layers under the shingles were installed correctly. Once shingles are on, the membranes beneath them aren’t visible without removing them.
A builder’s workmanship warranty typically lasts one year. After that, ongoing maintenance and repairs are the homeowner’s responsibility, though manufacturer warranties on specific products may still apply.
Builders who have been in business for decades and who use the same subcontractors over time are easier to work with on long-term issues. They know the homes they built and can often diagnose a problem over the phone. Even if the warranty period has passed, an established builder is more likely to be available to help, or to refer you to the right specialist.
This is one reason builder longevity matters. A builder in business for 35 years has handled long-term issues on homes they built 20 or 30 years ago. A builder five years into the trade hasn’t.
Ventilation
A roof has to breathe. Attic air picks up heat from the sun in summer and moisture from inside the home in winter. If that air doesn’t have a way out, it cooks shingles from below in the summer and condenses on the underside of the roof deck in the winter, which is how roof structures rot from the inside.
It’s important to build a balanced ventilation system: cool air entering at the eaves through vented soffits, and warm air exiting at the peak through continuous ridge venting. Between the two, soffit baffles run up the underside of the roof deck at each rafter or truss bay, holding insulation back so air can move freely from the soffit vent into the attic.
The principle is simple: warm air rises, so a continuous path from the eaves up to the ridge keeps air moving through the attic year-round, without fans or moving parts. That keeps attic temperatures and humidity in a healthier range, which extends shingle life and helps the home’s energy performance.
Some older homes use only gable vents at each end of the attic, or rely on a powered fan. These approaches work less consistently than balanced soffit-to-ridge ventilation, and they don’t deliver the same year-round performance.
Building code uses a simple ratio for attic ventilation: one square foot of net free vent area for every 300 square feet of attic floor space (the “1:300 rule”), split roughly evenly between intake (soffit) and exhaust (ridge).
“Net free vent area” is the actual open area for airflow, not the gross dimensions of the vent. A 1-square-foot soffit vent might have only 0.5 square feet of net free area after accounting for the screen and frame. Manufacturers list this number on the product.
When evaluating a builder, ask:
- Is the attic ventilated to the 1:300 standard or better?
- Is it balanced between soffit intake and ridge exhaust?
- Are soffit baffles installed at each rafter or truss bay?
A builder who can answer these questions specifically has thought through the ventilation. A builder who gives a vague answer probably hasn’t.
Gutters and Drainage
Gutters are part of the roof system, not an accessory to it. A well-built roof drains efficiently, and that depends on the gutters being sized and pitched correctly and kept clear of debris.
K-style seamless aluminum gutters are the standard choice for residential work. K-style refers to the profile: flat back, decorative front face, and the depth to carry water from a full roof in a heavy storm. Seamless means they’re formed on site in continuous runs that match the length of each eave, so there are no joints every ten feet to leak over time.
When gutters fail (overflow, sag, or pull away from the fascia), the water that should have been carried away ends up running down the siding, against the foundation, or behind the fascia. That’s how roof failures become wall and basement failures.
Wind and Weather Exposure
Some homes face more exposure than others. Open sites with fewer surrounding trees, hilltop positions, and waterfront homes all see more wind and sun than a sheltered inland lot. Storms move across open water or open land and hit the roof with the full force of whatever they’re carrying. UV exposure on a south-facing roof is harder on shingles than the same shingle on a shaded north-facing one.
Exposed homes are where the quality of the roof system shows up soonest. Architectural shingles handle wind better than 3-tab. Ice and water shield at valleys handles wind-driven rain. Balanced ventilation keeps shingles from cooking in the summer. None of this is exotic, but it adds up over twenty or thirty years on an exposed site.
Questions to Ask Builders
When evaluating builders, ask about the roof system specifically. A few questions worth asking:
What to Expect Over Time
A well-built roof should perform for decades without major intervention. But every roof needs occasional attention. Most homeowners shouldn’t be climbing on their own roofs, so think of maintenance as a mix of what you handle from the ground and what’s worth handing off to a roofer.
This is general guidance. Actual performance varies with the specific shingle, the installation, the exposure, and the climate. A roof on an exposed, south-facing lakefront site will age faster than one on a shaded, north-facing inland lot.
Choose a Builder Who Builds the Whole System
The roof is the part of a home that homeowners rarely see up close. The builder’s specifications and workmanship determine how it performs, and most of the decisions that matter happen in the first few weeks of construction.
Take the time to understand what’s going on above your head. Ask the questions. Read the specifications. The right answers come from a builder who can name every product on the roof and explain why it’s there.
The questions don’t stop once the contract is signed. A good builder welcomes them throughout construction, not just before it. If you’re not sure what to ask, that’s normal: this is probably your first or second time building a custom home, and asking is how you learn what you don’t yet know.
Glossary
Terms used in this article, defined briefly.
Frequently Asked Questions
Architectural shingles are thicker, heavier, and have a layered profile that creates depth and shadow lines. They typically last 25 to 50 years and carry stronger wind warranties. 3-tab shingles are thinner, flatter, less expensive, and have shorter warranties, often 20 to 25 years.
Architectural is the higher standard for new construction.
A quality architectural shingle roof in southwestern Virginia should perform for 25 to 40 years before replacement, depending on the shingle, the installation, the roof pitch, and how the roof is maintained.
Pitch matters because steeper roofs shed water and snow faster, which extends shingle life. A south-facing roof with heavy sun exposure may wear faster than a shaded north-facing roof on the same home.
Manufacturer warranties on shingles vary, but they typically cover defects in the shingle itself rather than installation issues. Coverage is usually strongest in the first 10 to 15 years and prorated after that. Some manufacturer warranties require certified installers for the full lifetime portion to apply.
Read the warranty carefully and keep it with the home records.
Most manufacturer warranties allow one transfer to a second owner, usually within a defined window after the original purchase. Coverage typically reduces for the second owner.
The specific terms are in the warranty document.
Architectural shingles installed to manufacturer specifications typically carry wind ratings in the range of 110 to 130 mph. Proper installation matters as much as the shingle itself.
In most cases yes. Solar racking systems install over existing shingle roofs, provided the roof is in good condition and has enough remaining life to outlast the panels.
If you’re planning solar down the road, mention it during design so it can be factored in.
On standard trusses, yes. The internal web members make most of the attic unusable for storage or living space.
If you want walk-up storage or a bonus room, that has to be designed into the truss system before they’re built.
Small leaks become big problems fast. Watch for water staining on ceilings, discoloration around vents or skylights, or shingles visibly out of place. Call a qualified roofer for an inspection.
Catching issues early is the difference between a repair and a replacement.
For more information about how we build custom homes in Virginia, view our detailed specifications.
View Our Specifications