Ellis Custom Homes, serving the Smith Mountain Lake area. Building trust one home at a time!

  • Smith Mountain Lake
    66 Builder's Pride Dr
    Hardy, VA
    540-912-0112

Uncategorized – Ellis Custom Homes

Roof Systems in Custom Homes

A custom home build with roof trusses being installed and ZIP System sheathing on the walls

A roof is the most weather-exposed part of a home. It takes every storm, every snowfall, every summer of UV, and every freeze-thaw cycle Virginia can produce. Most homeowners never look up at their roof until something goes wrong, and a well-built one means they rarely have to.

When planning a custom home, the roof gets less attention than kitchens or trim, but it carries more risk if it’s done wrong. Replacing a roof is one of the more expensive maintenance items a homeowner faces. Doing it right the first time pushes that decision off for decades.

About our specifications

This article explains roof systems in general terms. The specifications we build to are documented separately. We apply the same standards across the homes we build, whether a smaller rural ranch or a larger lakefront build.

Structure
Pre-engineered Trusses

Factory-built with hurricane straps tying every truss to the wall plate.

Water Protection
Ice and Water Shield

Self-adhered membrane at valleys, eaves, skylights, and roof-to-wall intersections.

Ventilation
Continuous Ridge Venting

Balanced with vented soffits at the eaves. Soffit baffles keep airflow clear.

Drainage
K-style Seamless Gutters

Aluminum, formed on site in continuous runs and sized for the roof above.

Components of a Roof System

A roof isn’t a single thing. It’s a stack of layers that work together, and each one has a job. Gaps in any one of them can become a leak years later.

Cross-section of a complete roof system at the eave showing all layers from truss to shingle Eave cross-section: how a roof system layers together 7 Drip edge L-shaped flashing at eave 8 Fascia vertical trim board 9 Vented soffit draws cool air into attic 11 Gutter catches water from drip edge 10 Soffit baffle keeps insulation clear of airflow 1 Shingles overlap downhill, starter strip seals eave 2 Underlayment water-resistant membrane over the deck 3 Ice and water shield membrane at eaves, valleys, penetrations 4 Sheathing OSB or plywood panels forming the deck 5 Truss or rafter structural skeleton, web members at panel points 6 Hurricane strap metal connector ties truss to wall
Every layer has a specific job. Done well, they form a redundant system.

Each layer plays a role in the system:

Trusses or rafters

The structural skeleton that gives the roof its shape and carries the load.

Sheathing

OSB or plywood structural panels nailed to the trusses to form the roof deck.

Drip edge

Metal flashing at the eaves and rakes that directs water off the roof and over the fascia.

Ice and water shield

A self-adhered membrane installed at the most vulnerable areas to block water from backed-up gutters, wind-driven rain, or ice dams.

Underlayment

A synthetic water-resistant layer that covers the rest of the deck beneath the shingles.

Shingles

The visible weather surface that sheds water and resists UV.

Flashing

Metal pieces that direct water away from gaps. Step flashing at roof-to-wall intersections, valley flashing through valleys, and counter-flashing at chimneys are the common types.

Ventilation

A flow path through the attic that controls heat and moisture.

A roof works as a system. Cut a corner on any single layer and the whole assembly is weaker for it.

The point of redundancy
A well-built roof addresses the common failure modes by stacking defenses. Shingles handle wind uplift. Ice and water shield handles backed-up water at valleys and eaves. Balanced ventilation handles heat buildup. The right approach is to do all of it, on every roof.

Roof Trusses and Framing

Most modern custom homes use pre-engineered trusses for the roof structure. These are factory-built triangular assemblies of dimensional lumber with internal web members that distribute the roof load across long spans. They arrive on site already built for the specific loads of the roof, sized and shaped for the plan.

The alternative is stick framing, where each rafter is cut and installed on site. Stick framing still has its place on a very complex custom roof that doesn’t lend itself to factory trusses, but for most homes, factory-built trusses are stronger, more consistent, and faster to install.

In the build sequence, roof framing happens early.

Build sequence timeline showing the four phases of roof construction Total roof phase: a week or two to a weather-tight shell 1 Exterior framing load-bearing wood-stud walls that support the roof First 2 Trusses set factory-built and lifted into place by crane 1 to 2 days 3 Sheathing OSB or plywood panels nailed to the trusses Same week 4 Roofing system underlayment, ice and water shield, shingles 1 to 2 days
  • Exterior framing first. The load-bearing wood-stud walls that support the roof go up before any roof work begins. (These aren’t the interior partition walls with drywall that you see when the home is finished. These are the structural exterior walls, just wood studs and sheathing at this stage.)
  • Trusses next. Lifted into place by crane and fastened to the wall plates with hurricane straps.
  • Sheathing follows. OSB or plywood nailed to the top of the trusses to form the deck.
  • “Dry-in,” then roofing. Once underlayment and ice and water shield are on, the home is “dried in,” meaning it’s weather-tight before the shingles go on. Shingles complete the assembly within a day or two.

The whole roof phase typically wraps in a week or two. That matters because it gets a weather-tight shell on the home quickly, which protects the framing below from rain while interior work continues.

Each truss is fastened to the wall plate with a metal connector called a hurricane strap, which holds the roof structure against wind uplift (the upward force that high winds exert on a roof). This is required by Virginia code.

Top-down aerial view of a custom home build with roof framing in progress

Practical Implications of Trusses

Pre-engineered trusses come with some constraints homeowners should understand before construction starts.

No standard living space in the attic

Truss-built attics aren’t usable as living space, because the web members run through the area. The web pattern that makes trusses strong is also what blocks out the attic.

Bonus rooms have to be planned in advance

If you want walk-up attic storage or a bonus room over a garage, that needs to be designed into the truss layout before the trusses are built.

Load-bearing walls are locked in

Trusses are engineered around specific load-bearing wall locations. Once trusses are installed, moving an interior wall that carries load isn’t a simple change.

If you want any part of the attic to be useful (walk-up storage, a future bonus room, mechanical access), the truss design has to account for it before manufacturing.

Common options include:

  • Attic trusses. A different truss design with an open center that can be finished into a bonus room. More expensive than standard trusses, but it gives you the space.
  • Scissor trusses. Sloped bottom chords that create a vaulted ceiling in the room below. Less attic space, but a dramatic ceiling.
  • Stick framing the attic area. For a complex custom design, the roof framing above the area in question can be stick-framed instead of trussed.

All of these have to be decided during design, not after the trusses are ordered. Trusses are typically the long-lead item in the build, and once they’re on the truck, the geometry is locked.

Sheathing and Underlayment

Once the trusses are set, OSB or plywood structural panels are nailed to the tops, edge to edge, to create a continuous roof deck. The deck is what every other layer of the roof system sits on, and it’s what gets nailed through when the shingles go on.

At the edges of the roof, both along the eaves and the rakes, drip edge is installed: a metal flashing that channels water off the roof and over the fascia instead of letting it work back behind. Drip edge is installed differently at eaves versus rakes. At the eaves it goes under the underlayment, at the rakes it goes over the underlayment. The sequence keeps water flowing off the roof and away from the structure.

The next layer is synthetic underlayment, a water-resistant membrane that covers the deck beneath the shingles. Its job is to keep water out of the structure if any gets past the shingles, which over the life of a roof is essentially guaranteed in small amounts over time. Quality underlayment plus tight shingle installation gives a redundant system.

Shingles shed most water. Underlayment catches the rest.

“Dry-in” is the milestone where the roof is weather-tight before the shingles are installed. It happens when the underlayment and ice and water shield are completely down, all edges and penetrations are flashed, and the home is protected from rain.

Dry-in matters because the interior work (wiring, plumbing rough-in, insulation, drywall) can begin as soon as the home is dried in. A builder who gets to dry-in quickly is protecting the framing and keeping the schedule on track. A builder who lets framing sit exposed to weather is creating problems that show up later as warping, mold growth, or fastener corrosion.

The shingles then go on after dry-in. They’re the final weather surface, but the dry-in layers are doing most of the work to keep the home dry during construction.

Ice and Water Shield

At specific areas of the roof, regular underlayment isn’t enough. These are places where water tends to back up or pool against the surface for longer than it would on a normal slope. The fix is a self-adhered membrane called ice and water shield, which bonds directly to the roof deck and creates a watertight seal even when shingles aren’t doing their full job.

Ice and water shield typically goes at:

Valleys
Where two roof planes meet and water concentrates as it runs off.
Eaves
Where ice dams can form when warm attic air melts roof snow that refreezes at the cold overhang.
Around skylights and roof penetrations
Where seals and flashings are vulnerable over time.
At roof-to-wall intersections
Where wind-driven rain can work its way under siding and into the structure.

A note on ice dams, since they’re the failure mode most homeowners haven’t seen up close.

How an ice dam forms – three-panel sequence showing heat warming the roof deck, snow melting, and water refreezing at the eave How an ice dam forms (and why eave protection matters) 1 Heat warms the roof deck Warm attic Snow sits on the roof. Heat from the home rises into the attic and warms the deck from below. 2 Meltwater runs to the eaves snow melted Snow melts on the warm middle. Meltwater runs down the slope toward the colder eaves. 3 Water refreezes at the eave Water refreezes at the cold eave, building a ridge of ice that backs water up behind it, under the shingles. 4 The fix: a self-adhered ice and water shield at the eaves creates a watertight barrier under the shingles, so water can’t reach the structure even when it gets past them.

In southwestern Virginia, we don’t get severe northern-style ice dams every winter, but we get enough freeze-thaw cycles that eave protection earns its place. Valley protection matters every time it rains hard.

There are several established ice and water shield products on the market (Grace Ice & Water Shield, GAF WeatherWatch, and CertainTeed WinterGuard are common ones). What matters more than the specific brand is that the product is rated for the application and is installed in the right locations.

Building code requires ice and water shield to extend a minimum of 24 inches inside the exterior wall line at the eaves. The reasoning: an ice dam can back water up well past the gutter, so the protection has to reach past the warm-wall line into the heated portion of the structure.

Builders in colder climates often extend this coverage to 36 inches or even the full first course (typically 3 feet) for extra protection. Around skylights and roof penetrations, the membrane wraps the opening completely, lapping over the flashing.

When evaluating a builder’s specs, look for the coverage area in square feet, not just whether ice and water shield is included. A builder using one roll at each valley and skipping the eaves is doing less than the code minimum.

Architectural Shingles

Architectural shingles are the standard for new construction today. Also called dimensional or laminated, they’re thicker, heavier, and last longer than the older 3-tab shingles they replaced. They also look better, with depth and shadow lines that read more like wood or slate from the ground.

The major architectural shingle manufacturers, including GAF, Owens Corning, and CertainTeed, all produce quality products with limited lifetime warranties. The differences between them come down to specific product lines, granule technology, and warranty terms. Any of these manufacturers can produce a roof that performs well for decades when the product is installed correctly.

A complete shingle installation includes more than the field shingles. Dedicated starter strips along the eaves and rakes seal the edges against wind uplift, and dedicated ridge cap shingles run along the peaks and hips. Some builders cut field shingles for these uses to save on material cost. Using the dedicated products the manufacturer makes for those locations is the better practice, and many manufacturers require it for the lifetime portion of the warranty to apply.

The same shingle system goes on every home regardless of size. A 1,400 square foot ranch gets the same architectural shingles, same ice and water shield placement, and same hurricane straps as a 3,200 square foot lakefront build. Quality doesn’t scale with square footage.

25-40
Years of service from
a well-built roof
110-130
mph wind ratings on
architectural shingles
Class A
Highest fire rating
shingles can carry

When two roofing bids come in with a meaningful price difference, the difference is usually in the details that aren’t visible from the ground. Common shortcuts:

  • 3-tab shingles in place of architectural shingles. Saves material cost. Shorter life, weaker wind rating, flatter appearance.
  • Felt underlayment in place of synthetic. Tears more easily during installation, shorter service life beneath the shingles.
  • Ice and water shield at valleys only, skipping the eaves. Misses the spot where ice dams form. Below code minimum.
  • Field shingles cut for ridge cap and hip cap. Looks fine at first. Manufacturer warranty may not cover this approach.
  • No dedicated starter strip at the eaves. Edges of the roof are more vulnerable to wind uplift.
  • Stapled installation in place of nailed. Some manufacturers will not warrant stapled shingles.
  • Powered attic fan in place of balanced soffit-to-ridge ventilation. Works less consistently and adds an electrical component that can fail.

Each shortcut saves the builder a small amount up front. It shows up later as a leak, a callback, or a premature replacement. Ask any builder for their detailed roofing specification in writing, and look for these specific line items.

Two different warranties cover your roof, and they cover different things.

Manufacturer warranty covers defects in the shingle itself, the product. It does not cover installation issues. Coverage is usually strongest in the first 10 to 15 years and prorates after that. Some manufacturer warranties require certified installers for the full lifetime portion to apply. The warranty document is the source of truth on what’s covered.

Builder workmanship warranty covers the installation itself: the labor that put the roof on the home. This is typically one year, sometimes longer. If a leak develops in the first year because of how the roof was installed (not because of a defective shingle), this is the warranty that applies.

If a shingle fails years later because of a manufacturing defect, the manufacturer pays. If a leak develops in the first year because of how it was installed, the builder pays. After the workmanship period, installation issues become the homeowner’s problem unless they’re covered by a separate extended warranty (sometimes available as an upgrade).

Read both warranties carefully and keep both documents with your home records.

The Importance of Subcontractor Selection

The roofing on most custom homes is installed by a specialty subcontractor, not the builder’s own crew. The quality of the install depends heavily on which roofing contractor the builder uses and how stable that relationship is.

A builder who uses the same roofing subcontractor consistently has done the work of vetting them. They know how that crew handles the details: flashing, starter strips, nail placement, valley work. They know who answers the phone if there’s a callback. A builder who shops the roofing job to whoever’s cheapest each time hasn’t.

When evaluating a builder, it’s worth asking who does their roofing, how long they’ve worked together, and whether the same crew works every home.

Our roofing crew

Rempfer Construction, Lynchburg. A Class A licensed contractor established in 2001. The same crew handles our roofs consistently, which means familiar standards, accountability, and a team that knows our specs without needing to be told.

For homeowners building from out of state, it’s worth asking up front how the builder will keep you informed during construction.

Common practices to expect from a builder working with distant clients:

  • Photos at key milestones (foundation, framing, dry-in, drywall, trim, final walkthrough)
  • Periodic video walkthroughs by phone
  • Weekly or biweekly written updates with progress and upcoming decisions
  • A primary point of contact who answers the phone and email

The roof phase happens fast, often in a single week or two. A builder who documents it as it goes gives you confidence that the layers under the shingles were installed correctly. Once shingles are on, the membranes beneath them aren’t visible without removing them.

A builder’s workmanship warranty typically lasts one year. After that, ongoing maintenance and repairs are the homeowner’s responsibility, though manufacturer warranties on specific products may still apply.

Builders who have been in business for decades and who use the same subcontractors over time are easier to work with on long-term issues. They know the homes they built and can often diagnose a problem over the phone. Even if the warranty period has passed, an established builder is more likely to be available to help, or to refer you to the right specialist.

This is one reason builder longevity matters. A builder in business for 35 years has handled long-term issues on homes they built 20 or 30 years ago. A builder five years into the trade hasn’t.

Ventilation

A roof has to breathe. Attic air picks up heat from the sun in summer and moisture from inside the home in winter. If that air doesn’t have a way out, it cooks shingles from below in the summer and condenses on the underside of the roof deck in the winter, which is how roof structures rot from the inside.

It’s important to build a balanced ventilation system: cool air entering at the eaves through vented soffits, and warm air exiting at the peak through continuous ridge venting. Between the two, soffit baffles run up the underside of the roof deck at each rafter or truss bay, holding insulation back so air can move freely from the soffit vent into the attic.

Balanced attic ventilation showing cool air entering at soffit vents and exiting at continuous ridge venting Balanced ventilation: cool air in at the soffits, warm air out at the ridge Cool air in at the soffit vents Cool air in at the soffit vents Warm air out at continuous ridge venting Soffit baffles keep insulation from blocking airflow Attic insulation sits on the attic floor Trusses behind airflow path

The principle is simple: warm air rises, so a continuous path from the eaves up to the ridge keeps air moving through the attic year-round, without fans or moving parts. That keeps attic temperatures and humidity in a healthier range, which extends shingle life and helps the home’s energy performance.

Some older homes use only gable vents at each end of the attic, or rely on a powered fan. These approaches work less consistently than balanced soffit-to-ridge ventilation, and they don’t deliver the same year-round performance.

Building code uses a simple ratio for attic ventilation: one square foot of net free vent area for every 300 square feet of attic floor space (the “1:300 rule”), split roughly evenly between intake (soffit) and exhaust (ridge).

“Net free vent area” is the actual open area for airflow, not the gross dimensions of the vent. A 1-square-foot soffit vent might have only 0.5 square feet of net free area after accounting for the screen and frame. Manufacturers list this number on the product.

When evaluating a builder, ask:

  • Is the attic ventilated to the 1:300 standard or better?
  • Is it balanced between soffit intake and ridge exhaust?
  • Are soffit baffles installed at each rafter or truss bay?

A builder who can answer these questions specifically has thought through the ventilation. A builder who gives a vague answer probably hasn’t.

Gutters and Drainage

Gutters are part of the roof system, not an accessory to it. A well-built roof drains efficiently, and that depends on the gutters being sized and pitched correctly and kept clear of debris.

K-style seamless aluminum gutters are the standard choice for residential work. K-style refers to the profile: flat back, decorative front face, and the depth to carry water from a full roof in a heavy storm. Seamless means they’re formed on site in continuous runs that match the length of each eave, so there are no joints every ten feet to leak over time.

When gutters fail (overflow, sag, or pull away from the fascia), the water that should have been carried away ends up running down the siding, against the foundation, or behind the fascia. That’s how roof failures become wall and basement failures.

Wind and Weather Exposure

Some homes face more exposure than others. Open sites with fewer surrounding trees, hilltop positions, and waterfront homes all see more wind and sun than a sheltered inland lot. Storms move across open water or open land and hit the roof with the full force of whatever they’re carrying. UV exposure on a south-facing roof is harder on shingles than the same shingle on a shaded north-facing one.

Exposed homes are where the quality of the roof system shows up soonest. Architectural shingles handle wind better than 3-tab. Ice and water shield at valleys handles wind-driven rain. Balanced ventilation keeps shingles from cooking in the summer. None of this is exotic, but it adds up over twenty or thirty years on an exposed site.

Aerial view of a custom home framed on an open site with significant weather exposure

Questions to Ask Builders

When evaluating builders, ask about the roof system specifically. A few questions worth asking:

What brand of shingle, and what are the exact warranty terms?
Get the specific product line (not just the brand) and the warranty terms in writing. “Architectural shingles” alone isn’t enough.
Where do you install ice and water shield, and how many square feet?
Valleys and at least 24 inches up from the eaves at minimum. A better answer also includes around skylights and penetrations, and at roof-to-wall intersections.
Is the underlayment synthetic or felt?
Synthetic is more durable during construction and longer-lasting beneath the shingles. Felt still gets used, but it tears more easily.
Do you use dedicated ridge cap and starter strips?
The right answer is yes. Some builders cut field shingles for these uses to save cost. The manufacturer warranty may not cover that approach.
How is the attic ventilated, and to what standard?
Vented soffit at the eaves combined with continuous ridge venting at the peak, balanced to the 1:300 rule, is the standard for new construction.
Who is the roofing crew, and how long have they worked with you?
Look for a builder who uses the same subcontractor consistently rather than shopping the job. A long relationship signals quality and accountability.

What to Expect Over Time

A well-built roof should perform for decades without major intervention. But every roof needs occasional attention. Most homeowners shouldn’t be climbing on their own roofs, so think of maintenance as a mix of what you handle from the ground and what’s worth handing off to a roofer.

What you can handle from the ground
Walk the perimeter once a year and look up. Check for missing or curled shingles, debris in valleys, or granules collecting in the gutters. Clean gutters yourself if you’re comfortable on a ladder, or hire it out twice a year. Keep tree branches off the roof when you can, or call a tree service when you can’t.
What’s worth a roofer’s eyes
Anything that requires getting on the roof. Skylights and roof penetrations are the most common leak locations and benefit from a professional inspection every few years. Staining on interior ceilings, unusual amounts of shingle granules in the gutters, or any visible damage from the ground all warrant a roofer’s look.
Years 1-5
A new roof should require minimal maintenance. Annual gutter cleaning, perimeter inspection from the ground. Watch for any installation issues that may show up in the first year (covered by builder workmanship warranty if they appear).
Years 5-10
Continue with annual visual inspection. Have a roofer inspect skylights, chimneys, and roof penetrations every 3 to 5 years. These are the most likely leak points before the shingles themselves wear.
Years 10-20
Watch for granule loss in the gutters (a small amount is normal, large amounts mean the shingles are aging). Look for any curling or lifting at the edges of shingles. Professional inspection every 3 years.
Years 20-30
Begin thinking about replacement timeline. Have a roofer assess remaining life. Some roofs last 30 years and beyond, others reach end of life closer to 25. Plan for replacement budget. Manufacturer warranty is usually prorated heavily by this point.
Year 30+
If the roof is still performing well, continue monitoring. If signs of failure appear (active leaks, widespread granule loss, curling), plan replacement. Most architectural shingle roofs will need replacement somewhere in this window.

This is general guidance. Actual performance varies with the specific shingle, the installation, the exposure, and the climate. A roof on an exposed, south-facing lakefront site will age faster than one on a shaded, north-facing inland lot.

Choose a Builder Who Builds the Whole System

The roof is the part of a home that homeowners rarely see up close. The builder’s specifications and workmanship determine how it performs, and most of the decisions that matter happen in the first few weeks of construction.

Take the time to understand what’s going on above your head. Ask the questions. Read the specifications. The right answers come from a builder who can name every product on the roof and explain why it’s there.

The questions don’t stop once the contract is signed. A good builder welcomes them throughout construction, not just before it. If you’re not sure what to ask, that’s normal: this is probably your first or second time building a custom home, and asking is how you learn what you don’t yet know.

Glossary

Terms used in this article, defined briefly.

Architectural shingles
Also called dimensional or laminated shingles. Thicker than older 3-tab shingles, with depth and shadow lines. The standard for new residential construction.
Dry-in
The construction milestone when the roof is weather-tight (underlayment and ice and water shield installed) before the shingles go on.
Drip edge
L-shaped metal flashing at the eaves and rakes that directs water off the roof and over the fascia.
Eave
The lower edge of the roof that overhangs the wall. The horizontal edge where the gutter sits.
Fascia
The vertical trim board at the eaves, behind the gutter, that closes off the rafter or truss tails.
Flashing
Metal pieces that direct water away from gaps in the roof, such as where the roof meets a wall, chimney, or skylight.
Hurricane strap (or hurricane tie)
A metal connector that ties each truss or rafter to the wall plate, holding the roof against wind uplift.
Ice dam
A ridge of ice that forms at the cold eaves when warm attic air melts roof snow that refreezes at the overhang.
Ice and water shield
A self-adhered membrane installed at vulnerable areas of the roof (valleys, eaves, penetrations) to create a watertight seal.
Panel point
In truss construction, the point where multiple structural members meet and are connected by a metal plate.
Pitch
The slope of the roof, expressed as rise over run (for example, 8/12 means 8 inches of rise per 12 inches of horizontal run). Steeper roofs shed water faster.
Rake
The sloped edge of a gable roof, running from eave to ridge.
Ridge
The peak of the roof where two slopes meet.
Ridge cap
Dedicated shingles designed to wrap over the ridge of the roof. Distinct from field shingles cut to fit.
Sheathing
Structural panels (OSB or plywood) nailed to the trusses or rafters to form the roof deck.
Soffit
The horizontal underside of the eaves, often vented to allow cool air into the attic.
Soffit baffle
A channel installed between the rafter or truss bays at the eaves to keep insulation from blocking the airflow path.
Starter strip
A dedicated row of shingles at the eaves and rakes designed to seal the bottom edge of the field shingles against wind uplift.
Truss
A factory-built triangular assembly of dimensional lumber with internal web members. Distributes the roof load across long spans.
Underlayment
A water-resistant membrane (synthetic or felt) that covers the roof deck beneath the shingles.
Valley
The internal angle where two roof planes meet. Water concentrates in valleys as it runs off.
Wall plate
The horizontal board at the top of the exterior wall framing. Trusses or rafters sit on the wall plate and are fastened to it.
Wind uplift
The upward force that high winds exert on a roof. Hurricane straps and properly installed shingles resist uplift.

Frequently Asked Questions

Architectural shingles are thicker, heavier, and have a layered profile that creates depth and shadow lines. They typically last 25 to 50 years and carry stronger wind warranties. 3-tab shingles are thinner, flatter, less expensive, and have shorter warranties, often 20 to 25 years.

Architectural is the higher standard for new construction.

A quality architectural shingle roof in southwestern Virginia should perform for 25 to 40 years before replacement, depending on the shingle, the installation, the roof pitch, and how the roof is maintained.

Pitch matters because steeper roofs shed water and snow faster, which extends shingle life. A south-facing roof with heavy sun exposure may wear faster than a shaded north-facing roof on the same home.

Manufacturer warranties on shingles vary, but they typically cover defects in the shingle itself rather than installation issues. Coverage is usually strongest in the first 10 to 15 years and prorated after that. Some manufacturer warranties require certified installers for the full lifetime portion to apply.

Read the warranty carefully and keep it with the home records.

Most manufacturer warranties allow one transfer to a second owner, usually within a defined window after the original purchase. Coverage typically reduces for the second owner.

The specific terms are in the warranty document.

Architectural shingles installed to manufacturer specifications typically carry wind ratings in the range of 110 to 130 mph. Proper installation matters as much as the shingle itself.

In most cases yes. Solar racking systems install over existing shingle roofs, provided the roof is in good condition and has enough remaining life to outlast the panels.

If you’re planning solar down the road, mention it during design so it can be factored in.

On standard trusses, yes. The internal web members make most of the attic unusable for storage or living space.

If you want walk-up storage or a bonus room, that has to be designed into the truss system before they’re built.

Small leaks become big problems fast. Watch for water staining on ceilings, discoloration around vents or skylights, or shingles visibly out of place. Call a qualified roofer for an inspection.

Catching issues early is the difference between a repair and a replacement.

For more information about how we build custom homes in Virginia, view our detailed specifications.

View Our Specifications
This article describes general roof construction practices as of May 2026. Construction methods and materials continue to evolve. For current specifications on Ellis Homes projects, see our specifications page.
How the Right Windows Change the Way Your Home Performs

How the Right Windows Change the Way Your Home Performs

They’re easy to take for granted. But windows affect comfort, energy costs, and maintenance more than most people realize, and the differences between good windows and mediocre ones don’t show up until you’re living with them.

When people plan a custom home, they spend weeks choosing kitchen cabinets, countertops, and paint colors. Windows get a glance at the spec sheet and maybe a question about what color frame is available. That’s understandable. Cabinets are something you touch every day. Windows are something you look through.

They’re also one of the largest thermal weak points in any home. Walls are insulated. Roofs are insulated. The foundation has waterproofing and drainage. Windows are holes in all of that. Every window is a place where heat escapes in winter, enters in summer, where moisture can infiltrate if the installation is wrong, and where outside noise finds its way in.

Modern window technology is dramatically better than what was available even fifteen years ago. But as with most building components, the differences between what various builders include in their specifications are significant. Understanding those differences helps you ask the right questions. Features like Low-E coating and argon gas fill should be standard in new construction, not premium upgrades, but some builders still treat them as add-ons. Knowing what belongs in a baseline specification keeps you from paying extra for what should already be included.

What a Modern Window Actually Is

A window looks simple. It’s not. A modern residential window is an engineered assembly with several components working together to manage heat, light, moisture, air, and sound.

Two panes of glass
Sealed together with argon gas between them. The gas insulates 34% better than air.
Low-E coating
Invisible metallic layer that reflects heat but lets light through. Reduces heat transfer 30-50%.
Vinyl frame
Insulates well, doesn’t rot or need painting. Multi-chamber design adds strength.
Seals and weatherstripping
Keep air and water out. Quality here determines how well the window performs at year 10, not just year 1.

The insulated glass unit is the sealed assembly at the heart of the window. Two sheets of glass separated by a spacer, sealed around the edges, with the chamber between them filled with argon gas. Argon is denser than air and conducts heat about 34% less efficiently. A single pane of glass has almost no insulating value. A double-pane unit with argon fill is a fundamentally different product, one that actually contributes to energy performance instead of working against it.

Low-E coating is a microscopically thin, transparent metallic layer applied to the glass inside the sealed unit. It reflects infrared radiation (heat) while allowing visible light through. In winter, it reflects heat back into the room. In summer, it reflects solar heat back outside. It also blocks a substantial portion of ultraviolet radiation, which fades floors, bleaches fabric, and damages artwork. Low-E glass can reduce heat transfer by 30% to 50% compared to clear glass.

Not all Low-E coatings are the same. Different coatings are engineered for different climates. In Virginia, you want a coating that balances blocking summer heat gain while still allowing winter solar warmth through. The specific coating your builder selects affects that balance.

The frame is a structural component that resists wind loads, supports the glass, and provides a weathertight seal against the wall. It also conducts heat. An aluminum frame conducts heat rapidly and creates a cold strip around every window in winter. Vinyl or fiberglass frames conduct heat poorly, which is why they perform better in homes.

Weatherstripping between the frame and the operable sash seals against air and water infiltration. How well it holds up over years of use is one of the biggest factors in long-term window performance. A window that seals well at year one but develops air leaks by year seven has lost much of its value. The balance mechanisms that hold the sash in position and the lock hardware also matter over time. In homes people have lived in for fifteen or twenty years, sticky sashes, broken balances, and locks that don’t fully engage are common complaints. These are manufacturing quality issues, and they vary significantly between window products.

Why Argon Gas Matters
Argon is an inert, non-toxic gas sealed between the panes. It slows heat transfer by reducing convection inside the glass unit. Quality sealed units lose less than 1% of their gas fill per year, remaining effective for twenty years or more. If the seal fails and the gas escapes, you’ll see condensation or fogging between the panes. That’s a warranty issue, not normal wear.

Energy Performance: What the Numbers Actually Tell You

Window specifications include performance ratings printed on the NFRC label required on every new window sold in the United States. These numbers tell you more about how a window will perform than the brand name or the marketing language.

U-Factor Comparison (lower is better)
Single-pane (1970s)
1.00
Clear double-pane
0.50
Low-E + argon fill
0.27
U-factor measures heat transfer through the entire window assembly. Lower values mean better insulation.

U-factor measures how well the window prevents heat from escaping. A quality Low-E window with argon is 50% to 75% better than clear double-pane. That’s the biggest reason modern windows feel so different to live with.

Solar Heat Gain Coefficient (SHGC) measures how much solar radiation passes through, on a scale from 0 to 1. For Virginia, a moderate SHGC in the 0.25 to 0.35 range provides the best year-round balance: enough solar blocking for summer, enough passive warmth for winter. South-facing windows might benefit from slightly higher SHGC to capture winter sun. West-facing windows, which get the hottest afternoon exposure, might benefit from lower.

Visible Transmittance measures how much natural light gets through. Quality Low-E coatings maintain high transmittance (0.40 to 0.55) while reducing heat transfer. Cheaper coatings can make rooms noticeably darker. If you’re building for the views, this number matters.

Air Leakage measures how much air passes through the closed window. ENERGY STAR requires 0.30 cfm/sq ft or less. This number reflects the quality of weatherstripping, hardware, and manufacturing tolerances. It’s one of the best indicators of overall build quality.

A builder who can discuss U-factor and SHGC has thought about windows as a performance component. A builder who can only tell you the brand name hasn’t. Keep in mind that two spec sheets can both say “double-hung vinyl windows” and describe very different products. The glass type, coatings, gas fill, and hardware quality all vary, and none of that is visible from the line item.

The takeaway
Ask for the NFRC label ratings, not just the brand. U-factor, SHGC, Visible Transmittance, and Air Leakage are the four numbers that tell you whether a window is good or not.

Frame Materials: The Real Differences

Vinyl
The standard, for good reason
Good insulator. Doesn’t rot, corrode, or need painting. Holds up in humid climates. Historical knock (thicker frames, limited dark colors) is less relevant as manufacturing has improved.
Fiberglass
The upgrade worth considering
Stronger. Expands at the same rate as the glass (better long-term seal). Thinner frames, more glass area. 15-25% more than vinyl.
Wood / Clad Wood
Traditional, with trade-offs
Good insulator, traditional appearance. Requires regular maintenance. In Virginia’s humidity, that’s not optional. Clad wood (exterior shell) helps. Both significantly more expensive.
Aluminum
Thin but thermally poor
Strong, very thin frames. But conducts heat readily. Even with thermal breaks, performs poorly versus vinyl or fiberglass. Rarely right where energy matters.

For custom homes in our area, vinyl provides the best balance of performance, durability, maintenance, and cost.

Condensation: What Your Windows Are Telling You

Windows don’t create condensation. They reveal it. When warm, humid indoor air contacts a surface cold enough to drop the air below its dew point, moisture condenses into droplets. Windows are typically the coldest visible surface in a home, so they’re where condensation appears first. The window is the messenger, not the cause.

This is where window quality shows itself in daily life. A quality Low-E window keeps the interior glass substantially warmer than a basic window. Warmer glass means the air contacting it doesn’t cool as far. During a cold Virginia morning, the difference is visible: fog and water streaming down the glass in one home, a clear view in another.

New homes can be an exception during the first heating season. Building materials release moisture as they cure, and a tightly sealed home holds that moisture inside. Some window condensation during the first cold months is normal. It should diminish within the first year.

Normal
  • Light fog on glass during cold mornings, especially in the first year
  • Condensation that clears as the day warms
  • Moisture on the exterior glass on humid summer mornings (sign of good insulation)
Call your builder
  • Fogging or moisture between the two panes of glass (failed seal)
  • Water pooling on the sill or running down the wall
  • Persistent condensation that doesn’t improve after the first year

One thing that is never normal: condensation or fogging between the two panes of glass. That indicates a failed seal, escaped argon, and compromised performance. Most manufacturers cover this under warranty. If you see it, call your builder.

Patio Doors: The Biggest Window in the House

A sliding patio door is six to eight feet of glass in a single opening. Everything that matters in a window matters more here, simply because of the scale. A patio door with basic glass creates a massive cold zone in winter and a heat gain problem in summer.

In our area, patio doors often face the primary view: the lake, the mountains, the rear outdoor living space. They’re used daily. What you’ll notice over time is the quality of the rolling mechanism and the hardware. A good patio door glides with one hand. A mediocre one drags and sticks, and it gets worse as the track collects debris and rollers wear.

Multi-point locking hardware (the lock engages at multiple points along the door’s edge) provides a tighter seal and better security than a single-point lock. Ask your builder about the track system, roller quality, and locking mechanism. These are the components that separate a patio door that still works well at year ten from one that became an annoyance at year three.

Installation: Where the Real Differences Are

You can buy the best window on the market, install it poorly, and end up with one that underperforms a cheaper window installed correctly. Improper flashing around windows is one of the leading causes of water intrusion in residential construction. Damage can go undetected for years, rotting framing, growing mold behind drywall, and compromising structure long before anyone sees a stain on the wall.

Flashing is the critical layer. It wraps the window opening and ties into the home’s weather barrier, directing water back to the exterior. It has to be layered in sequence, like shingles: upper layers overlap lower layers so water always flows outward and downward. Reversing the sequence traps water behind the assembly. The sill needs a sloped pan that drains outside, not a flat surface that pools water.

Builders who use integrated sheathing and weather barrier systems like ZIP System have an advantage. The taped seams create a continuous air and water barrier, and window flashing ties directly into it. With traditional housewrap, every opening is a point where the barrier is interrupted and the details require more labor and precision.

Air sealing around the frame is the final step. The gap between window and rough opening must be sealed to prevent air from moving around the frame, even when the sash is closed. Low-expansion spray foam or backer rod with sealant are standard methods. The wrong foam (high-expansion) can bow the frame and prevent proper operation.

The Connection to the Building Envelope
A window is one component of the envelope: foundation, framing, sheathing, insulation, air barrier, siding, roof. The best windows won’t perform well in a poorly sealed wall, and a well-sealed wall is undermined by poor windows. When evaluating a builder, ask how windows integrate with the rest of their system. The answer tells you whether they’re thinking about the whole home or just checking boxes.
The takeaway
A well-installed average window outperforms a poorly installed expensive one. Ask your builder how they flash and seal around windows. If they can’t explain the process, that’s a red flag.

Sound Reduction

Windows are the thinnest, densest component of a wall, so they transmit sound more readily than insulated wall sections. You feel this most at night, or when the house is quiet and you become aware of road noise, boat traffic, wind, or a neighbor’s equipment.

Standard double-pane windows rate STC 28 to 32 (Sound Transmission Class, the standard measure of how well a building component blocks airborne sound). For most residential settings in our area, that’s adequate. If you’re building near a consistent noise source, a main road, a marina, or a commercial area, laminated glass or triple-pane configurations improve sound performance. These add cost, so they’re worth specifying for the affected windows rather than the entire house.

The same qualities that improve thermal performance also improve sound: tight seals, quality weatherstripping, proper installation with no air gaps. Air leaks are sound leaks. A well-installed, well-sealed window does double duty. If you’re building a home you plan to live in for twenty or thirty years, the quiet matters more than you might expect during the planning stage.

Protecting What’s Inside the House

Low-E coatings block a substantial portion of UV radiation while allowing visible light through. If you’re investing in granite countertops, quality flooring, and furniture you intend to keep, your windows are part of protecting that investment. A south- or west-facing room with clear glass will show fading on floors and fabrics within a few years. The same room with Low-E glass largely prevents it.

Window Placement: Decisions That Are Hard to Change Later

During design, window placement feels like an aesthetic decision: where do you want the view? It’s also a performance decision. Where you put windows and which direction they face affects energy costs, comfort, and how rooms feel to live in.

On lakefront and waterfront homes, this gets more specific. The lake side of the house is typically where you want the most glass, but it’s also often the side with the greatest weather exposure: wind-driven rain, reflected UV off the water (which intensifies sun damage on interior surfaces), and humidity cycling that stresses seals over time. The best view and the hardest conditions often face the same direction. That’s a tension your builder should be addressing during design, not discovering during construction.

South
Best for passive solar
Most consistent sunlight. Free heat in winter. Manageable in summer with roof overhangs that shade when the sun is high.
West
Highest summer heat gain
Intense afternoon sun drives up cooling costs. Large west-facing glass needs lower SHGC coatings or exterior shading.
North
Even, consistent light
Minimal heat gain, no glare. Good for rooms where you want natural light without the thermal impact.
East
Morning sun
Pleasant to wake up to. Moderate heat impact. Good for bedrooms and breakfast areas.

This is the kind of decision that’s easy to make during design and impossible to change after framing. Window selections (style, size, placement, and any upgrades for specific locations) happen during the planning phase, before construction starts. If your builder isn’t discussing window orientation as part of the design process, bring it up. The floor plan might look great on paper, but if the great room’s wall of windows faces due west, you’ll feel it every summer afternoon.

Questions to Ask Your Builder

When reviewing specifications or interviewing builders, these questions help you understand how seriously they think about windows as performance components.

What type of glass is in your standard specification?
You’re looking for double-pane insulated glass with Low-E coating and argon gas fill. “Double-pane” without mentioning Low-E or gas fill is basic-grade glass.
Can you provide the NFRC ratings?
A builder who knows the U-factor, SHGC, and VT of their standard windows has done the homework. A builder who can’t hasn’t.
How do you integrate window flashing with the weather barrier?
Should reference a specific system and sequence. A vague answer is a concern, because flashing failures are among the most common sources of hidden water damage.
What patio door hardware do you include?
Multi-point locking provides a tighter seal and better security. Single-point is builder-grade minimum.
What warranty covers the windows and sealed glass units?
Quality vinyl windows carry a lifetime limited warranty on the frame and 20-year or longer on the insulated glass unit. Ask specifically about seal failure coverage.

What We Include

Every Ellis home includes double-hung Low-E tilt vinyl windows with screens on all operating windows, and vinyl Low-E patio sliding doors per plan. These are standard, not upgrades.

Low-E glass with argon fill handles Virginia’s climate range: summer highs in the 90s, winter lows in the teens, humidity year-round. Vinyl frames provide excellent thermal performance with zero exterior maintenance. Tilt-in sashes make cleaning practical on second-story windows. The windows carry a lifetime limited warranty on the frame and a manufacturer’s warranty on the sealed glass units, including seal failure coverage.

The windows tie into our ZIP System exterior sheathing, which provides a continuous air and water barrier. Flashing around every window and door integrates with that barrier system. This isn’t visible after the siding goes on, but it’s what keeps the wall system performing.

What to Expect After You Move In

Like other components of a new home, windows go through an adjustment period. Here’s what’s normal and what’s not.

Some condensation during the first heating season is normal
New materials release moisture as they cure. In a tightly sealed home, this can produce temporary window condensation. Typically diminishes within the first year.
Minor hardware adjustment may be needed
As the house settles, sashes may need adjustment to operate smoothly. Routine first-year maintenance.
Fogging between panes is not normal
Condensation between glass layers means a seal has failed. Contact your builder. Manufacturer warranties typically cover this.
Drafts around closed, locked windows are not normal
Air movement around a fully closed window means something needs attention. Address promptly: air leaks waste energy and can allow moisture into the wall.
Exterior condensation on summer mornings is normal
Humid air contacting cooler exterior glass (cooled by AC) condenses on the outside. Actually a sign your windows are insulating well. Evaporates as the day warms.

The View Is Just the Beginning

Windows are where you experience the home’s connection to its surroundings: the morning light, the lake view, the first snow. That’s the part people think about. What they don’t think about is the thermal performance that keeps the room comfortable while you’re looking out, the UV protection that keeps the floor from fading, the seals that keep cold air from finding its way in, and the flashing behind the siding that keeps water from reaching the framing.

A good window does all of those things simultaneously, every day, for decades. Choosing a builder who thinks about windows as part of a complete system, not just a line item on a spec sheet, is how you get there.

For more information about how we build custom homes in Virginia, view our detailed specifications.

View Our Specifications

Frequently Asked Questions

Vinyl windows require very little: periodic cleaning of glass and tracks, annual lubrication of hardware, and checking that weep holes aren’t blocked. Wood or clad-wood windows need annual inspection of painted or stained surfaces and prompt attention to any peeling or cracking.

In Virginia’s climate, quality double-pane Low-E with argon performs well. Triple-pane makes sense with specific noise concerns or very large glass areas. Evaluate case-by-case rather than specifying throughout.

Tinted glass absorbs solar heat, so the glass itself gets hot. Low-E reflects it, keeping the glass cooler and also reflecting interior heat back inside during winter. Low-E works in both directions and doesn’t darken the view.

Yes, but it involves integrating with the existing weather barrier, so exterior trim and possibly siding must come off. Upgrades for specific locations are more cost-effective to specify during construction.

Federal credits have specific U-factor and SHGC requirements by climate zone. Your builder or window supplier can confirm eligibility. Programs change, so check at the time of your build.

Double-hung windows offer ventilation flexibility (open top, bottom, or both), tilt-in cleaning from inside, and full screens. Casements seal slightly tighter and work well in specific locations: over kitchen counters, on high-wind-exposure walls, or where a crank handle is easier than lifting a sash. Many homes use both styles where each makes sense.

This article describes general window and patio door considerations for custom home construction as of March 2026. Products, specifications, and energy standards continue to evolve. For current specifications on Ellis Custom Homes projects, see our specifications page.
Do Heat Pumps Work in Cold Weather? | Ellis Custom Homes

Do Heat Pumps Work in Cold Weather?

If you’re planning to build a home in Virginia, you’ve probably wondered about heat pumps. They’re standard in new construction here, and for good reason. But can they actually keep up when temperatures drop?

The Short Answer

Yes, They Work

Modern heat pumps are significantly more capable than the systems from 10 or 15 years ago. But understanding why requires knowing a little about how they work and what separates a good installation from a mediocre one.

Heat pumps have become standard for heating and cooling in Virginia because they’re efficient in our climate. But there’s a persistent question that comes up, especially when temperatures drop into the teens: can a heat pump actually keep up?

The technology has improved dramatically. Current systems handle Virginia winters without issue. But the equipment is only part of the story. How it’s sized, what air handler it’s paired with, and how well the home is built all affect performance.

This article explains how heat pumps work, what’s changed in recent years, and what to look for when evaluating a builder’s HVAC specifications.

The Basics

How Heat Pumps Actually Work

A furnace generates heat by burning fuel. A heat pump does something different: it moves heat from one place to another.

Even when it’s cold outside, there’s heat energy in the air. A heat pump extracts that heat and moves it inside. In summer, the process reverses, and the system moves heat from inside your home to the outside. One system, two functions.

This is why heat pumps are so efficient. Moving heat takes less energy than creating it. A well-functioning heat pump can deliver two to three times more heat energy than the electricity it consumes. No furnace can match that efficiency.

The catch is that as outdoor temperatures drop, there’s less heat available to extract, and the system has to work harder. This is where older heat pumps struggled, and it’s where modern technology has made the biggest improvements.

Efficiency Advantage

Heat pumps move heat rather than generate it. At moderate temperatures, they can deliver 3-4 units of heat energy for every unit of electricity consumed. Even in cold weather, modern systems maintain efficiency advantages over electric resistance heating.

Technology Improvements

What’s Changed

Heat pumps have been around for decades, but the early systems had real limitations in cold weather. Two technologies changed everything.

Older units used single-stage compressors that ran at one speed: full blast. When the thermostat called for heat, the system turned on at 100% capacity. When the temperature was satisfied, it shut off. This constant cycling was inefficient and created noticeable temperature swings in the home.

More importantly, those older systems lost capacity as temperatures dropped. A heat pump rated to heat your home at 47 degrees might struggle to keep up at 25 degrees. Below that, many systems couldn’t maintain comfortable temperatures at all without backup heat running constantly.

This is where the reputation came from. People who lived through winters with those older systems remember the heat running nonstop, the house never quite getting warm, and electric bills that went through the roof when the backup heat kicked in.

Variable-Speed Compressors

Instead of running at full blast or not at all, variable-speed systems adjust output to match what the home actually needs. Think of it like cruise control instead of repeatedly flooring the gas pedal and then coasting.

Improved Cold-Weather Performance

Modern refrigerants and compressor designs allow systems to extract heat at much lower temperatures. Cold-climate heat pumps can operate effectively down to -15 degrees or colder.

Consistent Comfort

Variable-speed systems hold the temperature within a degree or two of your thermostat setting. They run longer at lower speeds, which means better air circulation and more even temperatures throughout the house.

Better Efficiency

On a mild day, a variable-speed system might run at 40% capacity, maintaining steady temperature without cycling. On a cold night, it ramps up to meet demand without the energy waste of constant on-off cycling.

Backup Systems

What About Auxiliary Heat?

Heat pumps have backup heating elements that can supplement the heat pump when needed. Understanding when auxiliary heat is normal, and when it’s a problem, helps you evaluate system performance.

You might see “AUX” on your thermostat during cold weather. This indicates the backup heating elements (usually electric resistance coils) are running. This is normal in certain situations.

Auxiliary heat typically kicks in when outdoor temperatures drop below a certain point (much lower on modern systems than older ones), when the system is in defrost mode, or when you raise the thermostat several degrees at once and the system needs help catching up quickly.

The key word is “supplement.” On a properly sized modern system, auxiliary heat runs occasionally and briefly. It shouldn’t be running constantly, and it shouldn’t be carrying most of the heating load.

When to Be Concerned

If your thermostat shows AUX heat running frequently even in moderate temperatures (above 35-40 degrees), something is wrong. Either the system is undersized, the thermostat is misconfigured, or there’s a problem with the heat pump itself. Electric resistance heat is much less efficient than heat pump operation. A system that relies heavily on auxiliary heat will have high electric bills.

Beyond the Equipment

What Makes a Good Installation

Not all heat pump installations are equal. The equipment matters, but so does how it’s sized, configured, and integrated with the rest of the home.

Proper sizing is critical. An undersized system won’t keep up on cold days. An oversized system will short-cycle (turn on and off frequently), which wastes energy, creates temperature swings, and doesn’t dehumidify properly in summer. The system should be sized based on a load calculation for your specific home, not rules of thumb.

Variable-speed equipment makes a significant difference in both comfort and efficiency. Single-stage systems are cheaper upfront but cost more to operate and don’t maintain temperatures as consistently. Variable-speed systems run longer at lower speeds, which is more efficient and more comfortable.

The air handler matters too. The air handler is the indoor unit that circulates air through your home. A variable-speed air handler paired with a variable-speed heat pump delivers the best performance. Some builders pair variable-speed heat pumps with single-speed air handlers to save money, which limits the system’s ability to modulate output.

The Building Envelope Connection

A heat pump is only as good as the home it’s heating. A well-sealed, well-insulated home lets the heat pump operate efficiently. A leaky home with poor insulation makes any heating system work harder and costs more to operate. This is why we consider HVAC and building envelope as a single system.

Read more about building envelope performance

Evaluating Builders

Questions to Ask

If you’re planning a custom home, the answers to these questions tell you a lot about whether a builder is thinking about long-term performance or just checking a box.

What efficiency rating does your standard heat pump have?

Look for the SEER2 rating (cooling efficiency) and HSPF2 rating (heating efficiency). Higher numbers mean better efficiency. Current minimum standards require 15 SEER for split systems.

Is the system single-stage, two-stage, or variable-speed?

Variable-speed is the most efficient and comfortable option. Two-stage is a middle ground. Single-stage is the most basic and least efficient.

What about the air handler?

Is it variable-speed to match the heat pump, or single-speed? A variable-speed heat pump paired with a single-speed air handler can’t deliver its full potential.

How do you size the system?

The answer should involve a load calculation based on the home’s design, insulation levels, window specs, and orientation. Rules of thumb like “one ton per 500 square feet” are a red flag.

What We Include

Every Ellis home includes a 15 SEER heat pump with a variable-speed air handler and programmable thermostat. This is our standard specification, not an upgrade. The variable-speed air handler is the key: it allows the system to modulate output based on conditions, maintaining consistent temperatures without the on-off cycling of basic systems. We also include 200-amp electrical service, which provides capacity for the heating system plus any additional loads you might add later.

Common Questions

Frequently Asked Questions

Yes. Modern heat pumps are significantly more capable in cold weather than systems from 10-15 years ago. Cold-climate heat pumps can operate effectively down to -15 degrees or colder. Virginia winters, which rarely drop below the teens, are well within the comfortable operating range of current technology. Our standard 15 SEER systems with variable-speed air handlers handle Virginia winters without issue.

Auxiliary heat is a backup heating element (usually electric resistance coils) that supplements the heat pump when needed. It kicks in when outdoor temperatures drop below a certain point, during defrost cycles, or when you raise the thermostat several degrees at once. On a properly sized modern system, auxiliary heat runs occasionally and briefly, not constantly. If AUX heat runs frequently in moderate temperatures, the system may be undersized or malfunctioning.

A single-stage heat pump runs at one speed: full blast. It cycles on and off repeatedly, creating temperature swings and using more energy during startup. A variable-speed system adjusts its output to match what the home needs, running longer at lower speeds for more consistent temperatures and better efficiency. Variable-speed systems also perform better in cold weather because they can ramp up gradually rather than cycling on and off.

Current federal minimum standards require 14.3 SEER2 for split-system heat pumps. Higher ratings indicate better cooling efficiency. For heating efficiency, look at the HSPF2 rating. Variable-speed systems typically achieve 20-24 SEER2, while single-stage systems range from 14-16 SEER2. Our standard specification is 14.3 SEER2, which meets current efficiency standards while keeping costs reasonable.

A heat pump is only as good as the home it’s heating. A well-sealed, well-insulated home lets the heat pump operate efficiently at lower output levels. A leaky home with poor insulation makes any heating system work harder, run longer, and cost more to operate. The building envelope and HVAC system should be considered together when evaluating a home’s overall performance.

Proper sizing requires a load calculation based on the home’s design, insulation levels, window specifications, orientation, and local climate data. An undersized system won’t keep up on cold days. An oversized system will short-cycle, wasting energy and creating temperature swings. Rules of thumb like “one ton per 500 square feet” don’t account for the variables that affect actual heating and cooling loads.

Questions about HVAC specifications?

Our full specifications are available online, and we’re happy to walk through them with you. We build custom homes in Bedford County, Franklin County, and the Smith Mountain Lake area.

View Full Specifications
Building Envelope Guide: What Keeps a Virginia Home Warm in Winter | Ellis Custom Homes

What Keeps a Virginia Home Warm in Winter

When temperatures drop and conditions get harsh, your home’s construction determines whether you stay comfortable or struggle to keep up. Here’s what goes into a building envelope that performs.

The Complete System

Your Home’s Building Envelope

The “building envelope” is everything that separates your living space from the outdoors: walls, roof, foundation, windows, and doors. These components work as a system, and weak points in any one area affect the whole.

A home with good insulation but leaky windows will still feel drafty near the glass. Quality windows installed in walls with gaps in the air barrier will underperform because conditioned air escapes around them. And even a tight, well-insulated envelope won’t help if the heating system is undersized for the space.

This matters in Virginia because our winters, while not extreme by northern standards, include enough cold snaps to test how well a home is built. In the Smith Mountain Lake area, temperatures regularly drop into the teens during winter, and single-digit nights aren’t unusual. A home that performs well during those stretches will be comfortable year-round.

This article walks through the major components of a home’s building envelope and explains what we include in Ellis homes and why.

Controlling Air Movement

Air Sealing

Before insulation can do its job, air movement has to be controlled. Warm air escaping through gaps is one of the biggest sources of heat loss, and it allows moisture into wall cavities where it can cause long-term problems.

Traditional construction uses housewrap as an air and weather barrier. It’s installed in sheets that overlap and get taped at seams. The problem is that housewrap depends heavily on installation quality. If tape fails, if sheets get torn during construction, or if seams aren’t properly detailed, gaps develop. Those gaps let air and moisture through.

ZIP System sheathing works differently. The weather-resistant barrier is built into the structural panel itself rather than applied as a separate layer. Seams are taped with a specialized adhesive designed to bond permanently with the panel surface. The result is a continuous barrier with fewer opportunities for installation errors.

ZIP System® Sheathing

We use ZIP System sheathing on every home we build. It costs more than traditional sheathing and housewrap, but it creates a tighter envelope that performs better over time. You won’t see it once the siding goes up, but you’ll notice the difference in how the home feels during temperature extremes.

Thermal Performance

Insulation

Insulation is rated by R-value, which measures resistance to heat flow. Higher numbers mean better performance. But the R-value on the label only tells you what the insulation can do if it’s installed correctly.

Insulation that’s compressed loses R-value. Insulation with gaps around electrical boxes or plumbing lets heat bypass it entirely. These installation issues are common in production building where crews work fast and supervision is limited.

For context on what R-values mean in practice: R-48 in the ceiling (what we specify) reduces heat transfer to about 2.6% of what would occur with no insulation. R-15 in the walls reduces it to about 6.7%. The ceiling matters most because heat rises, which is why Virginia energy code requires higher R-values there.

Ceiling Insulation: R-48

All our homes include R-48 ceiling insulation. This is where heat loss is greatest, so it’s where insulation matters most.

Wall Insulation: R-15 or R-21

Standard 2×4 exterior walls get R-15 insulation. Homes with 2×6 exterior walls (an available upgrade) get R-21.

Where You Feel the Difference

Windows & Doors

Even good windows have much lower R-values than insulated walls, which is why you feel cold near windows on winter mornings. Window quality determines how noticeable that cold zone is.

Low-E (low-emissivity) glass has a thin metallic coating that reflects radiant heat. In winter, it reflects heat back into the room rather than letting it escape through the glass. The practical effect is that the interior glass surface stays warmer, which reduces condensation and makes the area near windows more comfortable.

During sustained cold, with temperatures in the single digits for several days, window quality becomes obvious. Homes with basic single-pane or low-quality double-pane windows develop condensation, frost on the interior glass, and noticeable cold zones. Quality Low-E windows maintain more consistent interior surface temperatures.

Double-Hung Low-E Windows

All our homes include double-hung vinyl windows with Low-E glass. Tilt-in sashes allow cleaning from inside.

Insulated Fiberglass Doors

Exterior doors are insulated fiberglass. Steel conducts cold readily, and solid wood can warp and develop air gaps over time. Fiberglass avoids both problems.

Insulated Garage Doors

Steel insulated garage doors with weatherstripping. Attached garages share walls with living space, so garage door insulation affects the whole home.

Low-E Patio Doors

Sliding patio doors include the same Low-E glass as the windows, maintaining consistent performance across all glazed openings.

Keeping Up With Demand

Heating Systems

Heat pumps have become standard for heating and cooling in Virginia because they’re efficient in our climate. The question many people ask is how they perform when temperatures drop into the teens or single digits.

Modern heat pumps are significantly more capable in cold weather than systems from 10 or 15 years ago. Our standard systems are rated at 14.3 SEER2, which reflects current efficiency standards. But the efficiency rating is only part of the story.

The air handler (the indoor unit that circulates air through your home) matters just as much. We use variable speed air handlers, which adjust their output based on demand. A basic single-speed system runs at full blast until the thermostat is satisfied, then shuts off completely. It cycles on and off repeatedly, creating temperature swings and wasting energy.

Variable speed systems run longer at lower speeds, maintaining more consistent temperatures with less energy. During sustained cold, when the system runs for extended periods, the difference is significant. The home stays at a steady temperature rather than swinging between too warm and too cool.

What We Include

Every Ellis home includes a 14.3 SEER2 heat pump with a variable speed air handler and programmable thermostat. This is our standard specification, not an upgrade. We also include minimum 200-amp electrical service, which provides capacity for space heaters, electric vehicle charging, or other high-draw uses if needed during extreme cold.

Air Quality

Ventilation

A tight, well-sealed home needs controlled ventilation. The goal is to control where air enters and exits rather than relying on random leaks through the building envelope.

In older, leakier homes, fresh air enters through gaps and cracks throughout the structure. That’s inefficient for heating and cooling, but it does provide air exchange. A well-sealed home eliminates most of those leaks, which means ventilation has to be intentional.

Moisture is the primary concern in winter. Cooking, showering, and even breathing add moisture to indoor air. In a tight home, that moisture has nowhere to go unless it’s actively removed. High indoor humidity can cause condensation on windows, musty smells, and conditions that promote mold growth.

Controlled ventilation also matters for indoor air quality. Stale air, cooking odors, and off-gassing from furnishings and finishes need a path out of the home.

Bathroom Exhaust Fans

Every bathroom includes an exhaust fan vented to the exterior (not into the attic). These remove moisture at the source and should run during and after showers.

Kitchen Ventilation

Microwave hood combinations are standard; upgraded range hoods are available. Proper kitchen ventilation removes cooking moisture and odors.

Dryer Venting

Electric dryer hookup vented to the exterior. A dryer removes significant moisture from clothing; that moisture needs to exit the home, not enter it.

Below Grade Performance

Foundation & Moisture Control

Winter weather affects foundations through freeze-thaw cycles and moisture. Water expands when it freezes, and repeated freezing and thawing can crack concrete and damage waterproofing that wasn’t designed to handle it.

Our foundation system starts with 9-foot poured concrete walls, which provide more strength and water resistance than block construction. But the concrete itself isn’t waterproof. Water will migrate through it over time unless there’s a barrier.

We use the complete Tuff-n-Dri system on every home: spray-applied waterproofing on the exterior walls, Warm-n-Dri insulation board over that, and Drain-Star perimeter drainage to direct water away from the foundation. The Warm-n-Dri board provides R-5 insulation to the basement walls and protects the waterproof coating from damage during backfill.

This system comes with a 30-year written warranty from Tuff-n-Dri against water penetration. It’s one of the strongest foundation warranties available in residential construction, and it transfers to subsequent owners if you sell the home.

9-Foot Poured Concrete Walls

Full-height poured foundations with footers engineered for the specific load above. Stronger and more water-resistant than block construction.

Complete Tuff-n-Dri System

Exterior waterproof coating, Warm-n-Dri insulation board (R-5), and Drain-Star perimeter drainage. The same system used in commercial construction.

30-Year Warranty

Written manufacturer warranty against water penetration, transferable to future owners. Not a builder promise; backed by one of the largest waterproofing manufacturers in the industry.

Frost-Free Spigots

Exterior spigots (front and back) have the valve inside the heated envelope. The water supply line stays warm even when temperatures drop well below freezing.

Ice Dam Prevention

Roof Protection

When snow accumulates on a roof and temperatures hover around freezing, ice dams can form. Understanding how they develop explains why proper roof construction prevents them.

Heat escaping through the roof warms the underside of the snow, causing it to melt. The water runs down toward the eaves, which are colder because they extend past the exterior wall (there’s no heat below them). When the water reaches the cold eaves, it refreezes. This creates a dam of ice that traps subsequent meltwater, which can back up under shingles and leak into the home.

The primary defense is proper attic insulation and ventilation, which keep the roof surface cold so snow doesn’t melt from below in the first place. But ice and water shield provides a secondary defense at vulnerable areas.

Ice and Water Shield

Self-adhering membrane installed at valleys and eaves, where ice dam damage is most likely. If water does back up, the membrane prevents it from reaching the roof deck.

Architectural Shingles

Class A fire-rated architectural shingles with a lifetime manufacturer warranty. Thicker and more durable than basic three-tab shingles.

Floor System

One more detail that affects winter comfort: we use pre-engineered floor trusses with ¾” Advantech subflooring. Advantech is warranted for life and resists moisture better than standard OSB. The result is floors that feel solid underfoot and stay warmer because they don’t develop gaps that let cold air through from below.

Common Questions

Frequently Asked Questions

Virginia energy code requires R-48 or higher in ceilings and R-13 to R-19 in walls depending on climate zone and wall construction. For the Smith Mountain Lake area, we use R-48 ceiling insulation and R-15 in standard 2×4 walls, with R-21 available in 2×6 wall construction. These values meet or exceed code requirements for our region.

Yes. Modern heat pumps are significantly more capable in cold weather than systems from 10-15 years ago. They remain efficient into the teens and continue operating in single-digit temperatures. Variable speed systems perform better than single-stage units during sustained cold because they run longer at lower speeds rather than cycling on and off. Our standard 14.3 SEER2 systems with variable speed air handlers handle Virginia winters without issue.

ZIP System is a structural sheathing panel with a built-in weather-resistant barrier. Unlike traditional construction that uses separate sheathing and housewrap, ZIP System integrates both into a single panel. Seams are taped with specialized adhesive tape, creating a continuous air and moisture barrier with fewer opportunities for installation errors. It costs more than traditional methods, but creates a tighter, better-performing envelope.

Ice dams form when heat escaping through the roof melts snow, which then refreezes at the colder eaves. Prevention starts with proper attic insulation (R-48 in our homes) and ventilation to keep the roof surface cold. Ice and water shield membrane at valleys and eaves provides secondary protection by preventing any water backup from reaching the roof deck. Both are standard in every home we build.

A complete waterproofing system includes exterior coating on foundation walls, insulation board to protect the coating, and perimeter drainage to direct water away. We use the Tuff-n-Dri system, which includes all three components and carries a 30-year written warranty against water penetration. The Warm-n-Dri board also adds R-5 insulation to basement walls. This warranty transfers to future owners if you sell the home.

Yes. A well-sealed home needs controlled ventilation to maintain air quality and manage humidity. Moisture from cooking, bathing, and breathing needs a path out of the home. Our homes include bathroom exhaust fans vented to the exterior, kitchen ventilation, and dryer venting to the outside. The goal is to control where air enters and exits rather than relying on random leaks through the building envelope.

Questions about what’s included?

Our full specifications are available online, and we’re happy to walk through them with you. We build custom homes in Bedford County, Franklin County, and the Smith Mountain Lake area.

View Full Specifications
Basement Waterproofing Systems for Custom Homes

Basement Waterproofing Systems

Waterproofing systems add an extra layer of protection against water and moisture entering through foundation walls. Here’s how they work and why we include Tuff-n-Dri as standard in our homes.

Waterproofing vs. Dampproofing

These terms are often used interchangeably, but they’re not the same thing. Understanding the difference matters when evaluating what a builder includes as standard.

Dampproofing is a thin coating – often just sprayed-on tar or asphalt – that slows moisture migration through concrete. It’s the minimum code requirement in many areas. It handles water vapor but provides little resistance to liquid water under pressure.

Waterproofing is a thicker, more flexible membrane designed to stop liquid water, even under hydrostatic pressure from saturated soil. Quality waterproofing systems bridge small cracks in the concrete and remain flexible as the foundation settles.

When Waterproofing Matters More

All basements benefit from waterproofing, but some situations make it especially important.

High water tables: If groundwater sits close to the surface – common near lakes, rivers, or in low-lying areas – hydrostatic pressure against foundation walls is higher. Basic dampproofing often can’t handle sustained pressure. In southwestern Virginia, we see this more often near Smith Mountain Lake and in valley locations.

Clay-heavy soils: Clay holds water rather than draining it away, keeping foundation walls wet longer after rain. Much of our region has clay content that makes drainage a challenge.

Finished basement plans: If you’re planning to finish the basement – whether immediately or years from now – the cost of waterproofing is small compared to protecting drywall, flooring, and furniture from moisture damage.

Sloped lots: Hillside sites often channel surface water toward the downhill side of the foundation. Proper grading helps, but a complete waterproofing system provides additional protection.

Even on well-drained sites with no plans to finish the basement, waterproofing protects stored items, prevents musty odors, and avoids the slow deterioration that moisture causes over decades.

Components of a Complete System

Effective basement waterproofing isn’t a single product – it’s a system of components working together. Each layer serves a specific purpose.

Spray-applied membrane: A flexible waterproof coating applied directly to the foundation walls. Quality membranes cure to at least 40 mils thick (about 1mm) and can bridge hairline cracks that develop as concrete cures. The best products withstand significant water pressure – some are rated for 8 feet of hydrostatic head, compared to 1 foot or less for basic coatings.

Foundation board: A rigid fiberglass board applied over the membrane. This serves three purposes: it protects the membrane from damage during backfill, it channels water down to the footer drains, and it provides insulation (typically R-10) that reduces energy loss and helps prevent interior condensation.

Footer drains: Perforated pipes installed around the base of the footers, surrounded by gravel. These collect groundwater and channel it away from the foundation before pressure can build against the walls.

Interior drainage (optional): A secondary drainage channel at the base of the interior walls that catches any water that enters and directs it to a sump pump. This provides a backup line of defense.

A System, Not Just a Coating
Each component addresses a different water source. The membrane stops water from penetrating the concrete. The board protects the membrane and channels surface water down. Footer drains remove groundwater before it builds pressure. Interior drainage catches anything that gets through. Removing any one component weakens the whole system.

The Tuff-n-Dri System

In our homes, we use the Tuff-n-Dri system from Tremco Barrier Solutions. This is the specific combination of products we’ve found delivers consistent, long-term performance.

The membrane: Tuff-n-Dri is a polymer-modified asphalt that’s spray-applied to create a seamless coating. It remains flexible at cold temperatures – important in Virginia where freeze-thaw cycles are common – and is formulated to bridge concrete shrinkage cracks rather than cracking along with them.

The board: Warm-n-Dri foundation board is a dense fiberglass panel that adheres to the membrane before it fully cures. It provides R-10 insulation, protects against backfill damage, and has drainage channels that direct water down to the footer drains.

The drainage: We install footer drains around the perimeter and Drain-Star interior drainage at the base of the walls. Water that reaches the foundation has multiple paths to exit before it can enter the basement.

This complete system comes with a 30-year manufacturer warranty on the waterproofing components – significantly longer than the one-year workmanship warranty that covers most construction.

Why We Use This System

We chose Tuff-n-Dri for straightforward reasons: it works, it has a long track record, and the manufacturer stands behind it.

Tremco has been making this product since 1983 – over 40 years of installations. That kind of history tells you more than marketing claims. Products that don’t perform don’t stay on the market for four decades.

The 30-year transferable warranty also matters. It’s not just peace of mind for the original homeowner – it transfers to future owners, which protects resale value. The warranty requires proper installation of the complete system by a certified contractor, which ensures the job is done right from the start.

Waterproofing Happens Once

Unlike most home systems that can be repaired or upgraded later, foundation waterproofing is largely a one-time decision. Once the foundation is backfilled, accessing the exterior walls means excavation – expensive and disruptive.

That’s why getting it right during construction matters. The difference between a complete waterproofing system and minimum dampproofing is a small percentage of your total build cost. The difference in long-term performance is significant.

Frequently Asked Questions

Three main sources: water seeping through the concrete walls, water entering through the floor-wall joint where the slab meets the foundation, and condensation from humid air contacting cold concrete surfaces.

A complete waterproofing system addresses all three – the membrane stops wall seepage, drainage handles groundwater at the floor-wall joint, and insulated foundation board reduces condensation.

Exterior waterproofing requires excavating around the foundation – possible but expensive and disruptive. Interior solutions like drainage channels and sump pumps can be added later and help manage water that enters, but they don’t stop it from coming through the walls.

This is why getting it right during initial construction is important. Retrofitting is always more expensive than doing it correctly the first time.

Tuff-n-Dri must be applied to clean, cured concrete in dry conditions – it can’t be sprayed in rain or on wet walls. It also requires certified installers, which limits who can do the work. And like any exterior waterproofing, it can’t be inspected or repaired after backfill without excavation.

These aren’t drawbacks so much as requirements for proper installation. The system performs well when installed correctly under the right conditions.

The waterproofing system itself requires no maintenance – it’s buried and sealed. Your job is to keep water away from the foundation in the first place: maintain gutters and downspouts, and ensure grading continues to slope away from the house over time.

Quality spray-applied membranes are designed to last the life of the structure. The Tuff-n-Dri system we use carries a 30-year manufacturer warranty, but the materials themselves don’t have an expiration date if installed correctly.

For more information about how we build custom homes in Virginia, view our detailed specifications.

View Our Specifications
As of December 2025, Tuff-n-Dri waterproofing is included as standard in our homes. Our specifications may change at any time. View our current spec sheet for the most up-to-date specifications on the homes we build.
Basement Foundations for Custom Homes

A professionally poured and well-constructed foundation will be a big factor in determining how your basement performs for years. When planning a custom home, many people think about kitchens and finishes – not footers and waterproofing. Both are equally important to how happy you’ll be after construction. When it comes to what’s beneath your home, here’s what to understand before you build.

Components of a Basement Foundation

A basement foundation is a system of components that work together. Understanding what each part does helps you evaluate what builders include in their standard specifications.

Footers: Wide concrete bases that sit beneath the walls and distribute the house’s weight to the soil below. Footer size depends on soil conditions and the load they’ll carry. They must extend below the frost line – in southwestern Virginia, typically at least 24 inches deep – or freeze-thaw cycles can cause heaving.

Walls: The vertical structure that sits on the footers and supports the house above. Poured concrete is standard for full basements. Steel rebar is embedded in the walls during the pour to add strength and help resist the lateral pressure from soil outside.

Floor slab: The concrete basement floor, typically 4 inches thick, poured over a gravel base. The gravel provides drainage beneath the slab and helps control moisture migration from the ground.

Waterproofing: Coatings or membranes applied to the exterior of the foundation walls to prevent water from seeping through the concrete. This is separate from the drainage system – waterproofing is a barrier, drainage moves water away.

Drainage: Perforated pipes installed around the footers to collect groundwater and direct it away from the foundation. If we find unusual soil conditions, for instance a spring or high water table, interior drainage systems at the base of the walls provide a second line of defense, channeling any water that enters to a sump pump.

Poured Concrete Foundations

Modern custom homes are built with poured concrete basement walls. The concrete creates a solid, continuous structure that’s stronger and more stable than the cement block foundations common in older homes.

Most builders today still use 8-foot basement walls, which provide just enough ceiling height for finished spaces. Many homeowners upgrade to 9-foot walls – once you account for HVAC ducts and dropped ceilings, the extra height helps maintain comfortable headroom in finished spaces. This is an upgrade that can’t be done after the fact.

In our homes, basements come standard with 9-foot walls and we pour these walls with the expectation that homeowners may want to finish the space. That means full height throughout, proper structural support, and attention to details that make finishing easier down the road.

Why Steel Rebar in Concrete Walls?
Concrete handles compression well but is weak in tension. Steel rebar (short for reinforcing bar) is embedded in the walls during the pour to add tensile strength. This reinforcement helps the walls handle both the weight of the house from above and the lateral pressure from soil pushing against the outside – forces that would otherwise cause cracking over time.

Managing Water Around Foundations

Keeping basements dry requires managing water before it becomes a problem. It starts with proper grading – soil sloping away from the house – to keep surface water from reaching the foundation. Still, some water will inevitably reach the walls, which is why waterproofing systems are standard in quality new construction. These typically include exterior waterproofing on the foundation walls, perimeter drainage around the footers, and interior drainage at the base of the walls.

We use the Tuff-n-Dri system in our homes – spray coating and Warm-n-Dri board on the exterior, footer drains, and Drain-Star interior drainage. This complete approach includes a 30-year manufacturer warranty on the waterproofing components. (Click here to learn more about Tuff-n-Dri.)

Different builders take different approaches to water management. Some use exterior waterproofing alone, others just add footer drains. More complete systems typically come with longer manufacturer warranties – and more importantly, they keep basements drier.

Why Concrete Alone Isn’t Enough
Concrete is porous – water can slowly seeps through it over time. Without waterproofing, moisture migrates through basement walls and floors, leading to dampness, musty smells, and conditions where mold can develop. Waterproofing systems create a barrier that concrete alone doesn’t provide.

Questions to Ask Builders

When interviewing builders, ask about their foundation approach. These questions help you understand their construction standards:

What foundation material do you use?
Poured concrete is standard for full basements. Block may be appropriate for specific applications like bi-levels.
What’s your waterproofing approach?
Look for complete systems with exterior waterproofing, footer drains, and interior drainage. Ask about manufacturer warranties.
What details are included in your standard specifications?
Ask specifically about gravel under slabs, expansion joints, steel in garage floors, and footers under outdoor structures.
Can I see your written specifications?
Quality builders provide detailed specs showing what they include on every home.

What to Expect After Construction

Now that you understand what goes into a foundation and how to evaluate your builder, what should you expect after construction?

A well-built foundation should perform without major issues. That said, all new homes go through a settling period as concrete cures, lumber dries, and the structure adjusts to its environment. Here’s what’s normal during that period – and what would actually indicate a problem:

Small cracks are normal
Hairline cracks under 1/8 inch in basement floors or walls as concrete cures, and small drywall cracks above doors and windows as lumber dries, are typical in the first year. Cracks wider than 1/8 inch, cracks that grow over time, or stair-step cracks in block walls warrant a call to your builder.
Your basement should stay dry
A properly waterproofed basement stays dry year-round. Any water seepage, persistent dampness, musty smells, or visible mold indicates something in the waterproofing system isn’t working – call your builder.
Doors may stick slightly
Minor sticking as the house settles during the first year is normal. Doors or windows that suddenly won’t close properly, or gaps appearing between frames and walls, warrant a call to your builder.
Some squeaking is expected
Floors may squeak as lumber dries, especially during the first heating season. Noticeable slopes, bouncing or springy areas, or floors pulling away from walls are not normal – call your builder.

Most settling happens in the first year. After that, a well-built foundation should stabilize and show no new movement. If new problems develop years later, have a foundation professional evaluate the situation.

Choose a Builder You Can Trust

Foundation work happens in the first few weeks of construction. Most of it disappears behind dirt and finishes – you won’t see it later, but you’ll live with the results. That’s why your builder’s approach and specifications matter more than anything you could inspect yourself.

Do your homework upfront. Ask the questions in this article. Look at written specifications. Understand what’s standard and what’s an upgrade. A builder who takes foundation work seriously will be happy to explain their approach.

Frequently Asked Questions

If you think you might want a bathroom, wet bar, or utility sink in your basement someday, rough it in before the slab is poured. The plumbing lines run beneath the concrete floor – adding them later means jackhammering through the slab, which is expensive and disruptive.

This is one of the few decisions during foundation work that’s difficult to change later. Even if you’re not finishing the basement right away, roughing in plumbing now gives you options.

Your main job is keeping water away from the foundation. Keep gutters clean and downspouts directed away from the house. Maintain grading so soil slopes away from the foundation. If you have a sump pump, test it periodically.

Avoid planting trees or large shrubs close to the foundation – roots can disrupt drainage systems and put pressure on walls over time.

It depends on how you plan to use the space. Once you account for HVAC ducts, dropped ceilings, and flooring, an 8-foot wall can leave you with under 7 feet of finished headroom in some areas. A 9-foot wall gives you room to work with and still end up with comfortable ceiling height.

This is an upgrade you can’t add later, so consider it carefully during the planning stage.

With proper construction – adequate waterproofing, drainage systems, and structural support – you can finish whenever you’re ready. Some homeowners finish immediately, others wait years.

Ask your builder about their warranty coverage for basements and whether finishing affects that coverage.

Builder warranties typically cover workmanship for one year. Manufacturer warranties cover specific products for longer periods – waterproofing systems often carry 10-30 year warranties.

Longer manufacturer warranties usually require complete system installation according to their specifications. Ask your builder what warranties come with their standard foundation package.

Builder workmanship warranties are typically one year, but manufacturer warranties on products like waterproofing systems can extend much longer. Check what warranties transferred to you at closing.

If you notice new cracks, water intrusion, or other issues after the builder warranty expires, consult a foundation professional for an evaluation. Many issues can be addressed – the key is not ignoring them.

For more information about how we build custom homes in Virginia, view our detailed specifications.

View Our Specifications
This article describes general foundation construction practices as of December 2025. Construction methods and materials continue to evolve. For current specifications on Ellis Homes projects, see our specifications page.
Granite Countertops: What You Need to Know Before Building Your Home | Ellis Custom Homes

Granite Countertops: What You Need to Know Before Building Your Home

In a custom kitchen, countertops do more than look good: they take the hits of daily life. That’s why Ellis Custom Homes includes granite countertops as standard throughout every home we build in Virginia, in kitchens and bathrooms. They’re beautiful on day one and still beautiful in year twenty.

See Our Complete Specifications

What Granite Is (and Why It’s Great for Active Kitchens)

Granite is an igneous rock formed deep in the earth’s crust over millions of years. When magma cools slowly underground, it creates the distinctive speckled pattern of interlocking crystals we recognize as granite. Those sparkly bits? They’re primarily quartz, feldspar, and mica, along with other minerals that give each slab its unique character.

Unlike manufactured surfaces, no two granite slabs are identical. The geological conditions where the granite formed — temperature, pressure, mineral composition — create patterns and colors that are literally one-of-a-kind. This means your kitchen island will have veining and crystal formations that exist nowhere else on earth.

For active families, granite handles the reality of daily life. Hot pans from the oven, kids doing homework at the island, holiday meal prep – granite takes it all without showing wear.

Where Granite Comes From (Global Sources, Local Fabrication)

Most granite used in American homes comes from quarries around the world. Brazil and India are major suppliers, known for producing stunning varieties like Ubatuba (deep green with gold flecks) and Kashmir White (creamy background with burgundy and gray veining). Domestic sources include quarries in Vermont, Georgia, and South Dakota.

The journey from quarry to your kitchen starts with massive blocks — sometimes weighing 20 tons or more — extracted using diamond wire saws and controlled blasting techniques. These blocks are shipped to fabrication facilities where they’re sliced into slabs, typically 3/4 inch or 1 1/4 inch thick.

Our Trusted Partner: Spectrum Stone Designs

We source all our granite through our trusted partner, Spectrum Stone Designs, one of Central Virginia’s leading fabricators of natural stone countertops.

What sets Spectrum Stone Designs apart is their comprehensive three-step process: expert measurement, perfect selection assistance, and flawless installation. When you build with Ellis Custom Homes, you can even hand-select your actual slab if you wish, and see exactly what will go into your home, not just choose from samples or photos.

From Slab to Countertop: The Fabrication Process

Understanding how granite goes from raw slab to finished countertop helps you ask better questions when choosing your material and fabricator.

1
Template Creation
Digital templating after cabinets are installed ensures perfect measurements and precision.
2
Slab Selection
Choose your specific slab, not just the color. Look for consistent patterns and minimal imperfections.
3
Cutting & Shaping
Diamond-blade saws cut to template. Sink and cooktop cutouts require skilled craftsmanship.
4
Edge Treatment
Edges polished to preference—eased, bullnose, or ogee—significantly impacting final appearance.
5
Installation
Professional installation with sealer application and care instructions for lasting performance.

What Defines Premium Granite (5 Quality Markers)

Not all granite is created equal. Here’s what separates premium granite from budget alternatives.

  • Thickness Matters

    While 3/4 inch granite costs less, 1¼ inch offers better durability and requires no plywood backing. The extra thickness also allows for more sophisticated edge treatments.

  • Consistent Grade

    Granite is typically graded from commercial grade (thinner, more variation) to premium grade (consistent thickness, minimal imperfections). Higher grades cost more but deliver better long-term performance.

  • Color and Pattern Consistency

    Quality granite shows consistent coloration throughout the slab without dramatic variations that could look patchy in your kitchen.

  • Minimal Surface Imperfections

    Small surface holes (pits) are natural in granite, but excessive pitting can trap food and bacteria. Quality slabs have minimal surface imperfections.

  • Professional Sealing

    Granite is naturally porous and requires sealing to prevent stains. Quality fabricators apply professional-grade sealers and provide maintenance instructions.

Installation Day in Your New Ellis Home (What to Expect)

Professional granite installation is typically a one-day process, but it requires precision and experience.

Cabinet Preparation: Your cabinets must be perfectly level and capable of supporting the weight. Granite weighs about 20 pounds per square foot, so proper cabinet construction is crucial.

Dry Fit: Before any adhesive is applied, all pieces are dry-fitted to ensure perfect alignment. This is the last chance to spot any issues.

Installation: The granite is carefully positioned and secured with construction adhesive and mechanical fasteners. Seams (if necessary) are joined using color-matched epoxy and carefully aligned for minimal visibility.

Final Details: Sink mounting, faucet installation, and cleanup complete the process. An initial sealer treatment is applied and care instructions are provided.

Care & Maintenance (Simple Routine + Water Test)

One of granite’s biggest advantages is how little maintenance it requires.

Daily Care: Warm water and mild dish soap handle most cleaning. Avoid harsh chemicals or abrasive cleaners that can dull the surface.

The Water Test: Drop water on the surface—if it beads up, your sealer is working. If it absorbs within 15 minutes, it’s time to reseal.

Resealing Schedule: Depending on the granite type and sealer quality, resealing every 1-3 years maintains stain resistance.

Heat and Stain Resistance: Granite handles hot pots and pans better than most surfaces, though trivets are recommended for very hot items. Quickly wiping up spills, especially acidic substances like wine or lemon juice, prevents any issues.

Granite vs Other Countertop Materials

Material Durability Heat Resistance Maintenance Cost Range
Granite Excellent Excellent Reseal every 1-3 years Mid-range
Quartzite Excellent Excellent Reseal every 1-2 years Luxury
Quartz Excellent Good Very low Premium
Marble Good Poor High maintenance Premium
Concrete Good Good with sealer Regular sealing needed Mid-range
Butcher Block Fair Poor Regular oiling required Budget
Laminate Fair Poor Low Budget

Why Ellis Includes Granite as Standard

After years of building custom homes in Virginia and seeing how different materials perform over time, we’ve made granite our standard for several key reasons:

Proven Durability: We see 20-year-old granite countertops that still look new. The investment pays off over decades of daily use.

Unique Character: Every installation is one-of-a-kind, giving each home natural beauty that can’t be replicated with manufactured materials.

Resale Value: Granite consistently ranks among the most desired features for Virginia homebuyers, typically adding more value than it costs.

Real-World Performance: Granite fits the way people actually live. It handles everything from holiday meal prep to homework sessions without requiring special care or constant worry about damage.

Heat and Humidity Resilience: In Virginia’s climate, with hot summers and varying humidity, granite’s natural properties make it an ideal choice that won’t warp, fade, or delaminate.

Frequently Asked Questions

1¼ inch is our standard and the better choice for several reasons. The extra thickness provides superior structural integrity, eliminating the need for plywood underlayment that 3/4 inch granite requires. This means fewer materials, cleaner installation, and better long-term performance.

1¼ inch granite also allows for more sophisticated edge treatments like bullnose, ogee, or custom profiles that simply aren’t possible with thinner material. The additional mass provides better vibration dampening, so your countertops feel more solid and substantial.

While 3/4 inch granite costs less initially, the hidden costs of additional support materials and more complex installation often narrow the price gap significantly. For the small difference in total project cost, 1¼ inch granite delivers noticeably better performance and aesthetics.

No—this is one of the most common misconceptions about granite. Most properly sealed granite only needs resealing every 1 – 3 years, and some dense granites can go even longer.

The key is understanding that different granite types have different porosity levels. Dense granites like Absolute Black or Steel Gray may only need resealing every 3 – 5 years, while more porous varieties might need attention every 12 – 18 months.

Use the simple water test: drop a few drops of water on your granite. If it beads up and stays on the surface, your sealer is working fine. If the water is absorbed within 15 minutes, it’s time to reseal. This test takes the guesswork out of maintenance scheduling.

Professional-grade sealers applied during installation typically last much longer than consumer products, which is why we ensure every installation includes proper sealing with commercial-grade materials.

This depends on your island size and granite selection, but skilled fabricators can make seams nearly invisible when they’re necessary.

Most granite slabs are approximately 9 – 10 feet long and 5-6 feet wide, so islands longer than about 8 feet will likely require a seam. However, experienced fabricators like our partners at Spectrum Stone Designs plan seam placement strategically, often locating them where they’ll be least noticeable, such as in front of a sink or cooktop.

The key to invisible seams is color matching and proper alignment. Fabricators select parts of the slab with similar patterns and use color-matched epoxy to fill the joint. When done properly, you’ll have to look carefully to spot the seam.

Some granite patterns actually hide seams better than others. Busy patterns with lots of movement mask seam lines, while solid colors or uniform patterns make seams more noticeable. This is something to discuss during slab selection.

Quality granite, properly installed, rarely develops cracks during normal use. Granite is incredibly durable – it’s the same material used in building construction and monuments that last centuries.

What homeowners sometimes mistake for cracks are usually natural fissures that were present in the original stone. These fissures are part of granite’s natural character and don’t affect structural integrity. They’re different from cracks in that they don’t go completely through the stone and aren’t sharp to the touch.

True cracks typically result from improper installation—inadequate support, uneven cabinets, or impact damage during installation. This is why choosing experienced fabricators and installers is crucial. Our partnership with Spectrum Stone Designs ensures proper installation techniques that prevent these issues.

The most vulnerable areas are around sink cutouts and overhangs, which is why proper templating and support are essential. With correct installation, granite countertops regularly last 20+ years without any cracking issues.

Absolutely. When properly sealed and cleaned, granite is actually more hygienic than many other common kitchen surfaces, including some cutting boards and butcher blocks.

Sealed granite is non-porous, which means bacteria, mold, and other contaminants can’t penetrate the surface. Regular cleaning with soap and water easily removes surface bacteria. Unlike wood or some synthetic materials, granite doesn’t develop knife cuts that can harbor bacteria.

The key is maintaining the seal and cleaning properly. Avoid harsh chemicals or abrasive cleaners that can damage the sealer. Simple dish soap and water handle daily cleaning, with occasional use of stone-specific cleaners for deeper cleaning.

Some people worry about granite’s natural radioactivity, but independent testing consistently shows that typical countertop levels are comparable to background radiation in most homes – far below any health concern thresholds established by the EPA.

Eased edges (slightly rounded) dominate current preferences for their clean, contemporary look and practical benefits. This simple profile works with both traditional and modern kitchen designs while being easy to clean and maintain.

The trend toward eased edges reflects the broader movement toward cleaner, more minimalist kitchen designs. Unlike ornate profiles, eased edges don’t collect dust or grease in detailed grooves, making them more hygienic and easier to maintain.

Bullnose edges (fully rounded) remain popular for families with small children, as they eliminate sharp corners. They’re particularly common on islands where people gather and work.

Ogee and other decorative profiles are less common now but still have their place in traditional or formal kitchen designs. These profiles can add elegance but require more careful cleaning and are more expensive to fabricate.

The choice often comes down to your kitchen’s style and how you use the space. We can show you samples of different edge profiles during the selection process to help you choose what works best for your family and design preferences.

Thinking About Building a Custom Home?

When you’re just starting to explore the idea of building a custom home, it’s natural to wonder about the countless decisions ahead. At Ellis Custom Homes, we focus on quality materials and craftsmanship that deliver lasting performance and value.

Reach Out Today

When it comes to your home’s exterior, the choices you make today will impact curb appeal, maintenance, and value for decades to come. Understanding the real differences between siding options helps you make informed decisions that align with your priorities and lifestyle.

Vinyl Siding: Why Thickness Matters

Not all vinyl siding is created equal. While many builders default to thin, builder-grade vinyl siding (typically .035″-.040″ thick), quality builders specify premium options with thicker gauges. According to the American Society for Testing and Materials (ASTM D3679), vinyl siding must meet minimum thickness requirements of .035″.

At Ellis Custom Homes, we use Mastic CarvedWood•44 at .044″ gauge as our standard—well above minimum requirements. This premium product from Mastic (part of the Ply Gem portfolio) delivers exceptional performance through its carefully engineered specifications.

Why We Choose Mastic CarvedWood•44

Superior Engineering Features:

  • Premium .044″ Thickness: 25% thicker than builder-grade options for superior rigidity and impact resistance
  • Enhanced Shadow Lines: Full 5/8″ lap projection creates deep, authentic wood-grain appearance
  • Wind Resistance: Rated for winds up to 153 mph (Standard DP of 56 PSF)
  • Color Technology: Rich color throughout the panel virtually eliminates appearance of nicks and scratches
  • Locking System: Wider mechanism provides more contact area for secure, precise installation

The SolarDefense Advantage

Nine CarvedWood•44 colors feature Mastic’s exclusive SolarDefense Reflective Technology™, which protects darker colors from UV damage. This technology comes with an industry-leading “No Fade, No Distortion Promise”—allowing homeowners to choose deep, rich colors without worrying about warping or fading.

See How Thickness Affects Quality

.035″ .040″ .044″ .046″
.035” Thickness
Below Standard
Wind Resistance
Poor
Impact Resistance
Minimal
Surface Quality
Rippling Visible
Color Options
Limited
A Helpful Touch Test: While not an industry standard, many homeowners find this tip useful: Press gently on siding between the studs. Quality siding feels solid with minimal flex, while thinner options have a hollow feel and visible deflection. This can help you evaluate installed siding quality.

The Mastic V.I.P. Limited Lifetime Warranty

Our choice of Mastic CarvedWood•44 is backed by one of the industry’s strongest warranties—the V.I.P. Limited Lifetime Warranty. This comprehensive coverage is fully transferable to subsequent homeowners, adding value to your investment. Mastic’s 80+ year legacy in home exteriors stands behind every panel we install.

The difference between .035″ and .044″ is just .009″ (less than three business cards), but this 25% increase in thickness delivers significantly better performance, allowing for deeper shadow lines, better wind resistance, and the ability to produce deep, dark colors without warping.

Installation: The Invisible Deal-Breaker

Even the best siding fails with poor installation. The difference between professional installation and a rushed job becomes obvious after just a few years.

Critical Installation Details

  • Proper nailing patterns that allow for expansion and contraction
  • Correct overlap and gap specifications
  • Professional handling of corners and trim interfaces
  • Meticulous flashing around windows and doors
  • Crews that follow manufacturer specifications
The Drive-By Evaluation Tip: While not a formal inspection method, experienced contractors suggest this helpful approach: Drive through neighborhoods built 5-10 years ago by builders you’re considering. Look for straight siding lines, consistent color, intact caulk lines, and overall crisp appearance despite weather exposure. Quality installation shows its worth over time.

LP SmartSide vs. James Hardie

In neighborhoods where vinyl isn’t permitted, LP SmartSide and James Hardie fiber-cement become the primary options. According to manufacturer specifications, here’s how they compare:

Feature LP SmartSide James Hardie
Weight 1/3 lighter, easier install Heavy, requires more crew
Cutting Standard blades, no dust Special tools, silica dust
Warranty 50-year (5-year full, then prorated) 30-year non-prorated
Flexibility Resists cracking Rigid, can crack
Priming All 6 sides factory-primed Field cuts need priming
Pricing** 50-100% more than vinyl 60-120% more than vinyl

**Pricing varies significantly by region, project complexity, and installer. These are general ranges compared to premium vinyl siding.

Hidden Cost Consideration: Fiber-cement trim typically costs significantly more than vinyl or PVC trim options. This difference can impact your overall project budget, so discuss trim specifications with your builder.

Moisture Management: The Hidden Critical Factor

Behind every siding job is a moisture management system that determines whether your walls stay dry for decades. More siding failures result from water infiltration than from the siding material itself.

What Quality Builders Include:

  • Proper water-resistive barriers (Ellis Custom Homes uses ZIP System® sheathing)
  • Complete flashing at all penetrations
  • Drainage gaps behind siding
  • Careful sealing where materials meet
  • Foundation protection (including waterproofing and drainage systems)
Red Flag: When interviewing builders, ask about moisture management. Professionals will enthusiastically explain their methods. Hesitation or vague answers are warning signs.

The Evolution Away from Brick

While brick remains a quality material, market data shows changing preferences in new construction. According to the Census Bureau’s Characteristics of New Housing, vinyl siding leads at approximately 26% of new homes, with fiber cement at 21%, and brick/stone declining to around 20%. This shift reflects evolving priorities:

  • Design Flexibility: Painted siding allows color updates every 10-15 years
  • Cost Considerations: Similar price to premium siding without flexibility
  • Architectural Trends: Modern styles favor clean lines and mixed materials
  • Maintenance Reality: Repointing, efflorescence cleaning, crack repair needed
  • Labor Market: Skilled masonry contractors becoming less available in many areas

Where Brick Still Makes Sense

  • Accent wainscoting on front elevations
  • Columns and architectural features
  • Foundation-level applications
  • Mixed with siding for visual interest

Maintenance Expectations

No siding is truly maintenance-free forever. Premium products simply extend the time between maintenance and look better longer. These are general guidelines—actual maintenance schedules vary based on climate conditions, installation quality, and exposure:

Premium Vinyl (.044″+) – Mastic CarvedWood•44

Typically requires washing every 2-3 years. May need individual panel replacement after severe storms. The V.I.P. Limited Lifetime Warranty covers manufacturing defects. Expected lifespan: 30-50+ years depending on installation quality and conditions.

LP SmartSide or Hardie

Generally requires repainting every 10-15 years in our climate. Re-caulking needed as materials age. Field cuts require special attention. Expected lifespan: 30-50+ years with proper maintenance.

Brick

Repointing mortar joints typically needed every 20-30 years. Efflorescence cleaning as needed. Crack repairs vary by settling. Can last 100+ years with proper maintenance.

Warranty Reality: Manufacturer warranties only cover product defects, not installation issues. Many are prorated, require proof of proper maintenance, don’t cover labor after initial years, and exclude damage from extreme weather events. Always read warranty details carefully.

Energy Efficiency Considerations

While siding primarily protects your home’s structure, it also impacts energy efficiency. Here’s how different materials compare:

Insulated Vinyl Siding

Can increase R-value by 2.0-5.0 when foam backing is added. Studies show potential energy savings of 10-20% compared to non-insulated options.

Fiber Cement (Hardie/LP SmartSide)

Minimal inherent insulation value (R-value approximately 0.50). Requires proper installation with house wrap and air gaps for best thermal performance.

Brick

Provides thermal mass but limited insulation (R-value around 0.80). Benefits from its ability to absorb and slowly release heat.

Note: Your home’s overall energy efficiency depends more on wall cavity insulation, air sealing, and window quality than siding choice alone. However, proper siding installation prevents air infiltration, which significantly impacts energy costs.

Environmental Impact & Sustainability

Increasingly, homeowners consider environmental factors when choosing siding:

Vinyl Siding

Made from PVC, which has improved manufacturing processes in recent years. Can be recycled through specialized programs—ask your installer about recycling old vinyl siding. Lifespan of 30-50 years means less frequent replacement.

LP SmartSide

Made from engineered wood products using fast-growing trees and wood strands. Uses zinc borate treatment instead of more toxic preservatives. Renewable resource, though requires repainting over its lifetime.

James Hardie

Contains sand, cement, and cellulose fibers. Manufacturing is energy-intensive but the 50+ year lifespan offsets initial impact. Non-combustible nature can reduce fire spread in communities.

Brick

Extremely durable (100+ year lifespan) but energy-intensive to manufacture. Can often be reclaimed and reused. Natural clay material returns to earth without toxicity.

Virginia Climate Considerations

Our hot, humid climate brings unique challenges that make proper material selection and installation critical. This is precisely why Ellis Custom Homes standardizes on Mastic CarvedWood•44:

  • UV Protection: SolarDefense technology prevents fading on south/west walls
  • Wind Resistance: 153 mph rating exceeds Virginia’s storm requirements
  • Moisture Resistance: Engineered formulation resists warping in high humidity
  • Temperature Stability: .044″ thickness handles expansion/contraction without buckling
  • Impact Resistance: Superior thickness protects against hail and debris

Mastic’s exclusive formulation and manufacturing process creates panels that are specifically engineered to handle temperature extremes and humidity—critical factors in Virginia’s climate where summer temperatures can exceed 95°F with high humidity, while winter can bring freezing conditions.

Making Your Decision

If You Want Best Value

Premium vinyl (.044″ minimum) offers the best balance of appearance, durability, and maintenance. Ellis Custom Homes’ standard—Mastic CarvedWood•44—represents this premium category, providing peace of mind through superior engineering and comprehensive warranty protection.

If Vinyl Isn’t Allowed

LP SmartSide edges out Hardie for most homeowners. Better warranty terms, easier installation, more flexibility. Just plan for repainting every 10-15 years.

If Comparing Builders

Focus on specific product names and thicknesses, not vague specifications. Quality builders like Ellis Custom Homes will proudly share exact products (like Mastic CarvedWood•44) and explain why they chose them. Ask about:

  • Exact siding thickness and brand specifications
  • Wind resistance ratings for your area
  • Warranty details and transferability
  • Installation crew certification and experience
  • Complete moisture management systems
Red Flags When Builder Shopping:
  • Vague specs using “or equivalent” without defining standards
  • Reluctance to put specific product names and thicknesses in writing
  • Only showing brand-new homes or renderings
  • Unable to explain their moisture management approach
  • No clear warranty on workmanship

The Bottom Line

Your home’s exterior is your first defense against weather, your biggest maintenance factor, and a major component of value. Focus on thickness for vinyl (minimum .044″), understand real costs including trim, and ensure your builder knows how to keep water out.

View Our Complete Specifications

Additional Resources

When you’re choosing a builder for your dream home, the decisions made during the structural phase will impact your daily life for decades to come. At Ellis Custom Homes, we’ve made engineered floor truss systems a standard feature in every home we build – not as an upgrade or premium option, but as the foundation of our commitment to quality construction.

What Are Engineered Floor Truss Systems?

Engineered floor trusses are precisely manufactured structural components that replace traditional solid lumber floor joists. These trusses consist of top and bottom chords connected by a web of diagonal and vertical members, creating an incredibly strong yet lightweight framework. Each truss is computer-designed and factory-built to exact specifications, ensuring consistent quality and performance that simply can’t be achieved with conventional stick-built framing.

Unlike dimensional lumber that can vary in strength and moisture content, every engineered truss meets strict manufacturing standards. The result is a floor system that’s stronger, more consistent, and more reliable than traditional construction methods.

The Ellis Homes Advantage: Why We Choose Engineered Trusses

Unmatched Strength and Span Capabilities Engineered floor trusses can span greater distances without support posts or beams, giving you more open floor plans and design flexibility. This means fewer load-bearing walls, larger rooms, and the freedom to modify your layout in the future without structural concerns.

Superior Dimensional Stability Traditional lumber shrinks, warps, and settles over time, leading to squeaky floors, nail pops, and uneven surfaces. Engineered trusses are manufactured with kiln-dried lumber and engineered connections that minimize movement, keeping your floors level and quiet for years to come.

Built-in Utility Passages The open web design of floor trusses creates natural pathways for plumbing, electrical, and HVAC systems. This eliminates the need to drill holes through structural members, maintaining the integrity of your floor system while making future maintenance and upgrades easier and more cost-effective.

Faster, More Precise Installation Because trusses are pre-manufactured to exact specifications, our crews can install your floor system more quickly and accurately than traditional methods. This precision translates to a better-built home and helps us maintain our construction timeline commitments.

Real-World Benefits for Homeowners

Quieter Living Spaces The engineered design and precise manufacturing of floor trusses significantly reduces floor squeaks and vibrations. You’ll notice the difference when walking across your floors, especially in two-story homes where sound transmission between levels is minimized.

Long-Term Value Protection A home built with engineered floor trusses maintains its structural integrity better over time. This means fewer callbacks for floor issues, reduced maintenance costs, and better resale value when it’s time to move.

Design Flexibility Whether you want a grand foyer with soaring ceilings, an open-concept kitchen and living area, or a bonus room above the garage, engineered trusses give our architects and designers the structural freedom to create the spaces you envision.

Energy Efficiency The consistent dimensions and tight construction possible with engineered trusses contribute to better overall home performance. Properly installed floor systems reduce air leakage and thermal bridging, helping your home stay more comfortable while reducing energy costs.

The Ellis Commitment to Quality

At Ellis Custom Homes, we don’t cut corners on the components you can’t see. While some builders treat engineered floor systems as an expensive upgrade, we’ve made them standard because we believe every family deserves the benefits of superior construction technology.

Our engineered floor trusses are sourced from certified manufacturers and installed by experienced crews who understand the importance of proper handling and installation. We also coordinate closely with our other trades to ensure that utilities are routed through the truss system correctly, maintaining both structural integrity and system performance.

Making the Right Choice for Your Family

When evaluating builders, ask about their floor systems. Many builders still rely on traditional methods because they’re cheaper upfront, but this short-term savings often leads to long-term problems. At Ellis Custom Homes, we invest in engineered floor trusses because we build homes that our clients will love for decades, not just during the first few years.

The difference between a house and a home often lies in the details you can’t see. Our engineered floor truss systems represent our commitment to building homes that perform better, last longer, and provide the solid foundation your family deserves.

Ready to learn more about the Ellis Custom Homes difference? Contact our team to schedule a consultation and see how our commitment to superior construction can benefit your family’s new home project.


At Ellis Custom Homes, we believe that quality construction starts with the right foundation. Our engineered floor truss systems are just one example of how we go beyond industry standards to deliver homes that exceed expectations.

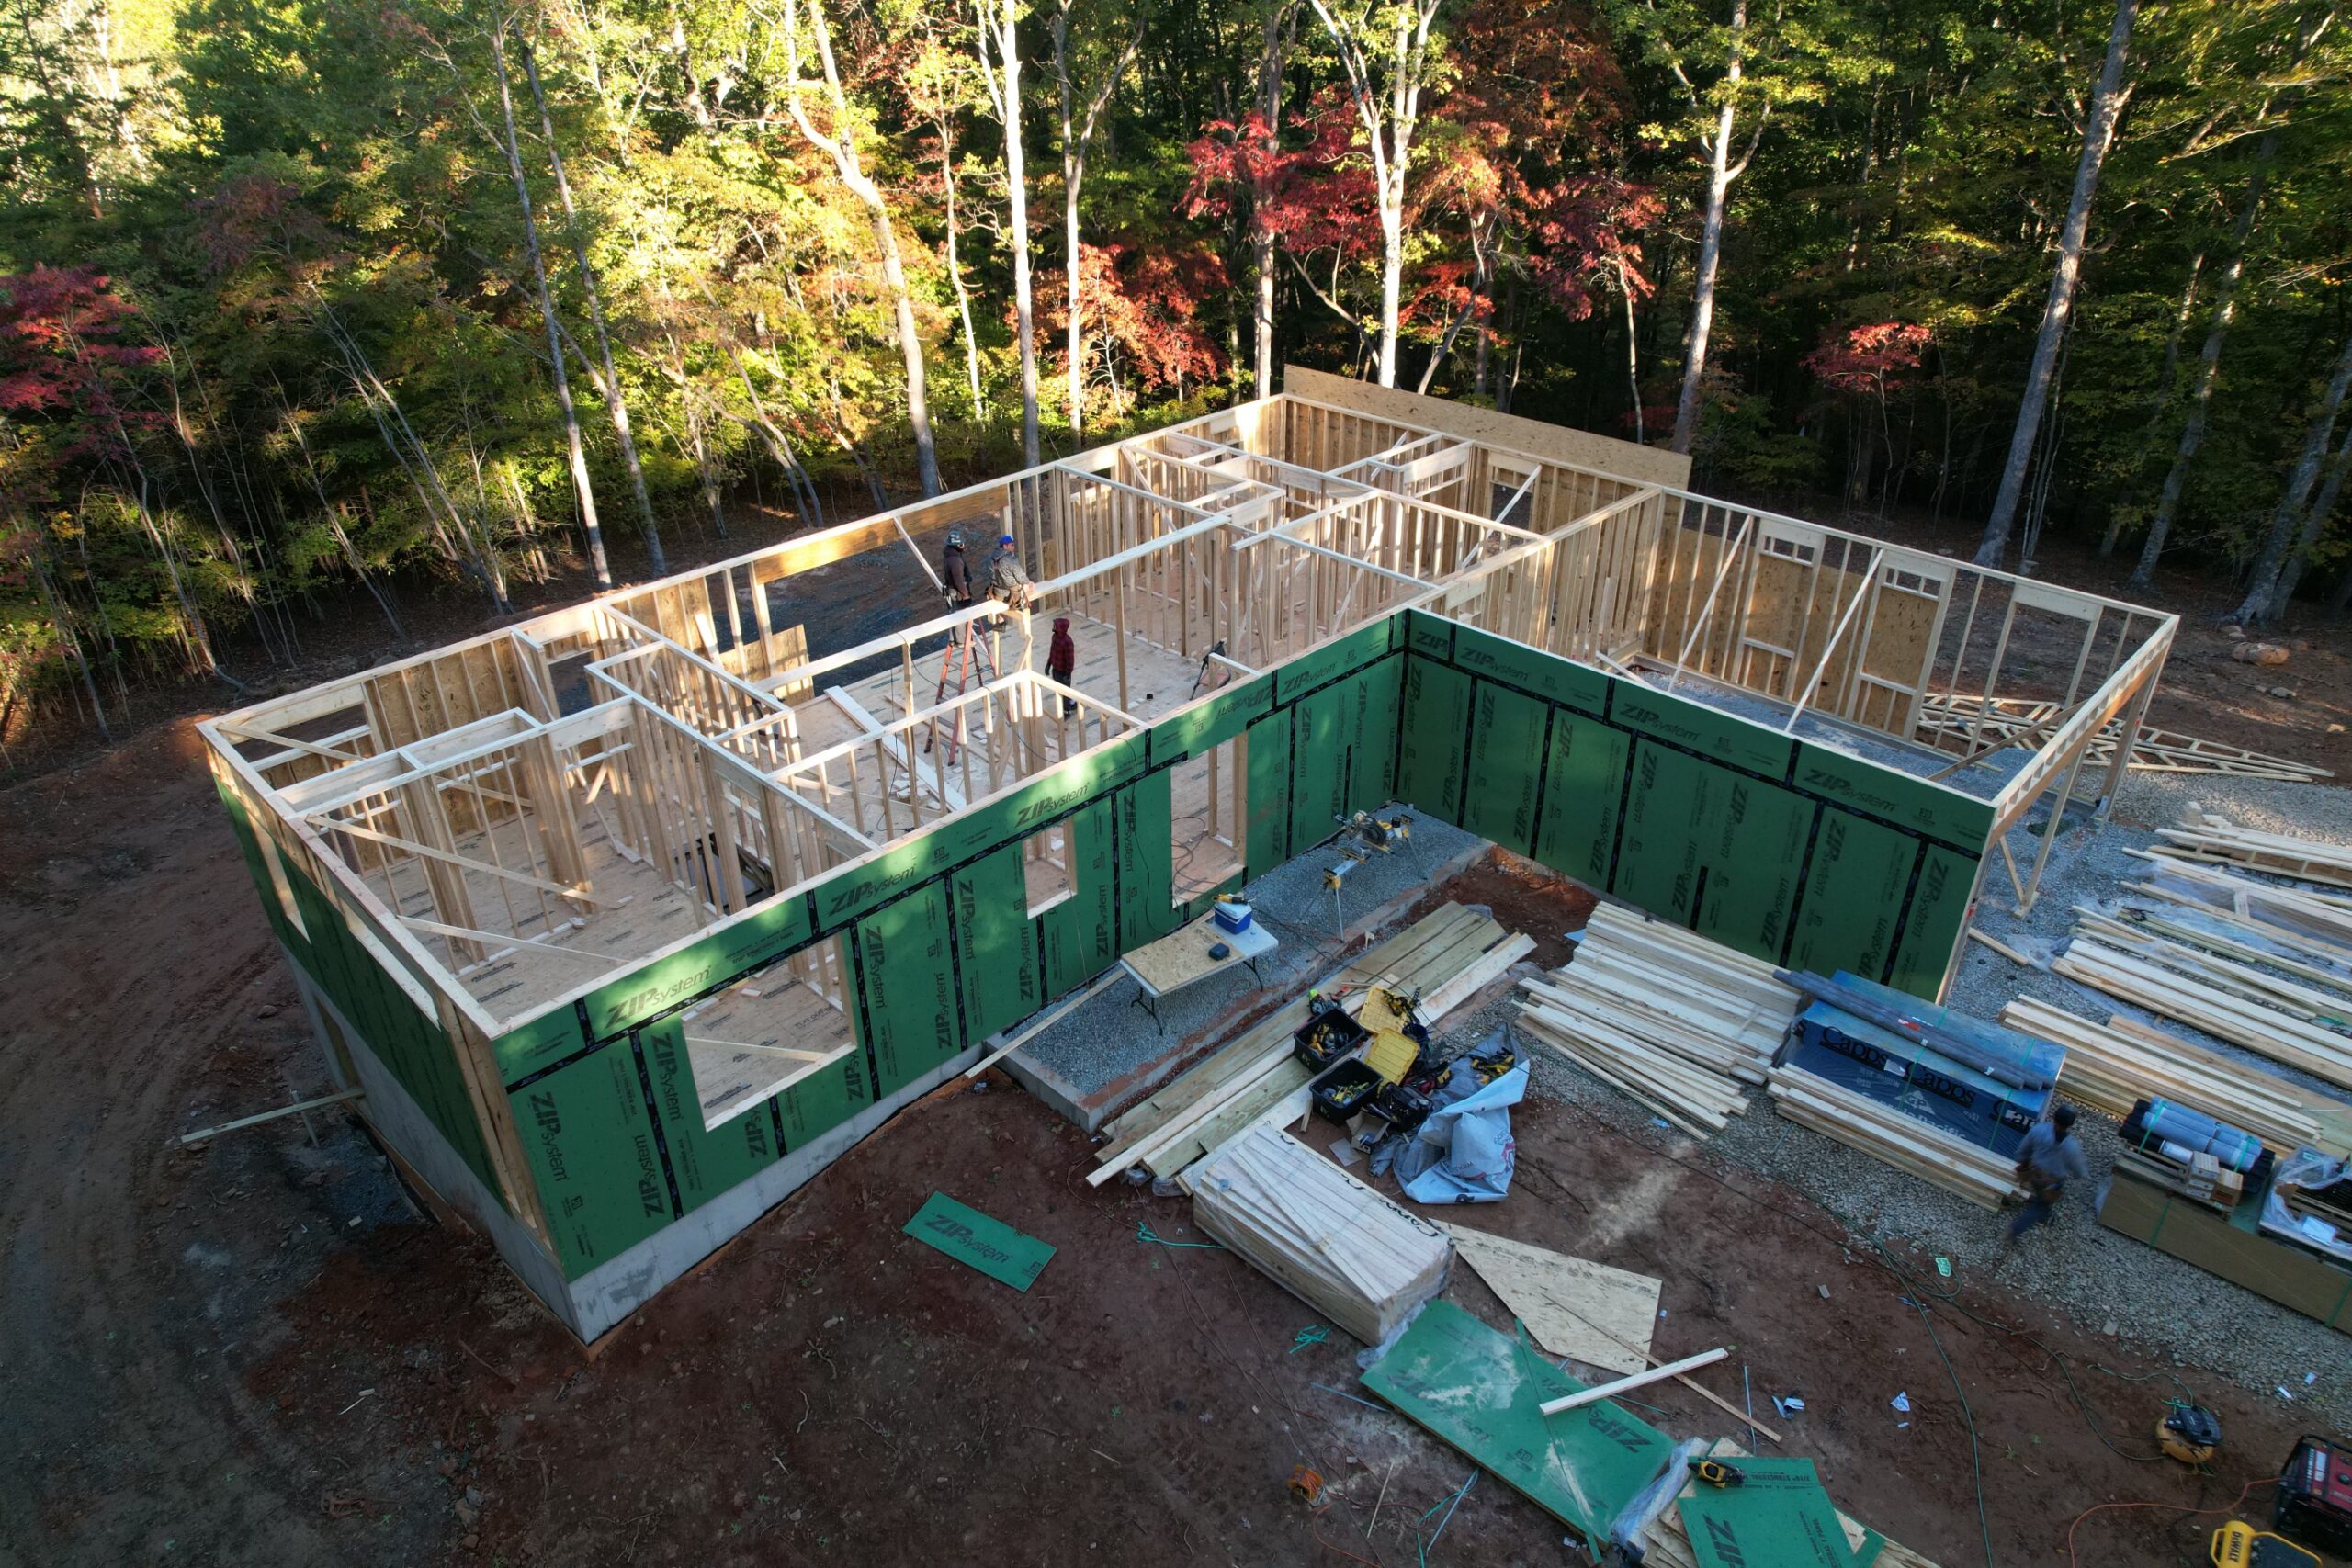
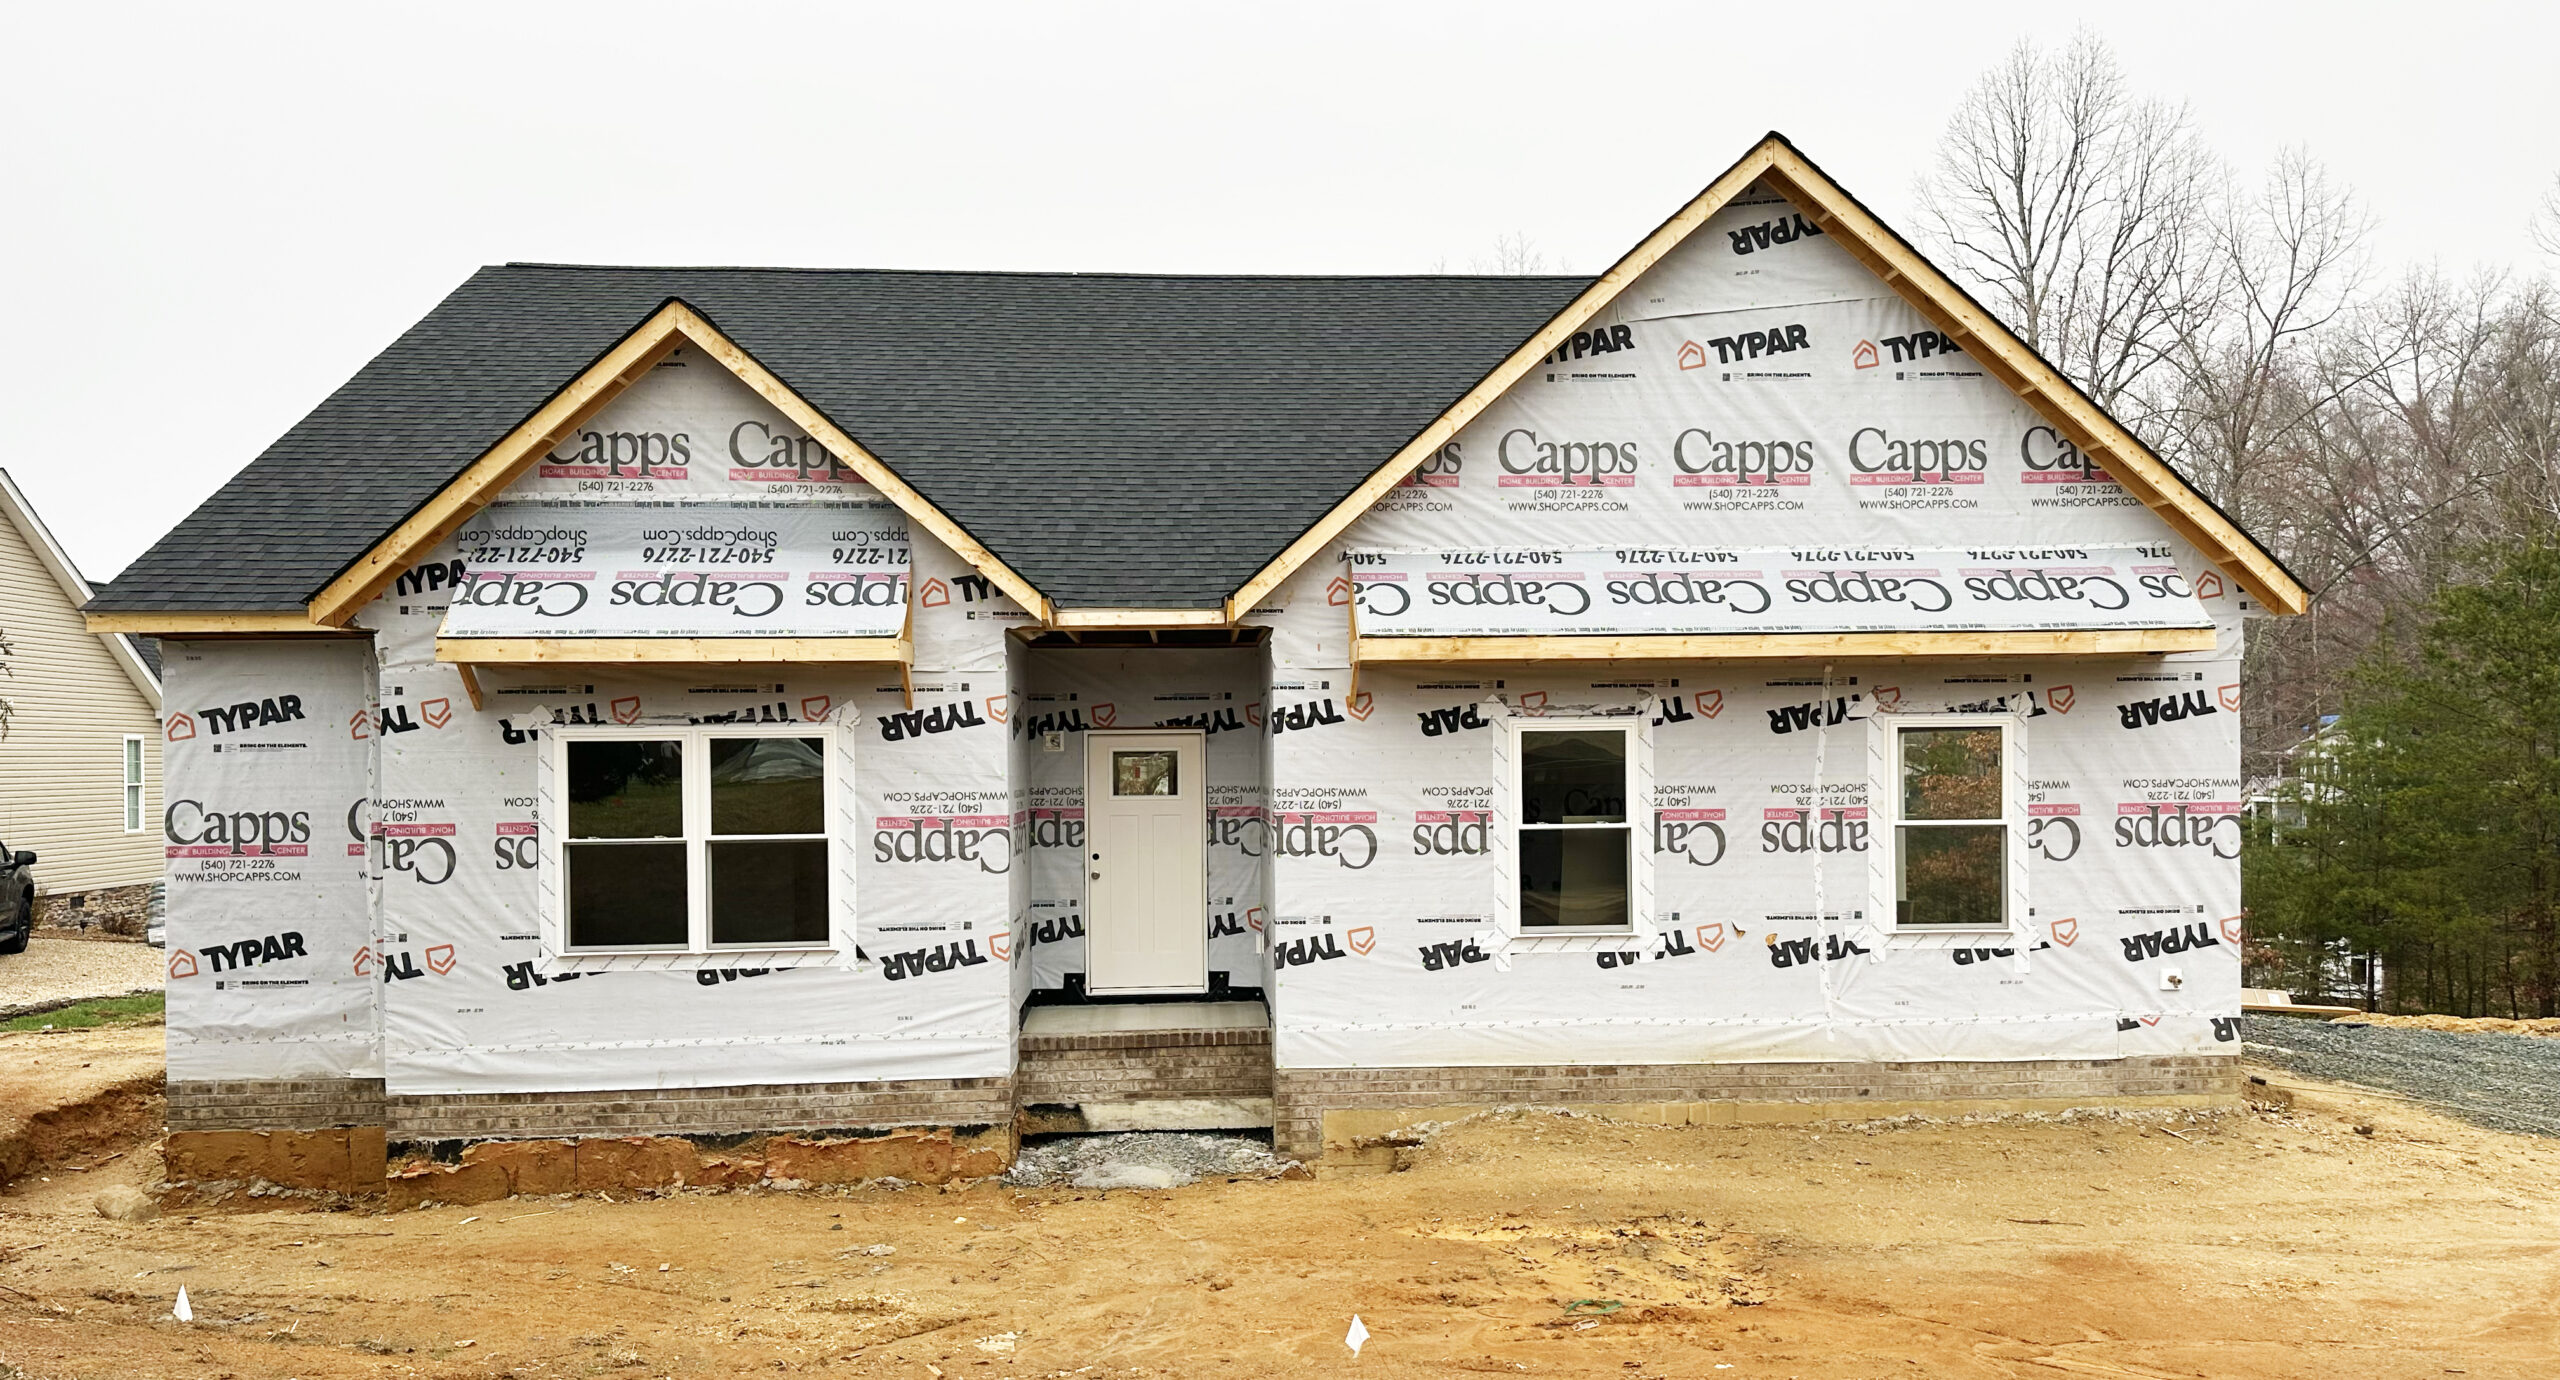
Framing is the structural core of a home. It involves assembling a carefully measured and cut network of lumber that defines the shape and support of every room. Once the foundation is cured, framing is the first major step where your home moves from a set of plans into physical form. From floor joists and subfloors to wall studs, headers, and roof trusses, framing creates the structure that every other system relies on.

In the stick-built homes, like those we construct throughout southwestern Virginia, framing is done on site using a combination of traditional dimensional lumber and engineered wood products. Every board has a structural purpose and must be installed with care and precision.

The Framing Process at a Glance

We begin by anchoring pressure treated sill plates to the top of the foundation walls. This creates the base of the structure and helps protect against ground moisture. From there, floor systems are built using engineered or dimensional joists, carefully spaced for strength and stability, then topped with a moisture resistant subfloor.

Wall framing comes next. Using kiln dried whitewood studs, we frame both the interior and exterior walls. Studs are spaced 16 inches on center to ensure consistent strength and predictable finish work. Structural headers are installed above all door and window openings to carry the load of the walls above.

After the walls are in place, roof trusses are installed and tied into the structure to form a stable and consistent roof system. Exterior walls and roof surfaces are then sheathed with OSB panels to increase rigidity and create a uniform base. Once that’s complete, a weather resistant house wrap is applied to protect the structure from moisture, air, and seasonal changes.

Setting Realistic Expectations: What Defines Quality Framing

Customers walking through a newly framed home often notice minor imperfections such as knots, slight bends, or pencil marks on the lumber. Before understanding framing thoroughly, you might naturally focus on these cosmetic details. It is important to recognize that minor imperfections like these are completely normal and have no bearing on structural quality or durability. Lumber is not furniture grade material and is chosen specifically for strength rather than visual perfection.

To help clarify, here’s what quality framing is not:

Instead, quality framing is defined by structural integrity and precision construction. What genuinely matters includes:

By clearly distinguishing between minor cosmetic imperfections and true indicators of structural quality, you can confidently trust that your home’s framing provides lasting durability and value.

Built for the Southwest Virginia Climate

Framing in this region must handle heavy seasonal changes including snow, summer humidity, and strong winds. Builders like us, frame with these factors in mind. Moisture resistant subfloors and properly wrapped sheathing help prevent mold and warping. Roof trusses and wall systems are braced and anchored to meet local wind load requirements. We also use framing practices that allow for proper insulation and ventilation, giving each home a stronger foundation for comfort and efficiency.

Why Framing Quality Matters in the Long Run

Framing determines how your home looks, feels, and functions for decades. Squeaky floors, cracked drywall, and doors that stick are often results of poor framing practices. When framing is done well, these issues are avoided. Your home feels solid. Your finishes remain aligned. You enjoy a quieter, sturdier, more durable structure from day one. Understanding that small cosmetic imperfections don’t reflect framing quality helps homeowners appreciate the true measures of long-term home value and performance.

Built Right from the Start

At Ellis Custom Homes, framing is never just another step. It’s the foundation of your home’s structural integrity, and we treat it like that. We use quality materials, trusted techniques, and a disciplined building process to ensure the frame behind your walls holds up to everything life brings. By understanding the true factors of quality framing, you can confidently trust your investment, long after we’ve finished constructing it.
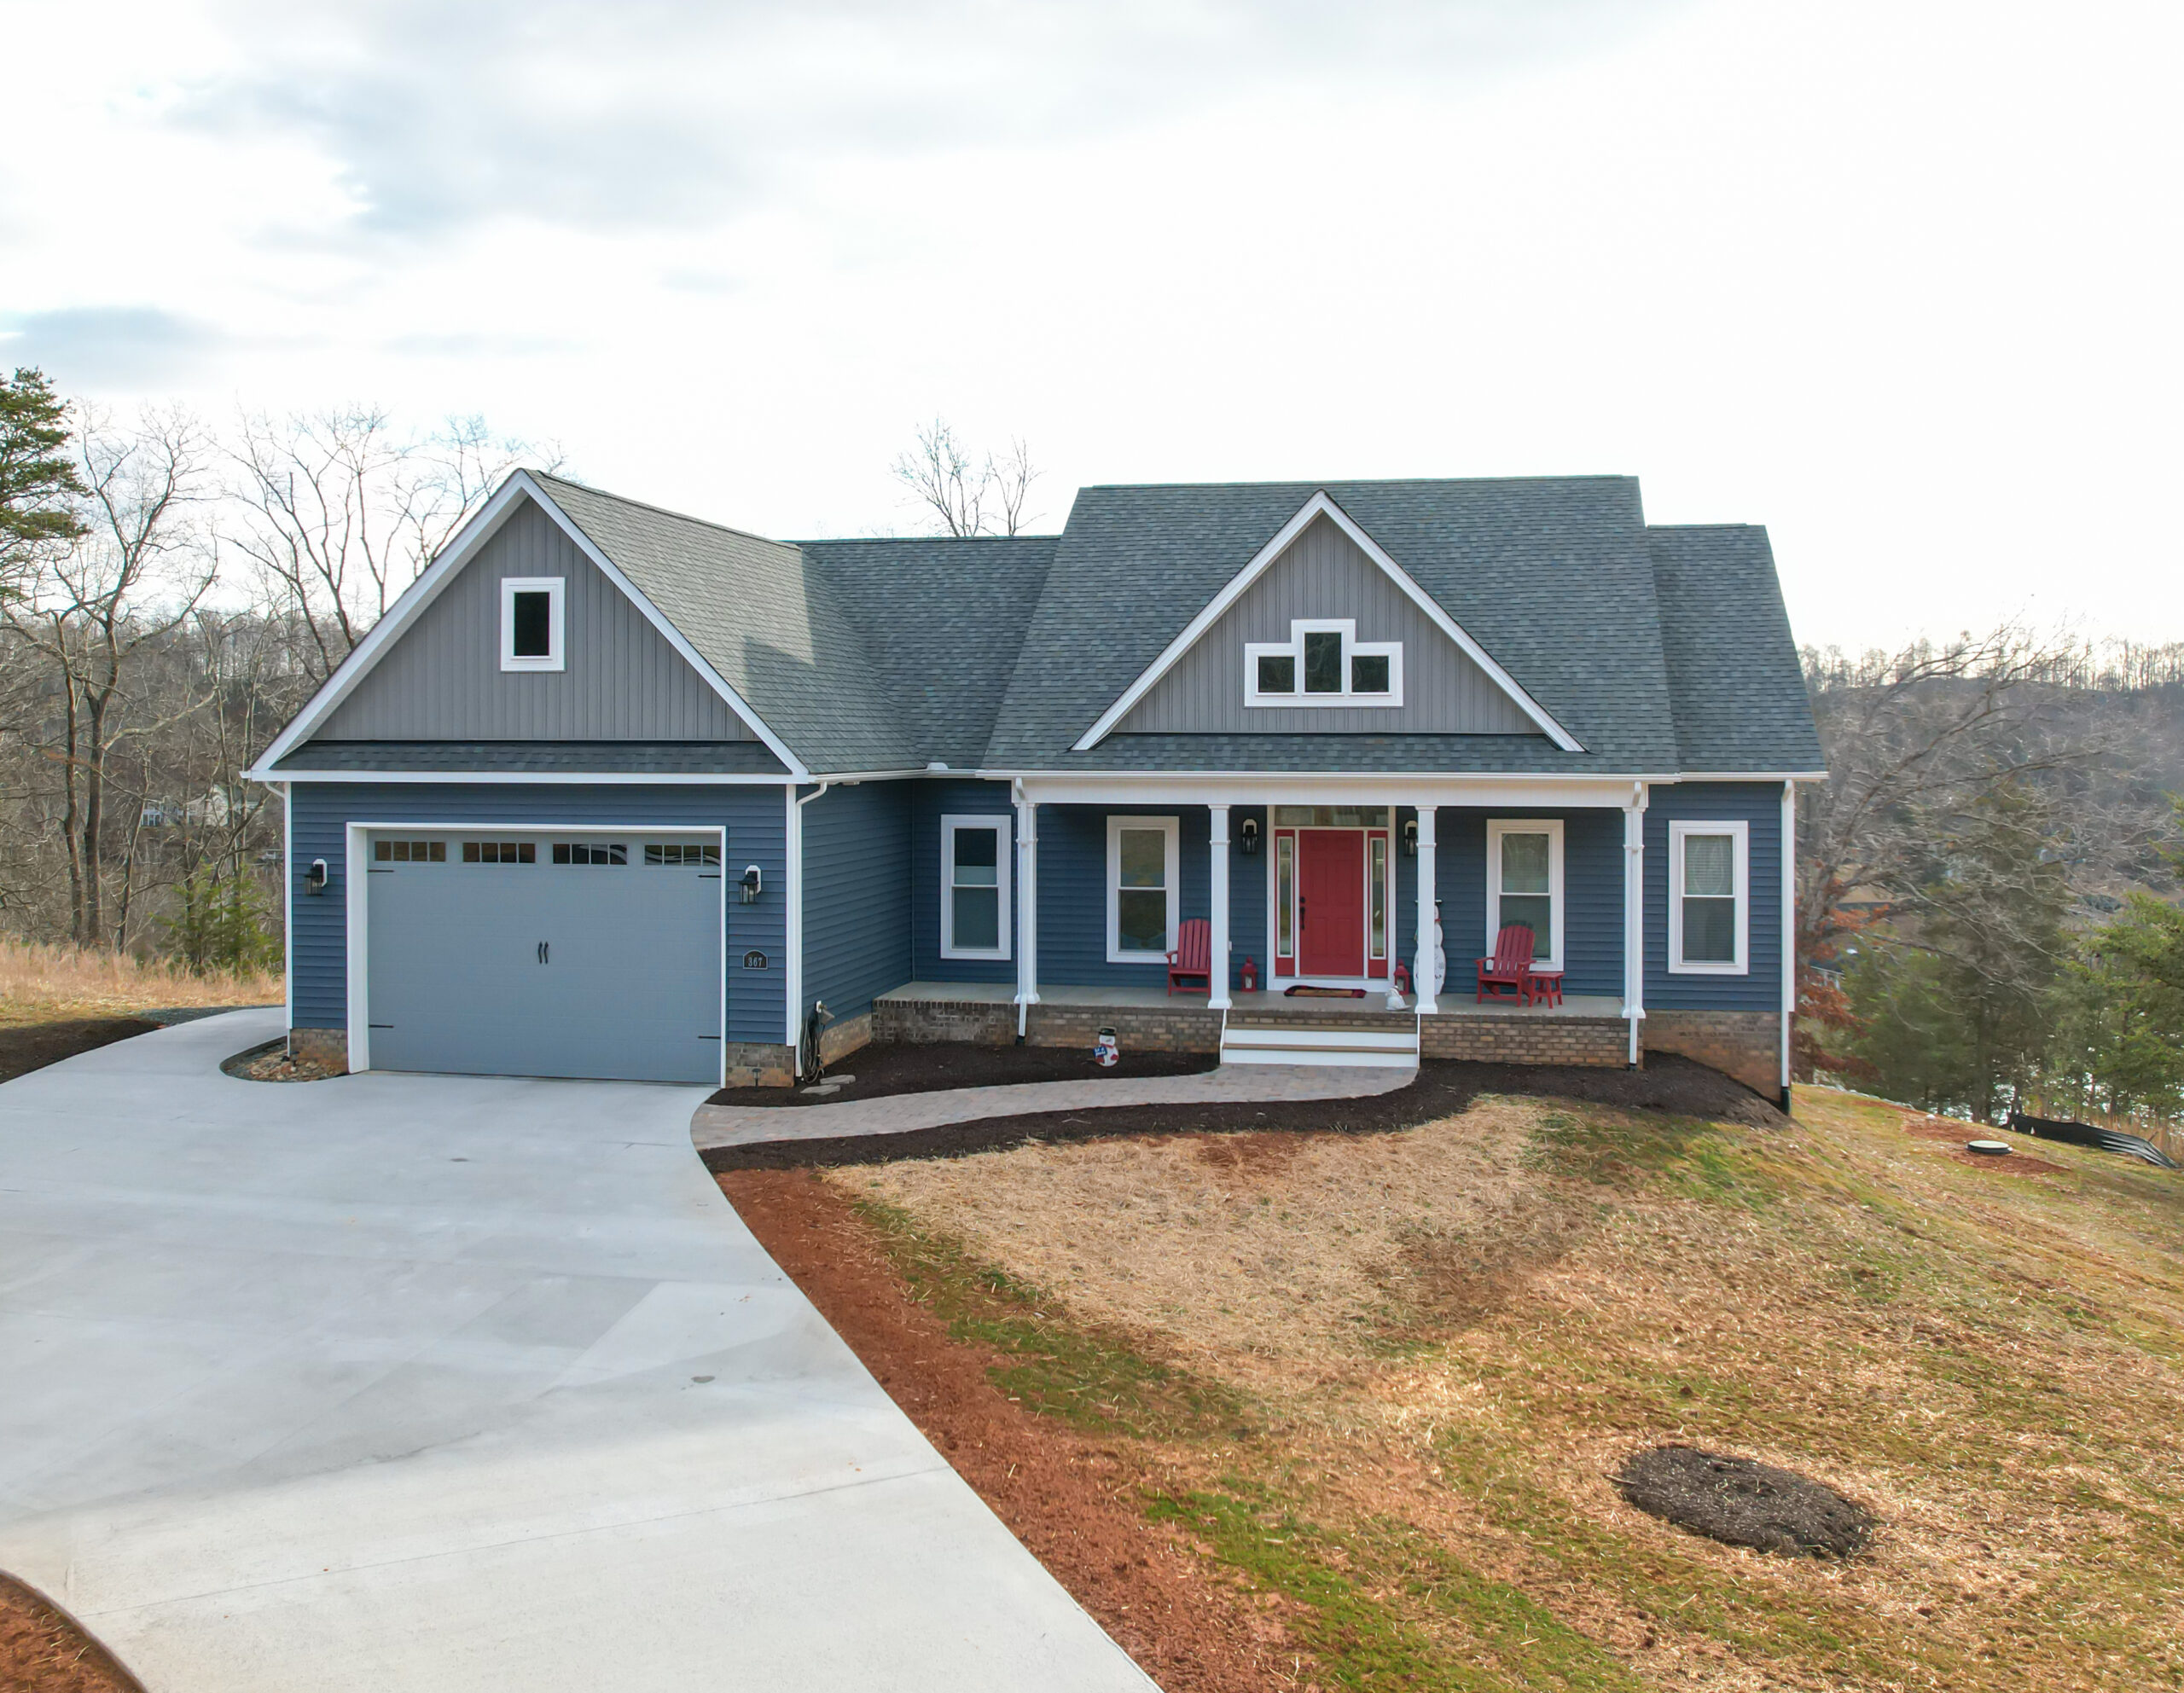
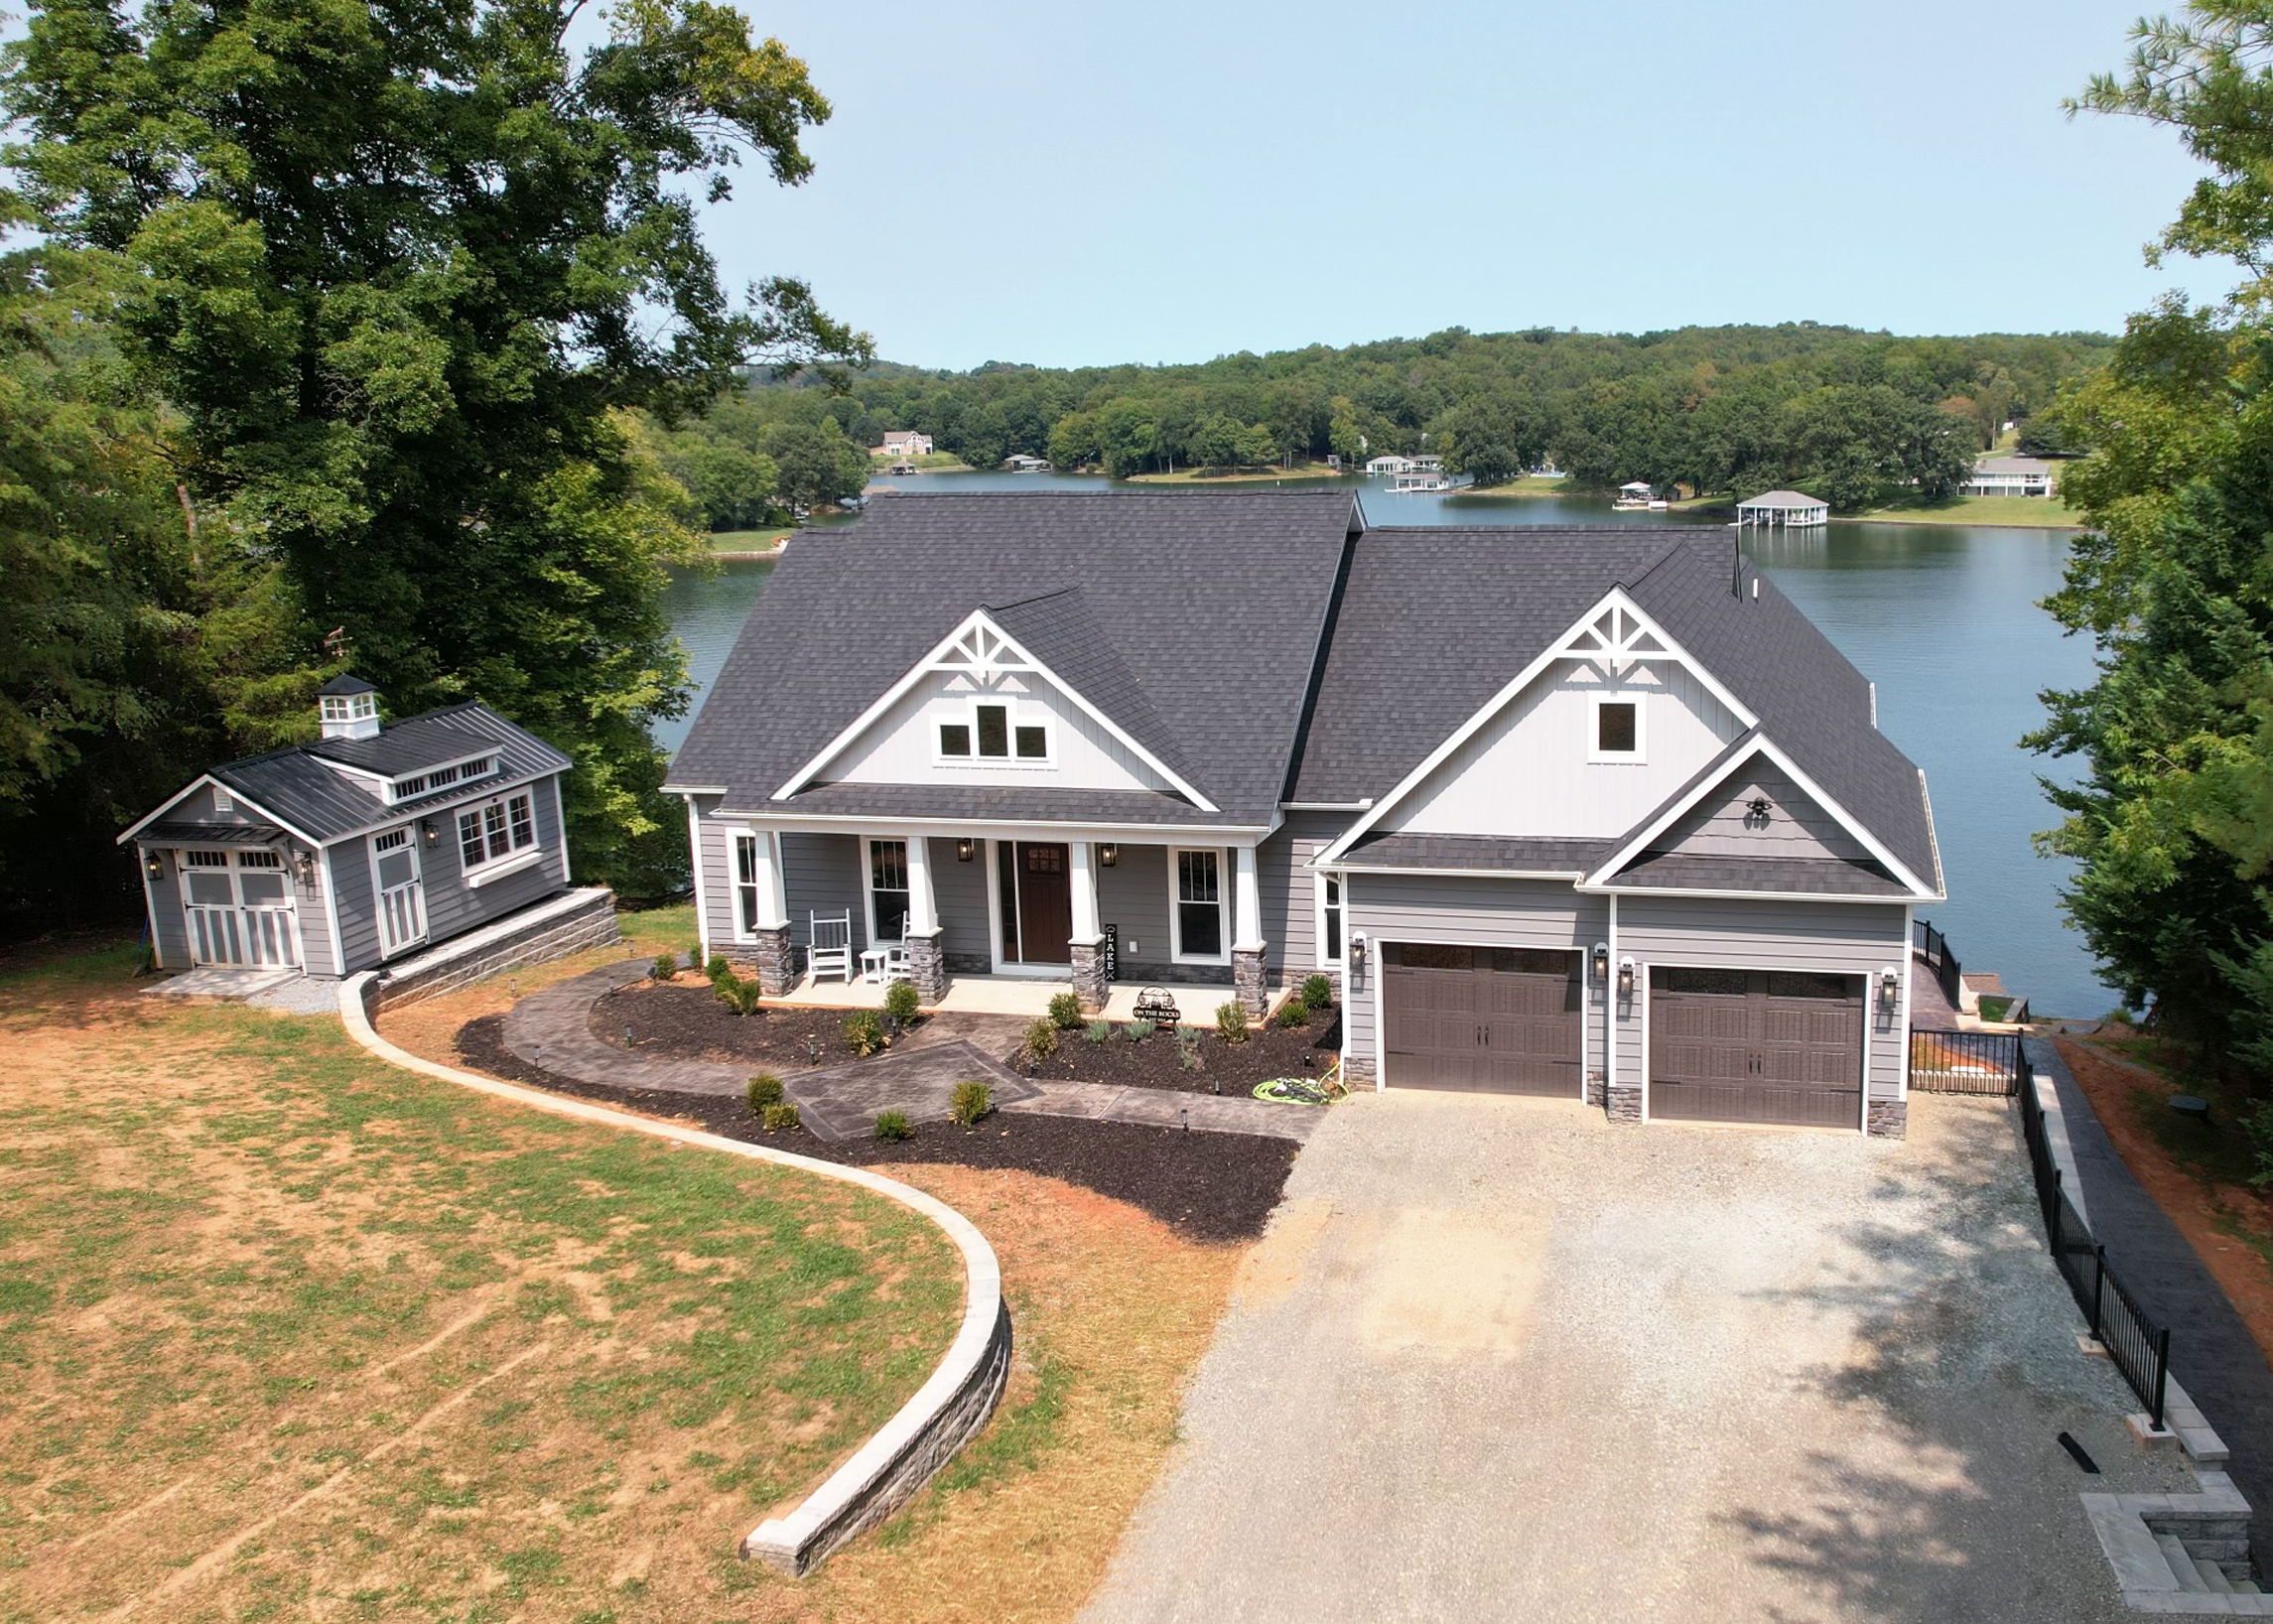
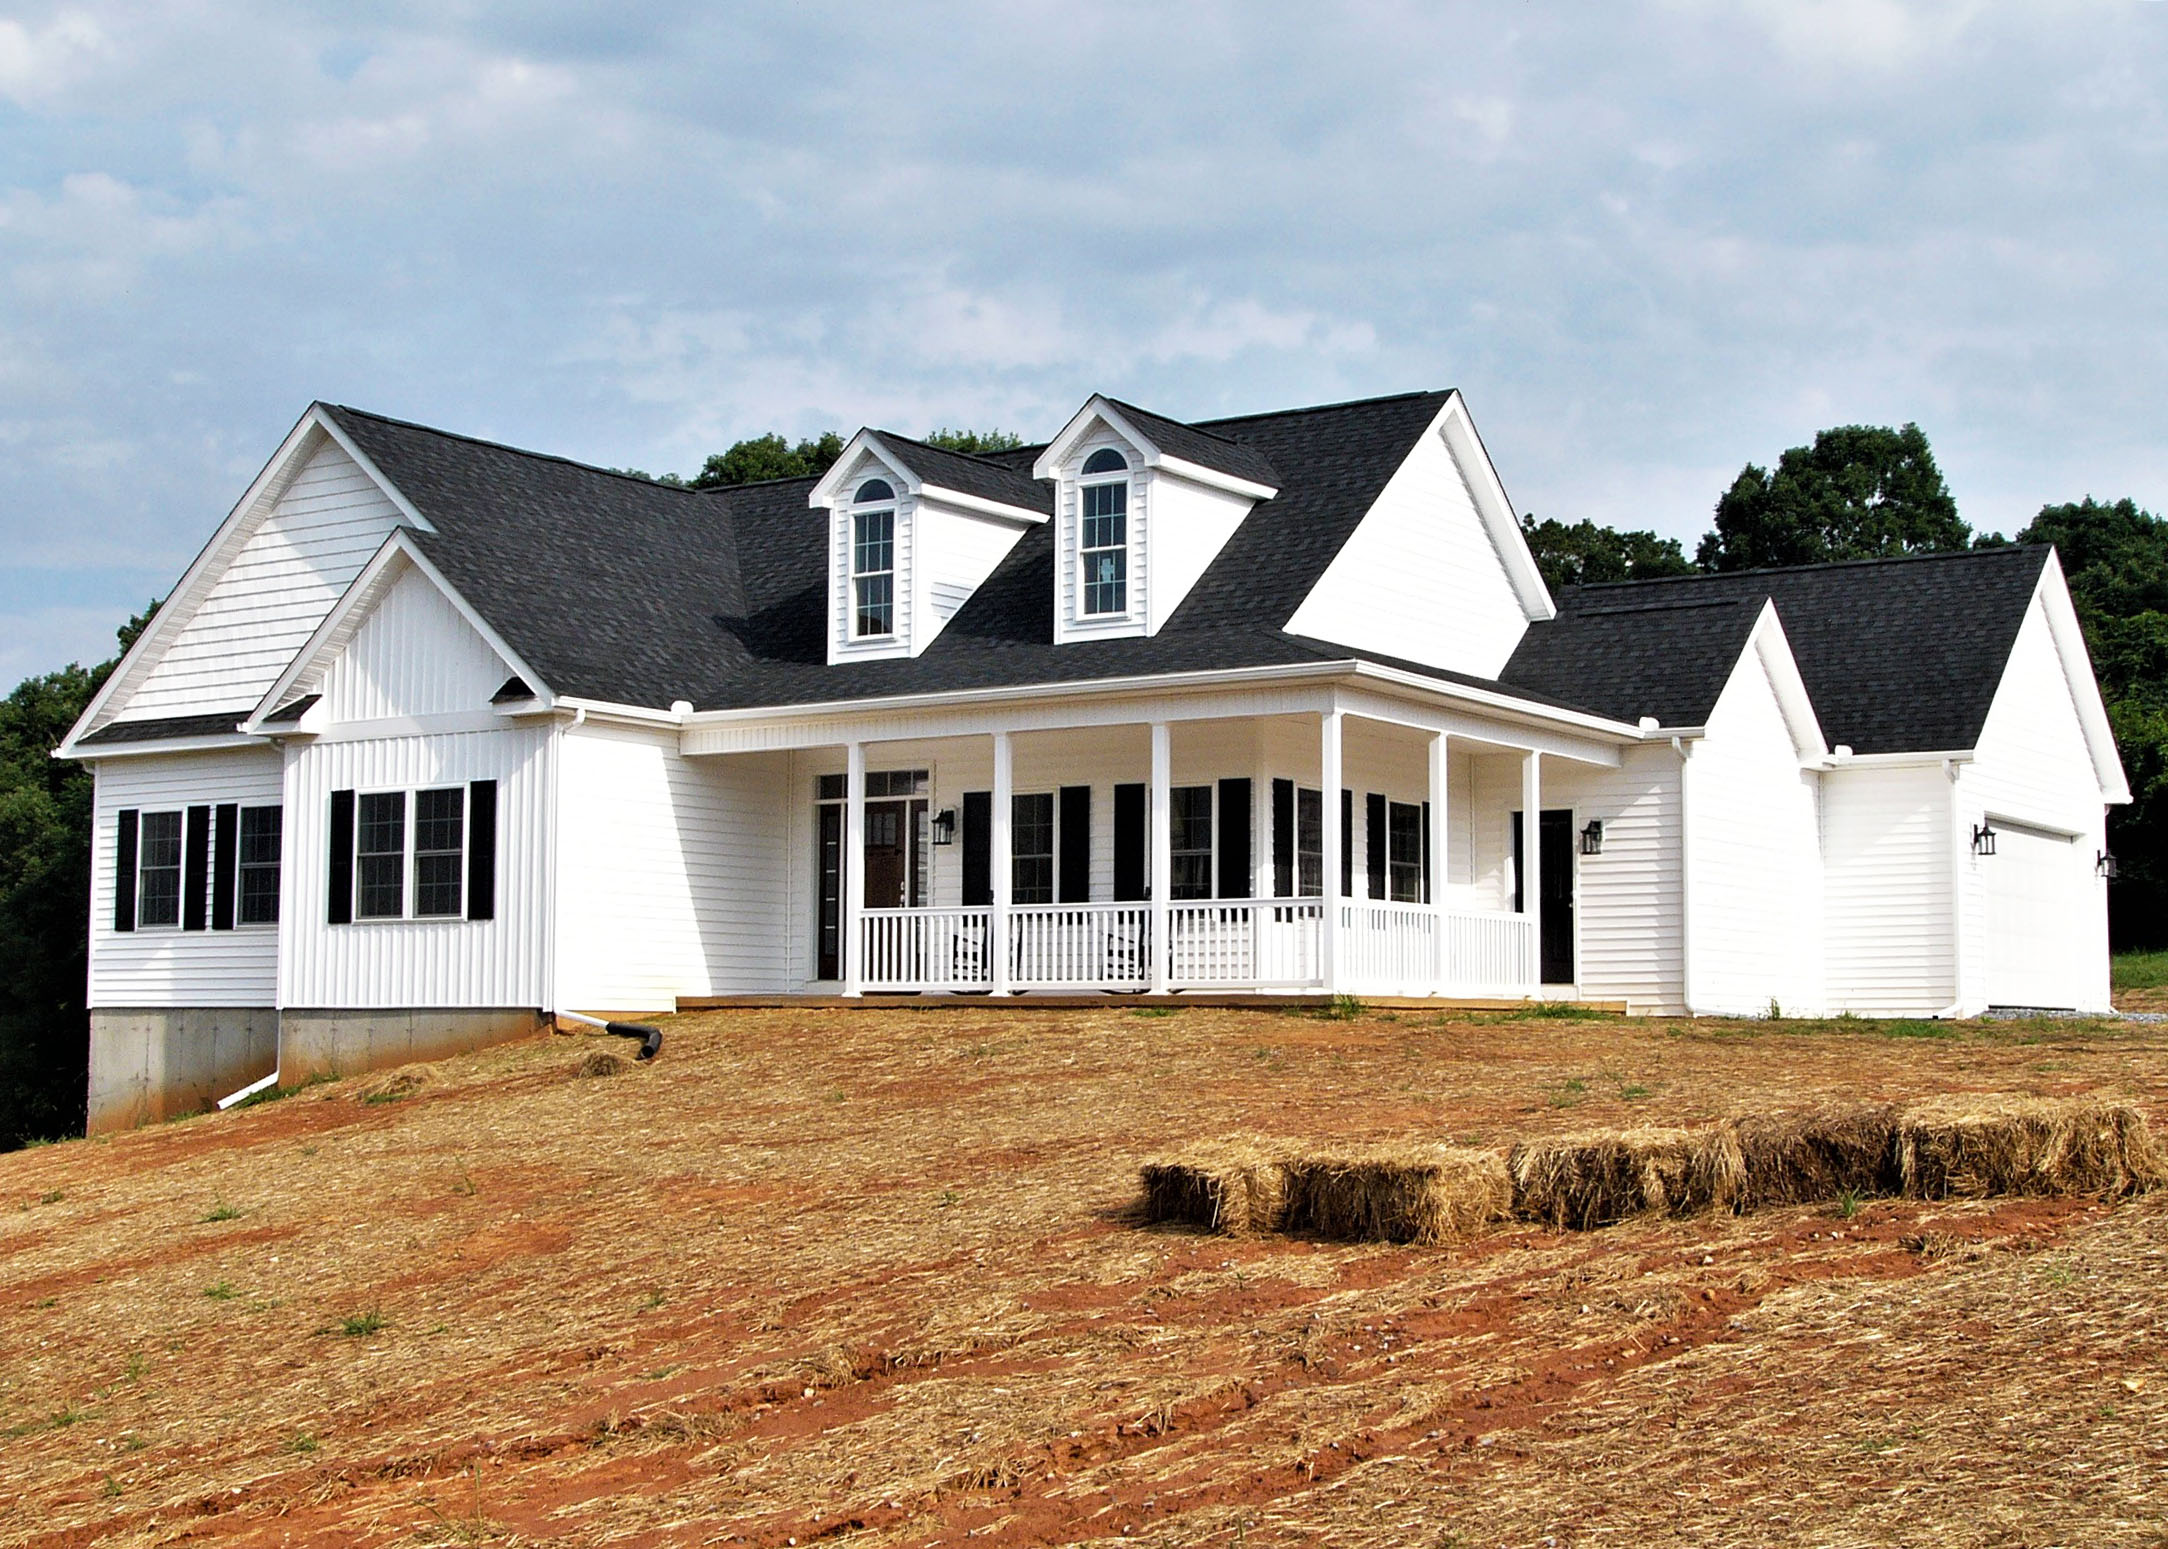
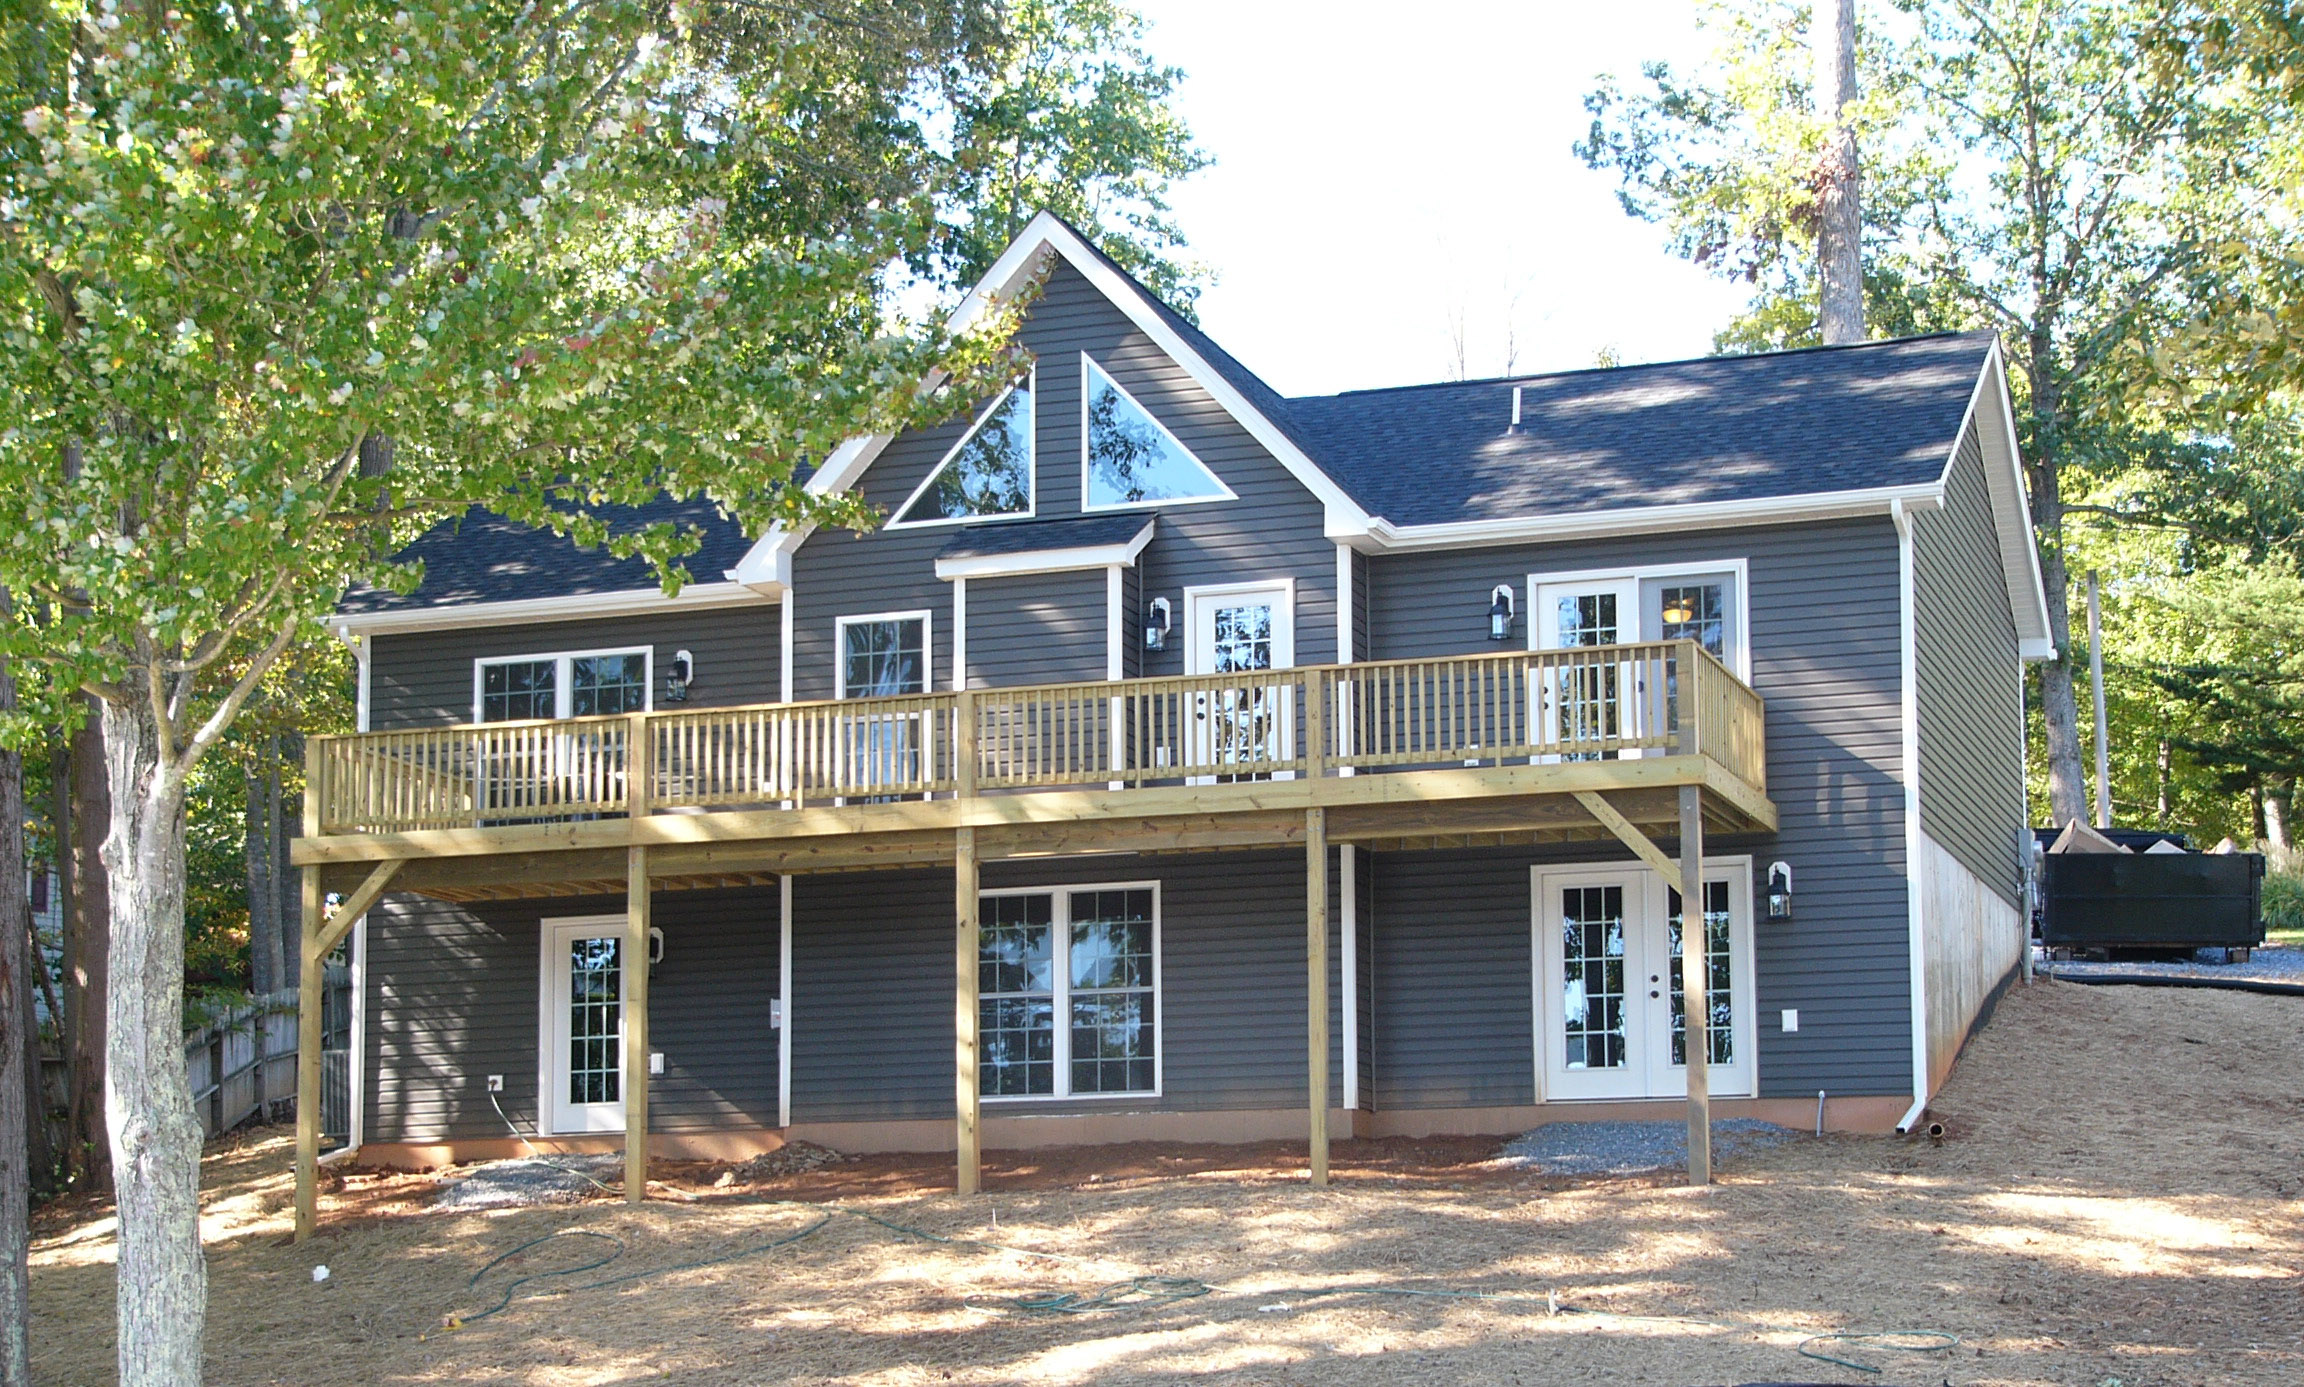